










StoneShot Learning > Email Marketing > Creating a Form
Creating a Form
Need to capture data outside of an event or email campaign — a content download, a contact-us page, a simple survey? StoneShot’s built-in Form Builder lets you create fully branded, on-site forms in minutes, without needing a developer.
Finding Your Forms
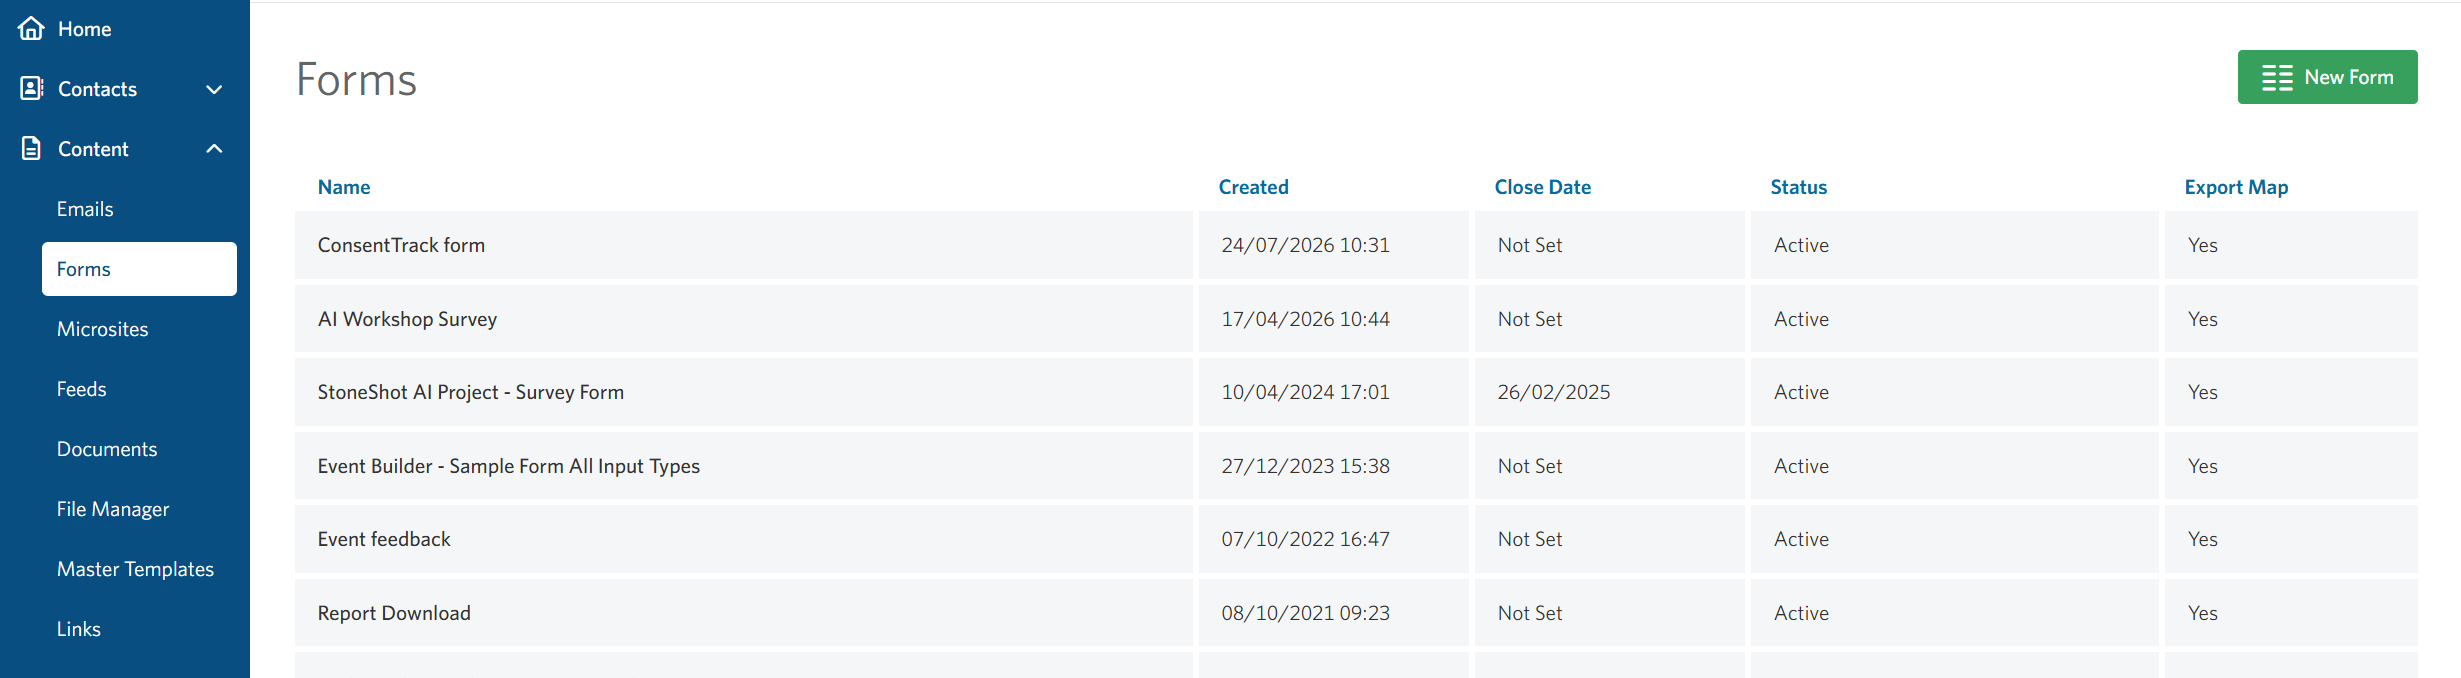
Head to Content > Forms to see every form currently linked to the account. The summary page shows each form’s Name, Create Date, Close Date and Status, so you can see at a glance what’s live, what’s closed and what’s still in progress.
To start a new one, click New Form in the top right of the summary page.

Each form you create has five tabs to work through: Details, Design, Settings, Test & Launch, and Review. Let’s go through them one by one.
Form Details
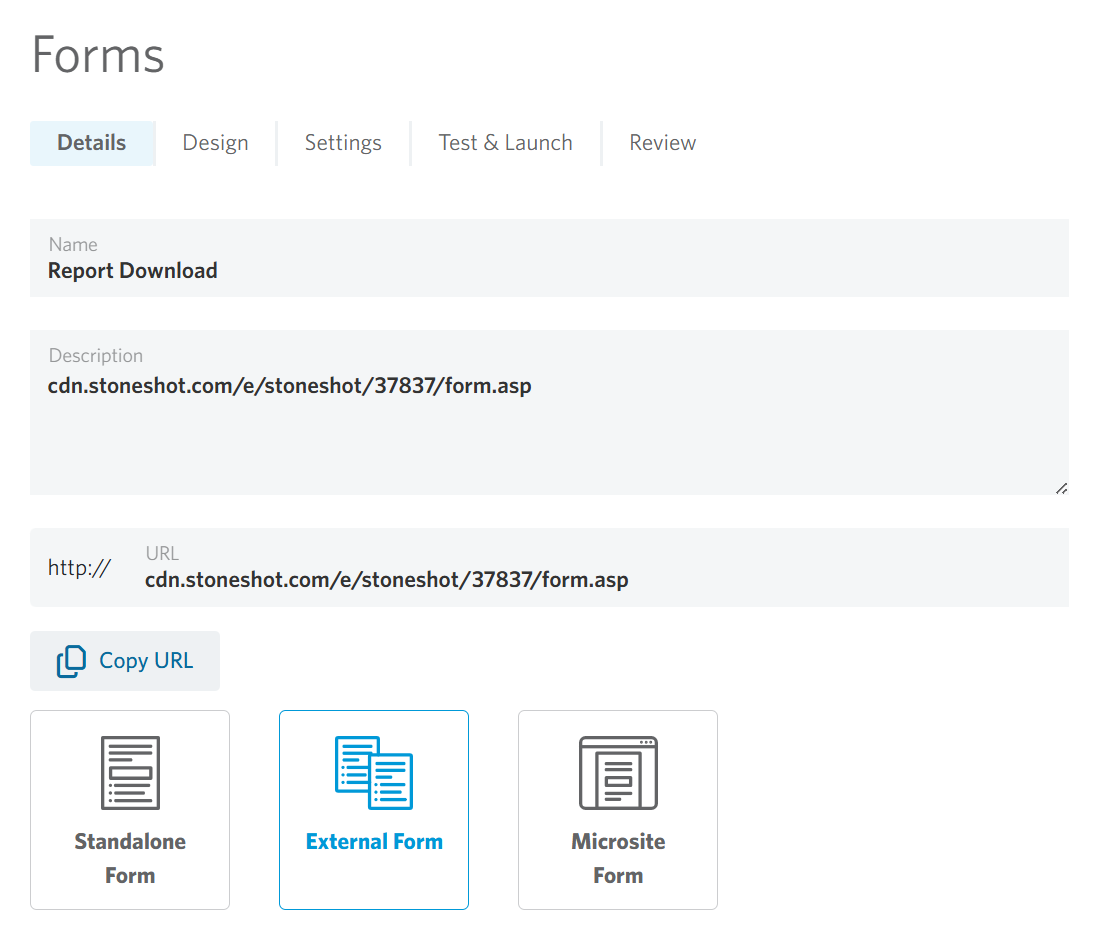
This is where you give the form its identity:
- Name – for internal reference
- Description – also internal, handy for anyone else who works on the form later
- URL – built as domain/folder/filename, where you can set the folder and filename to whatever you like
- Form Type – there are three to choose from:
- Standalone form – the option you’ll use in almost all cases, and the one this guide covers
- External form – for a custom form built by StoneShot outside the platform
- Microsite form – for the rare case where a form needs to link to a microsite
Designing Your Form
This is where the form actually takes shape.
Drag and drop existing Contact fields and Segmentation elements from the left-hand sidebar straight into the form. Need something that doesn’t already exist? Use the Add custom element + bar at the bottom to add:
- Short answer (text field)
- Paragraph (text area)
- Multiple choice (radio buttons)
- Checkboxes
- Dropdown
- Section break
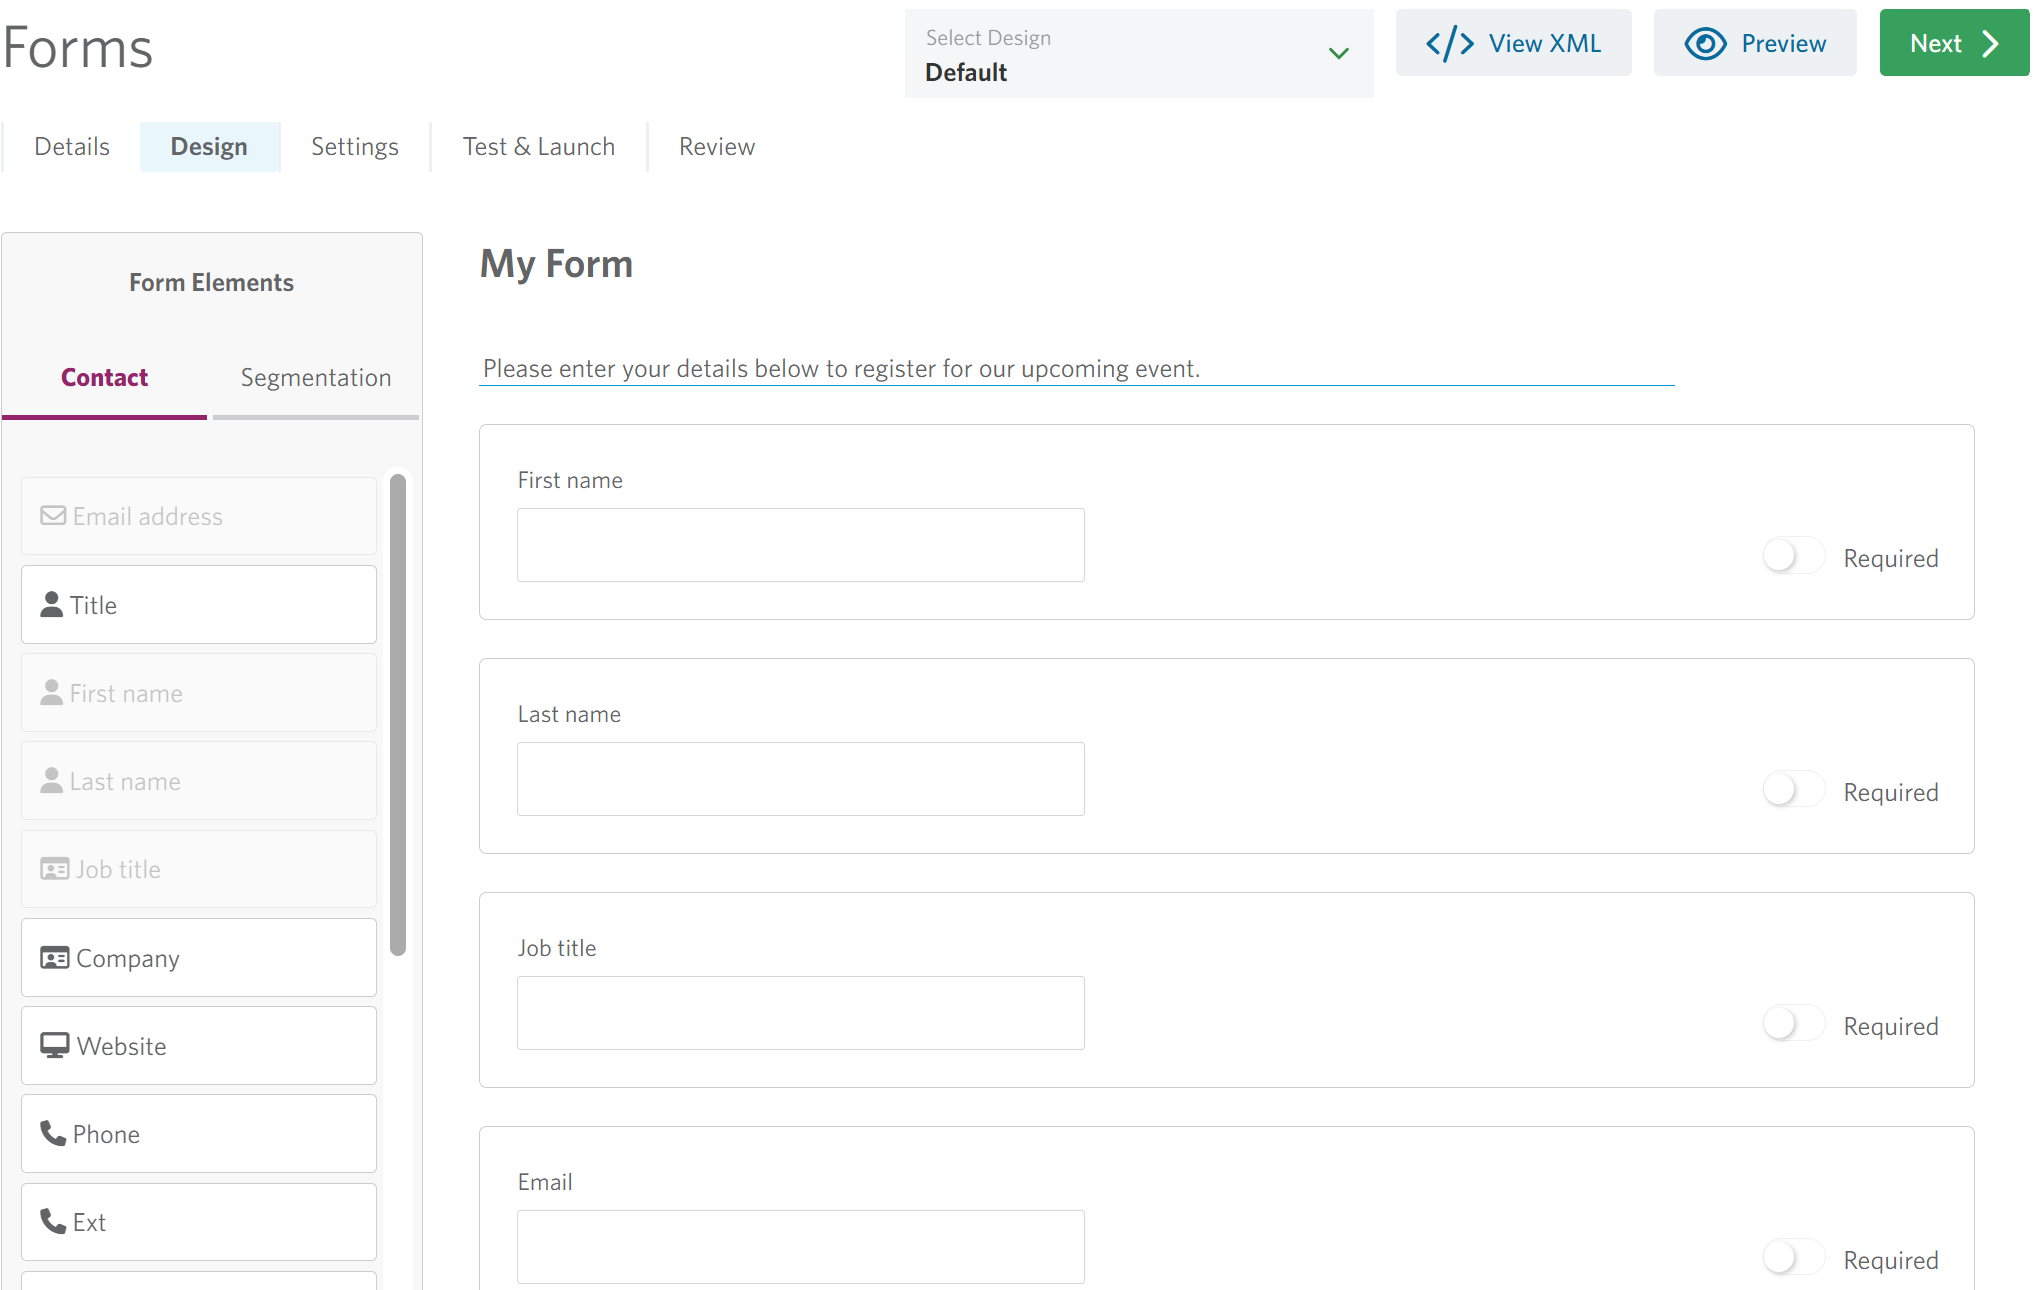
Hover over any field to copy, move, edit or delete it. To make a field mandatory, switch on the Required toggle to the right of it — you can then set a custom error message by editing the field.
Need a short answer or paragraph field to accept more characters? Edit the field and increase the Range Amount — this controls the maximum number of characters a user can enter.
Finally, pick an overall Design from the dropdown at the top of the page. This controls the outer skeleton of the form — branding, header and footer. If you don’t have a design to choose from yet, email support@stoneshot.com and we’ll get one built for you.
Form Settings
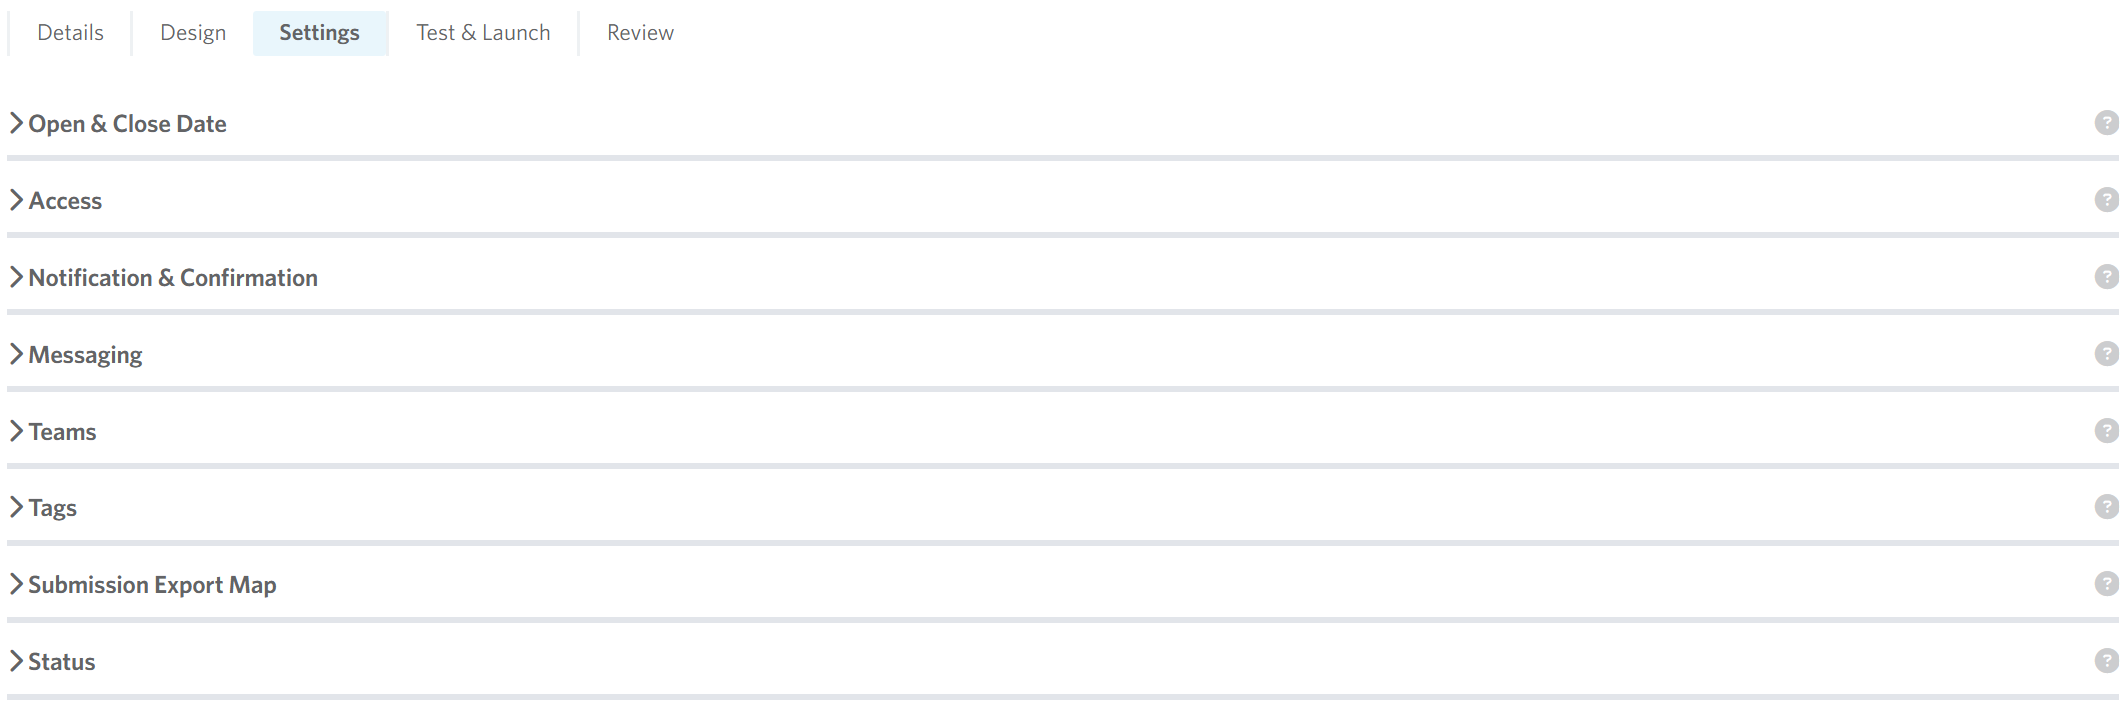
The Settings tab covers everything that happens around the form itself, split into a few areas.
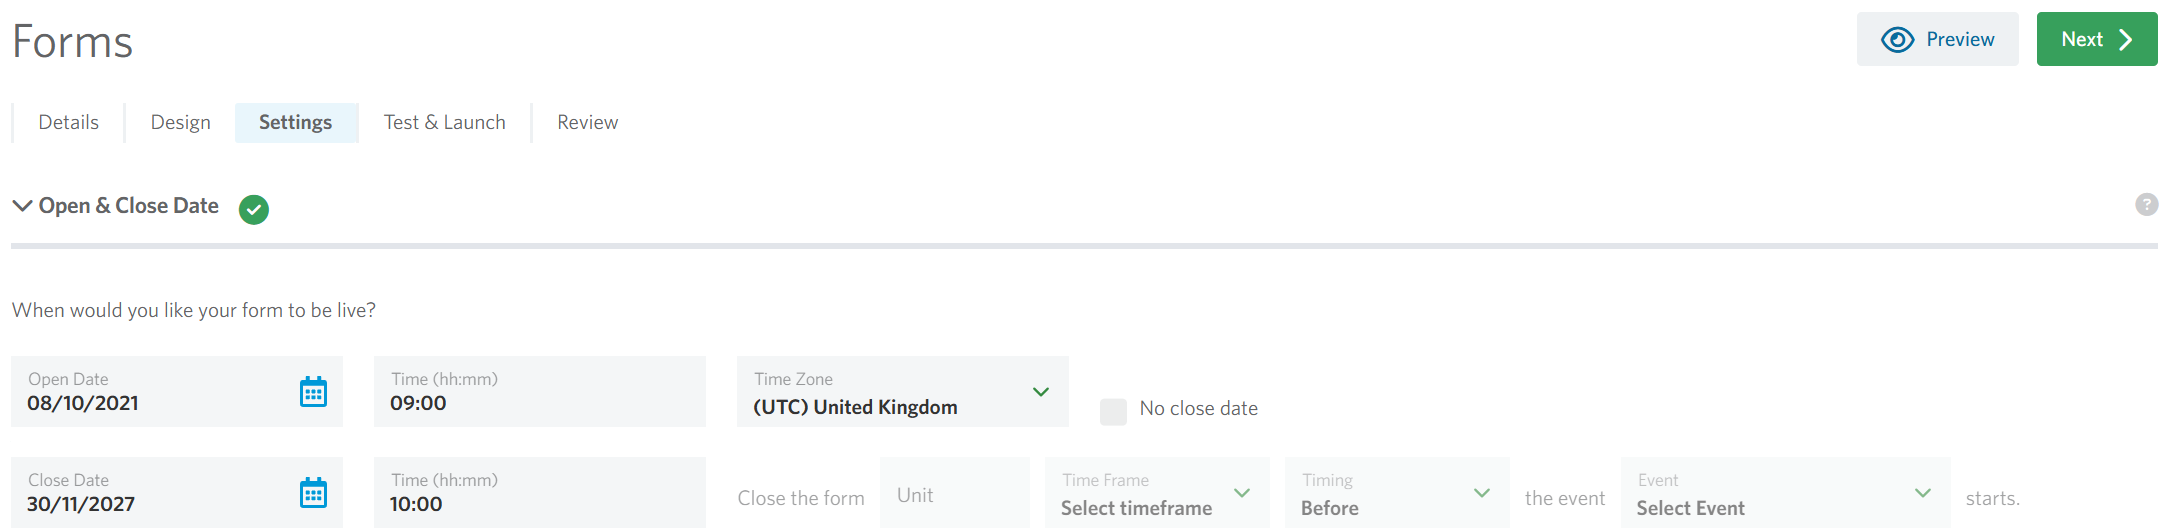
Set when the form should open and close. If you don’t want it to ever close, there’s an option to leave it running indefinitely.
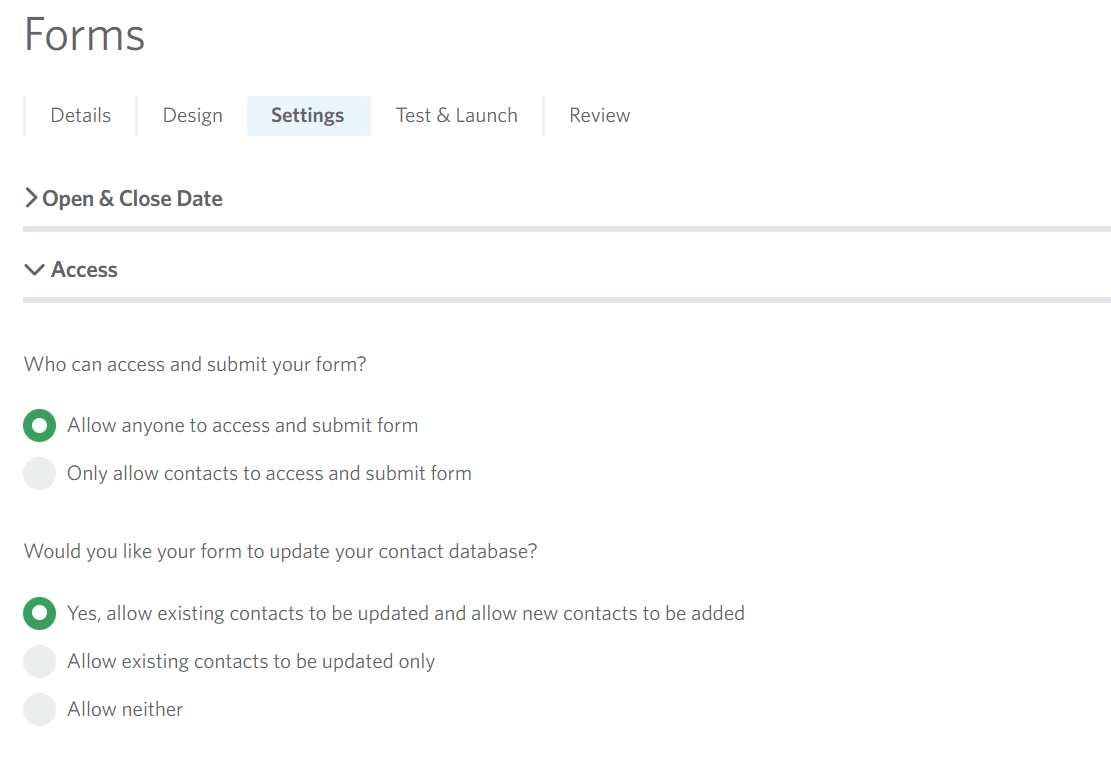
Access
Control who can see and submit the form:
- Who can access and submit your form?
- Allow anyone to access and submit the form
- Only allow contacts to access and submit the form
- Would you like your form to update your contact database?
- Yes, allow existing contacts to be updated and new contacts to be added
- Allow existing contacts to be updated only
- Allow neither
Notification & Confirmation
Decide what happens the moment someone submits the form:
- Send a confirmation email
- Send a notification email for each submission
- Update segmentation
The Update segmentation option is what lets the form actually move contacts between statuses. For example, on a registration form you’d use this to set contacts to Registered on submission, or to Declined if the form is built to capture a decline response.
Messaging
Set the content shown on the Success page (after a successful submission) and the Expiry page (if someone lands on the form outside its open/close window).
Teams
Restrict which teams can view the form within the StoneShot platform. This only affects visibility inside the platform — it has no impact on the live, public-facing form.
Submission Export Map
Don’t skip this one. Click Yes to generate the export map — it’s what allows submissions to be exported with the correct fields later on. If you make any changes to the form’s elements or design afterwards, come back and hit Update to keep the export map in sync.
Test & Launch
Once everything looks right, head to the Test & Launch tab and hit Launch to make the form live.
Made changes after the form is already live? Launching only happens once — any further edits to the form need to be pushed out by coming back to the Test & Launch tab and clicking Update Live Form. Skipping this step means your changes will sit in the builder without actually reaching the published form.
Reviewing Submissions
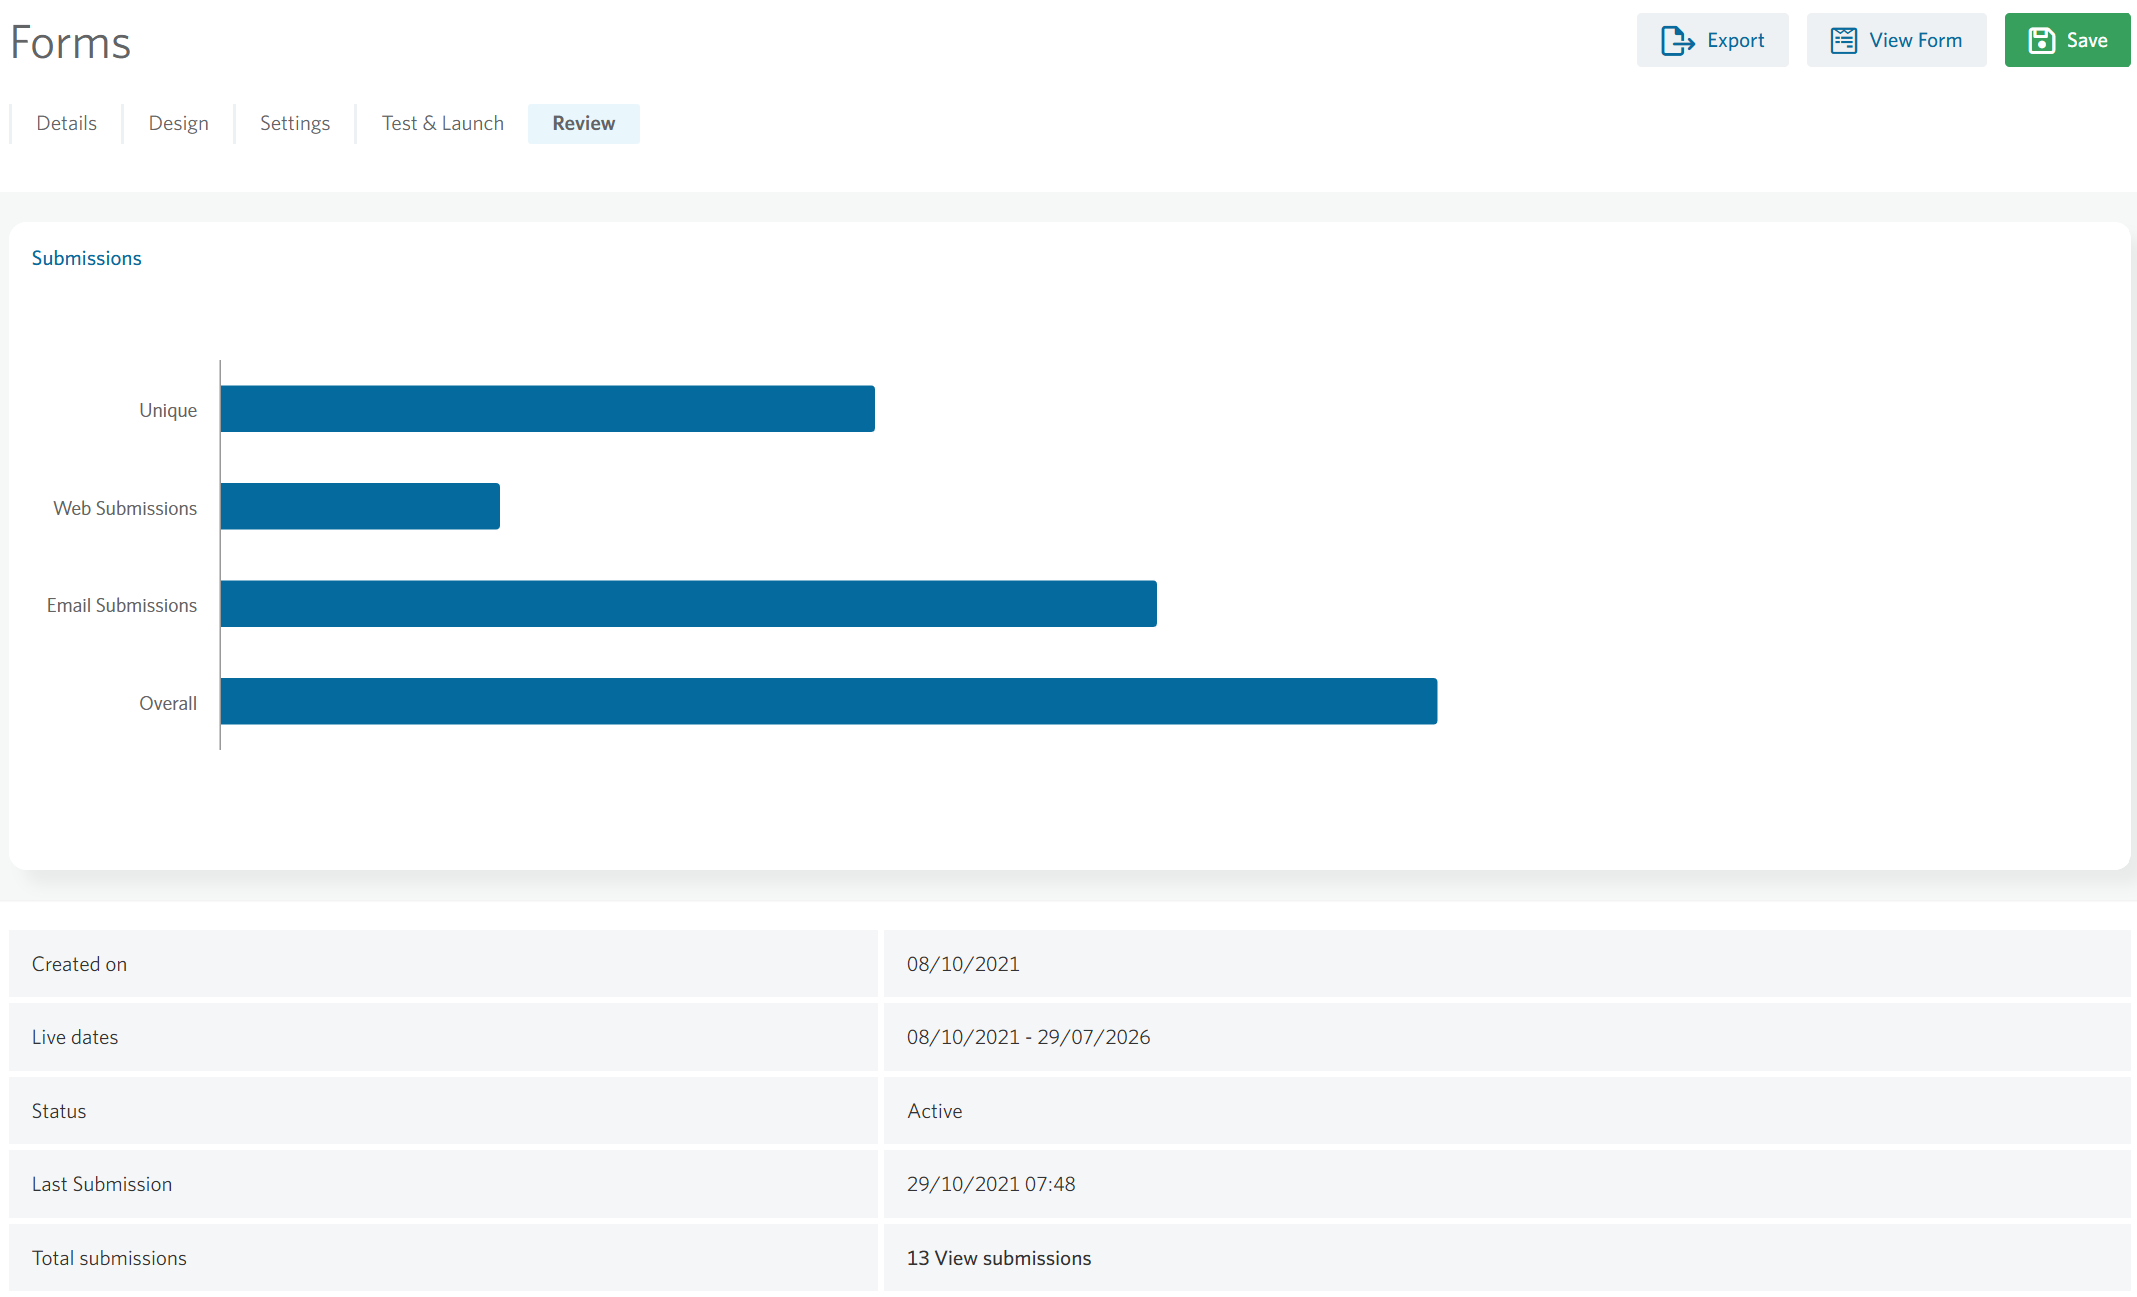
Once your form is live and collecting responses, you can review them straight from the Review tab — click Export in the top right to download all submissions into Excel.
You can also find the same submissions later via Reports > Forms: click into your form and export from there in exactly the same way.
FAQ
Can I edit a form after it's already live?
Yes, though changing the form elements or design after launch means two things: you’ll need to click Update Live Form on the Test & Launch tab to push those changes out, and revisit the Settings tab to update the Submission Export Map so exports still line up with the current fields.
What's the difference between a Standalone form and an External form?
A Standalone form is built and hosted entirely within the StoneShot platform using the Form Builder. An External form refers to a custom form built by StoneShot outside the platform — you’d typically only see this option if that’s already been set up for your account.
Where do I get a form Design if none are available?
Email support@stoneshot.com and the team will get a branded design built for you.
Can I stop a form from ever closing?
Yes, in the Open & Close Dates section of the Settings tab, there’s an option to leave the form with no close date.
Where can I find submissions from a form that's already closed?
Closed forms still keep their submission history. Head to Reports > Forms, click into the form, and export the data the same way as an active form.