










StoneShot Learning > Email Marketing > Managing Tables
Managing Tables
Use tables to organise and present information in a structured format. You can either copy an existing table from another application or create a new one directly within the Rich Text Editor.
Copy an existing table
If you’ve already created a table in another application, such as Microsoft Excel or Word, you can simply copy and paste it into a layout with a Rich Text Editor and select Keep formatting.
The table will retain its original formatting, including:
- Fonts and text formatting
- Cell colours
- Borders
- Row and column sizing
- Basic alignment
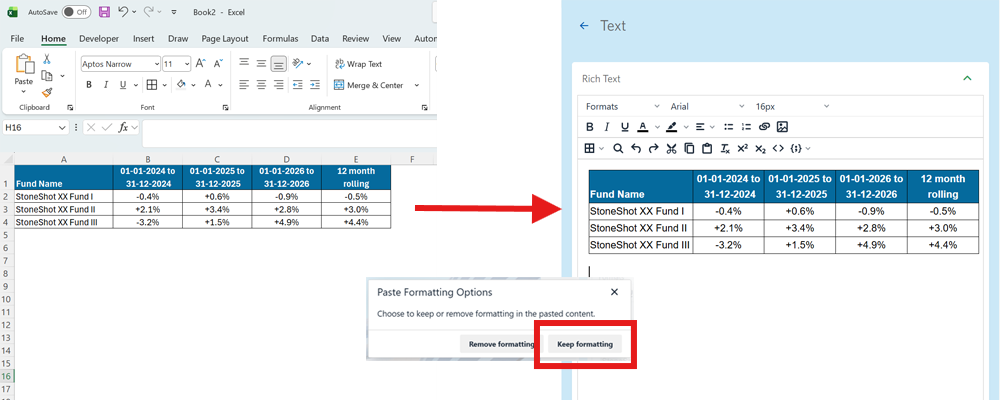
If required, you can further edit the table using the Rich Text Editor’s table tools.
Create a new table
- Select a layout with a Rich Text Editor.
- Position your cursor where you’d like the table to appear.
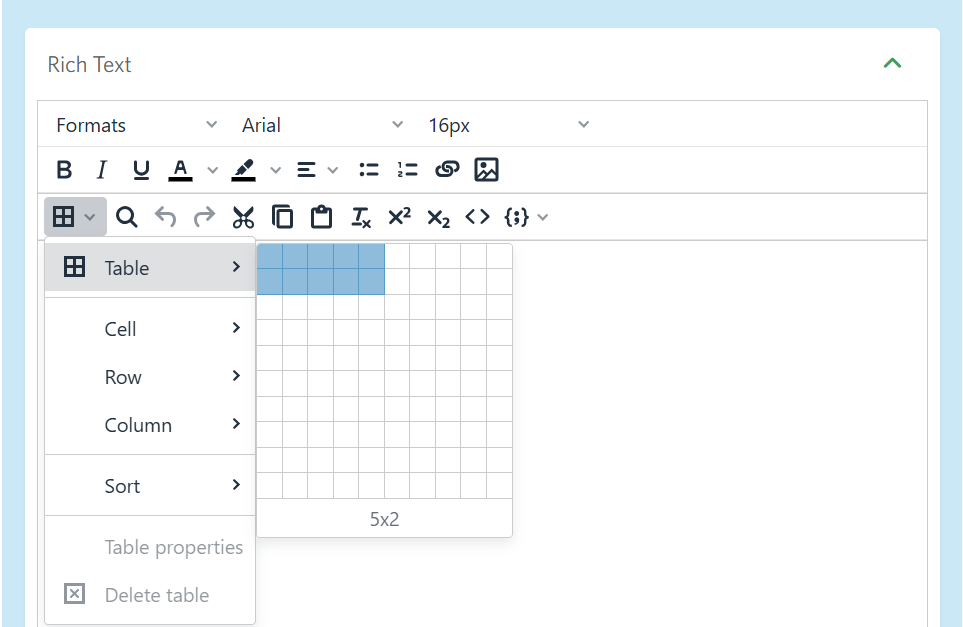
- Select the Table icon from the toolbar.

- From the Table submenu, drag your cursor across the grid to select the required number of rows and columns, then insert the table into the email template.
Edit table properties
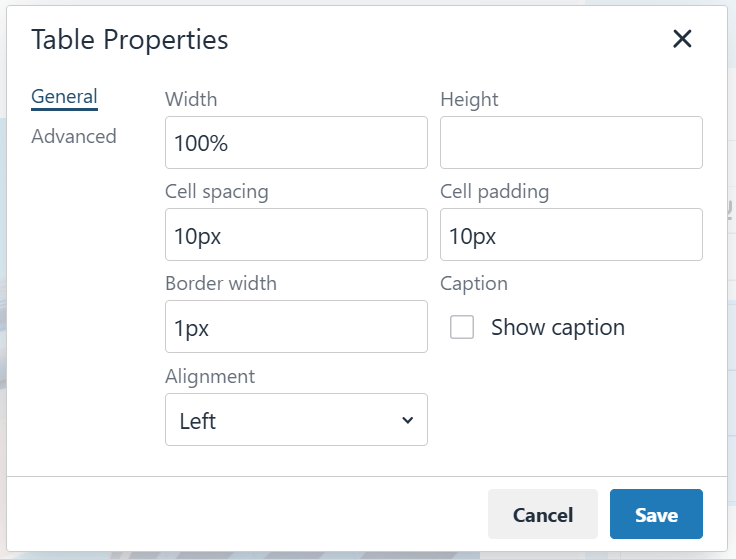
Table Properties allow you to update the formatting of the entire table.
- Highlight the table in the Rich Text Editor.
- Click the Table icon and select Table Properties.
General settings
You can adjust:
- Width and Height (using pixels or percentages)
- Cell spacing (the space between table cells)
- Cell padding (the space between cell content and its border)
- Border width
- Table alignment (Left, Centre or Right)
Advanced settings
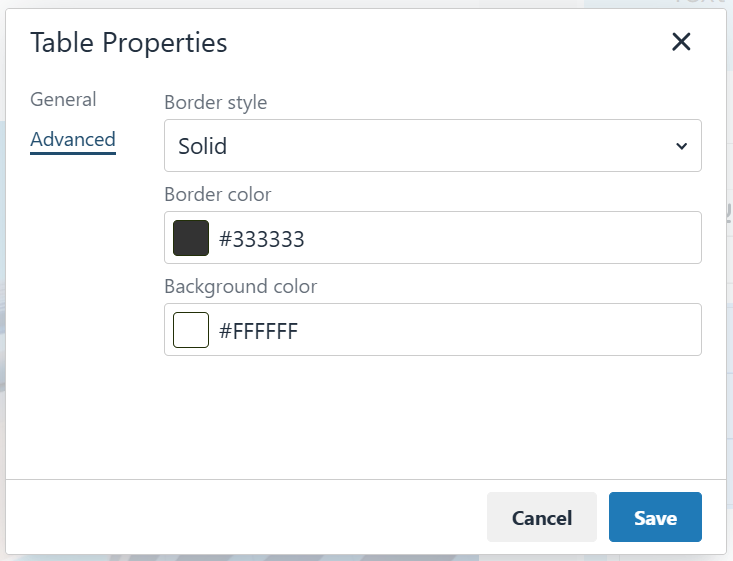
You can also customise:
- Border style
- Border colour
- Background colour
Edit cell properties
Use Cell Properties when you want to apply formatting to individual cells without affecting the rest of the table. This can be useful for highlighting important information, creating headings or visually separating sections of data.
Common use cases include:
- Adding a coloured background to header cells
- Applying borders to highlight key information
- Aligning text within individual cells
- Formatting selected cells differently from the rest of the table
To edit cell properties:
- Select one or more cells within the table.
- Click the Table icon > Cell > Cell Properties.
General settings
You can:
- Set the width of a cell
- Specify the cell type
- Adjust the horizontal alignment (left, centre or right)
- Adjust the vertical alignment (top, middle or bottom)
Advanced settings
You can:
- Set the border width and style
- Apply a border colour
- Add a background colour to selected cells
Add or remove rows and columns
Click anywhere inside the table to display the table editing toolbar.
From here you can:
- Insert rows above or below
- Insert columns to the left or right
- Delete individual rows or columns
- Delete the entire table
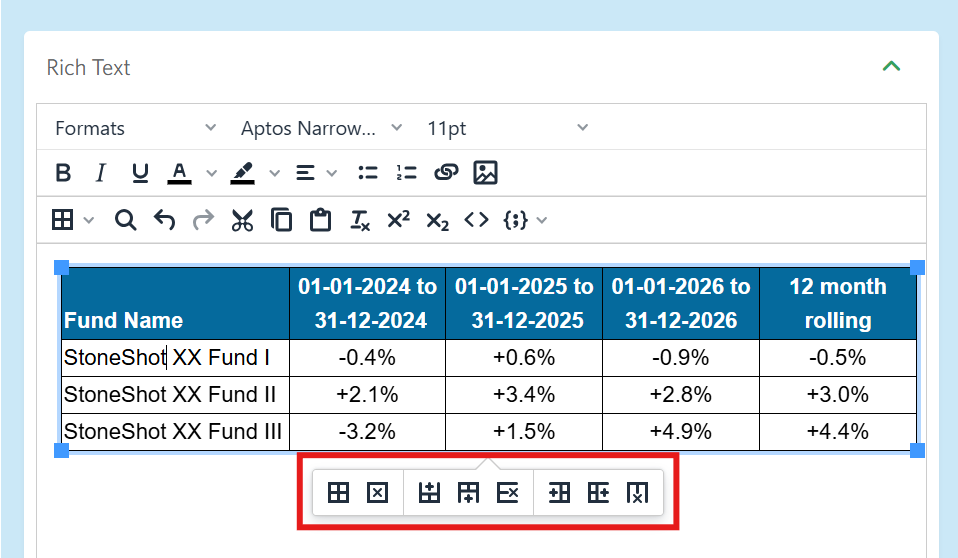
Hover over each icon to display a description of its function.
Merge or split cells
To merge cells:
- Select the adjacent cells you want to combine.
- Click the Table icon > Cell > Merge cells.
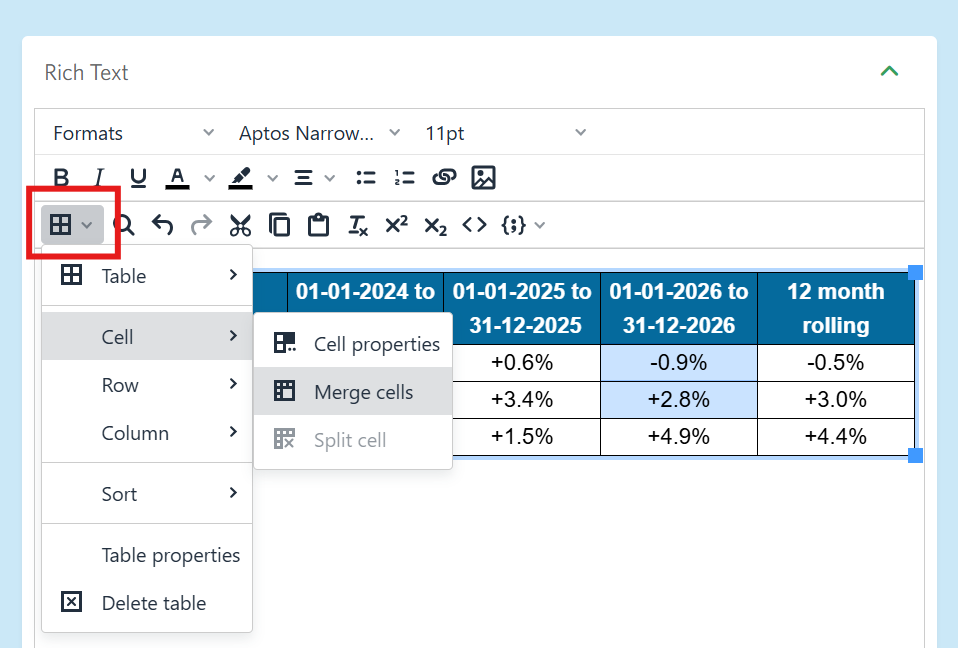
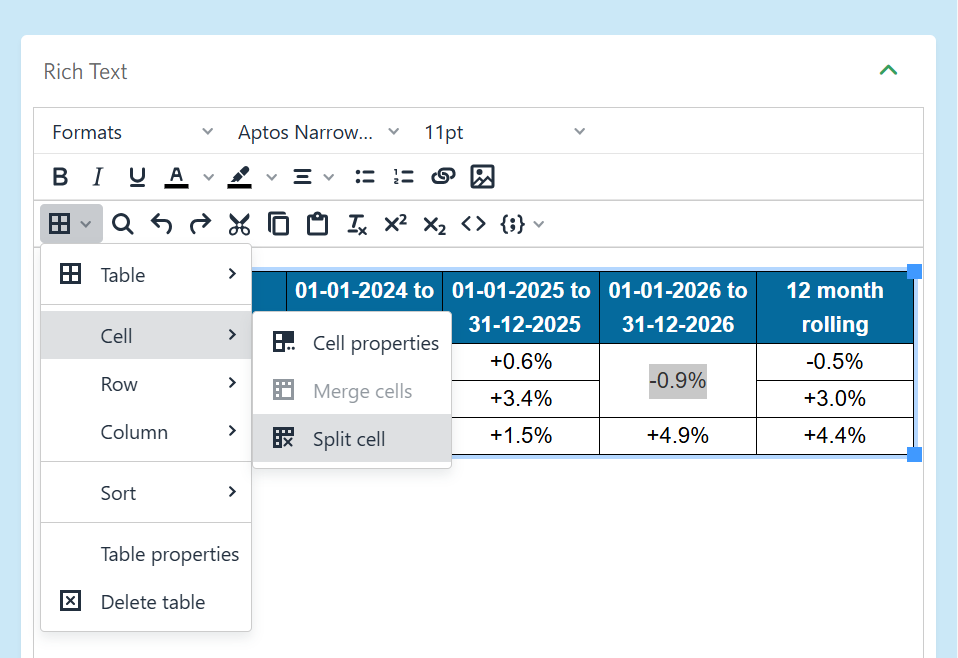
To split a merged cell:
- Select the merged cell.
- Click the Table icon > Cell > Split cells.
FAQ
Why doesn't my table fit within my email template?
This is usually caused by the table or one or more of its cells being wider than the available space in the email layout.
To resolve this:
- Check the Table Properties and ensure the table width is no greater than the width of the section it sits within.
- Check the Cell Properties for each column and ensure the combined widths of all cells do not exceed the width of the email template.
- If necessary, reduce the width of individual cells or use percentage-based widths instead of fixed pixel values.
Once you’ve made your changes, remember to Save the layout before previewing the email again.