


StoneShot Learning > Contacts Lists > Managing Contacts
Managing Contacts
Learn how to add contacts, import a list of contacts, export contacts and search for contacts in our Contacts section of the StoneShot Marketing Platform.
To start off, let’s take a quick look at what’s on the contacts page. Here you’ll be able to:
- Create new contacts or import contacts
- Export existing contacts
- Search Fields
- Edit to add and remove columns to your current view, ready for Export
- Adapt the way you view your contacts
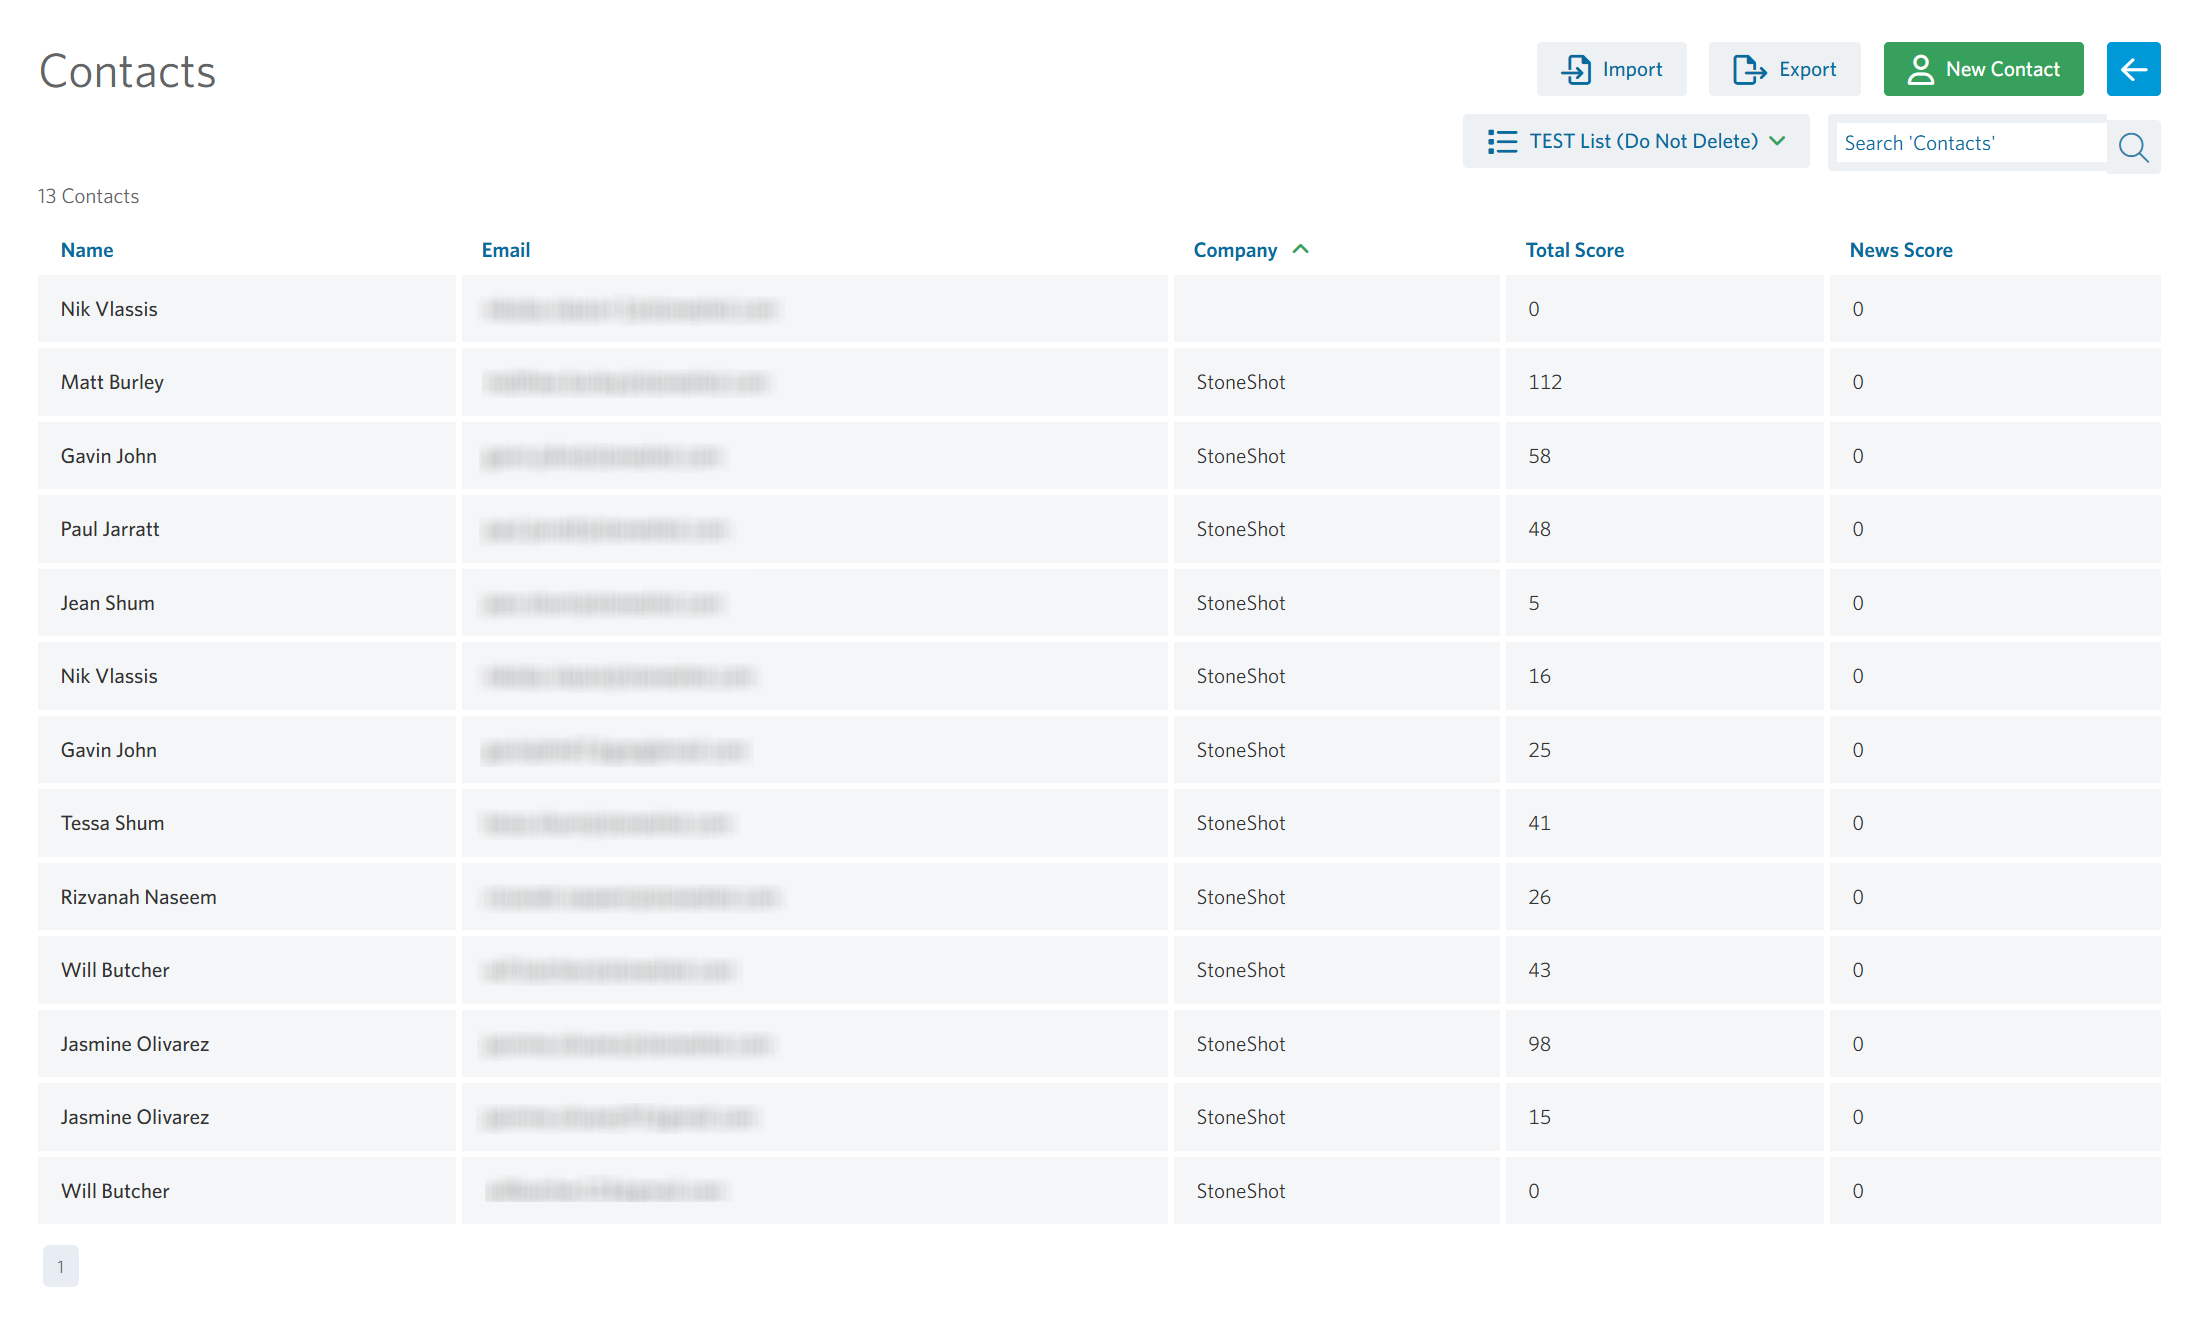
Sorting and Search
You can sort data by clicking the head of each column. By default, contacts are ordered by the order in which they were loaded.
Managing individual contacts
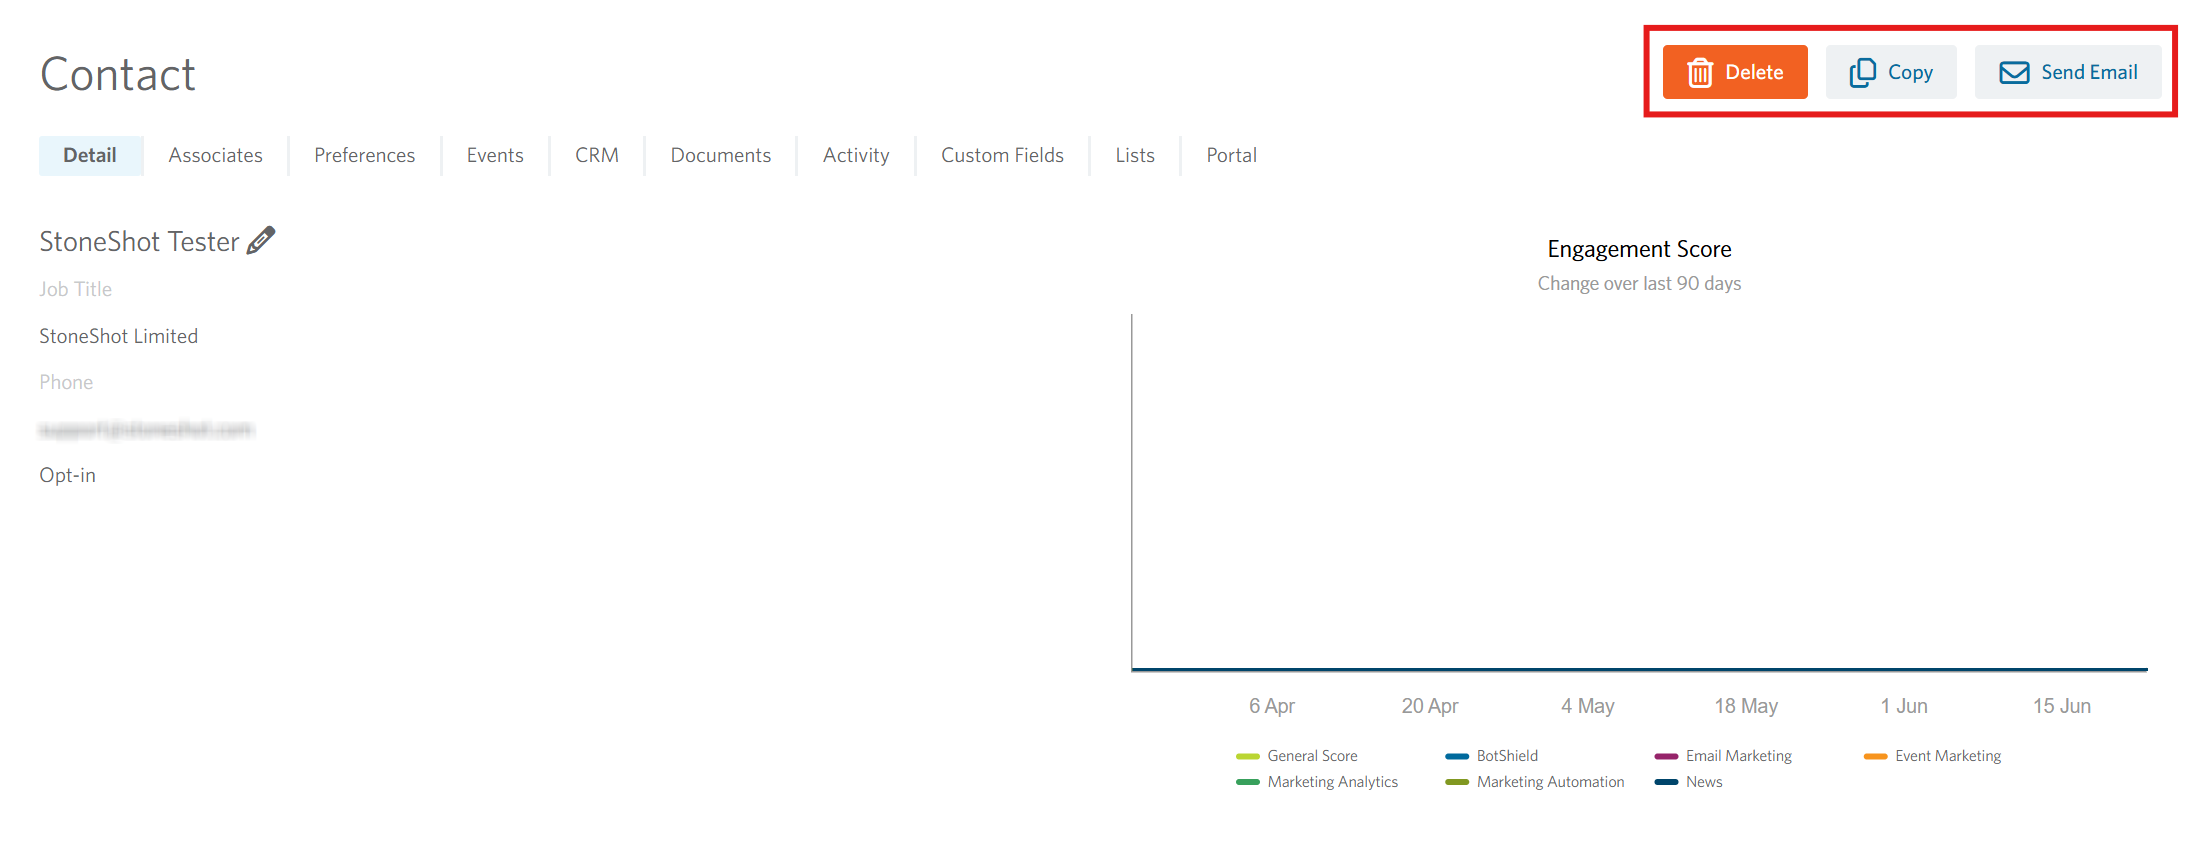
You can then view or edit a contact’s record by clicking the Edit pencil next to their name. This will take you to the Detail tab.
- Opt-in and Bounce – The opt-in flag shows whether this contact will receive an email or not. If you opt someone out, their record will automatically be excluded from all campaigns. Email recipients can also opt themselves out by following an unsubscribe link within the email. The bounce flag shows whether this contact is on the suppression list. This means that the client is still opted in but won’t receive any emails until his or her email address is fixed.
 You can manually change these by toggling the switches ON/OFF and clicking Save.
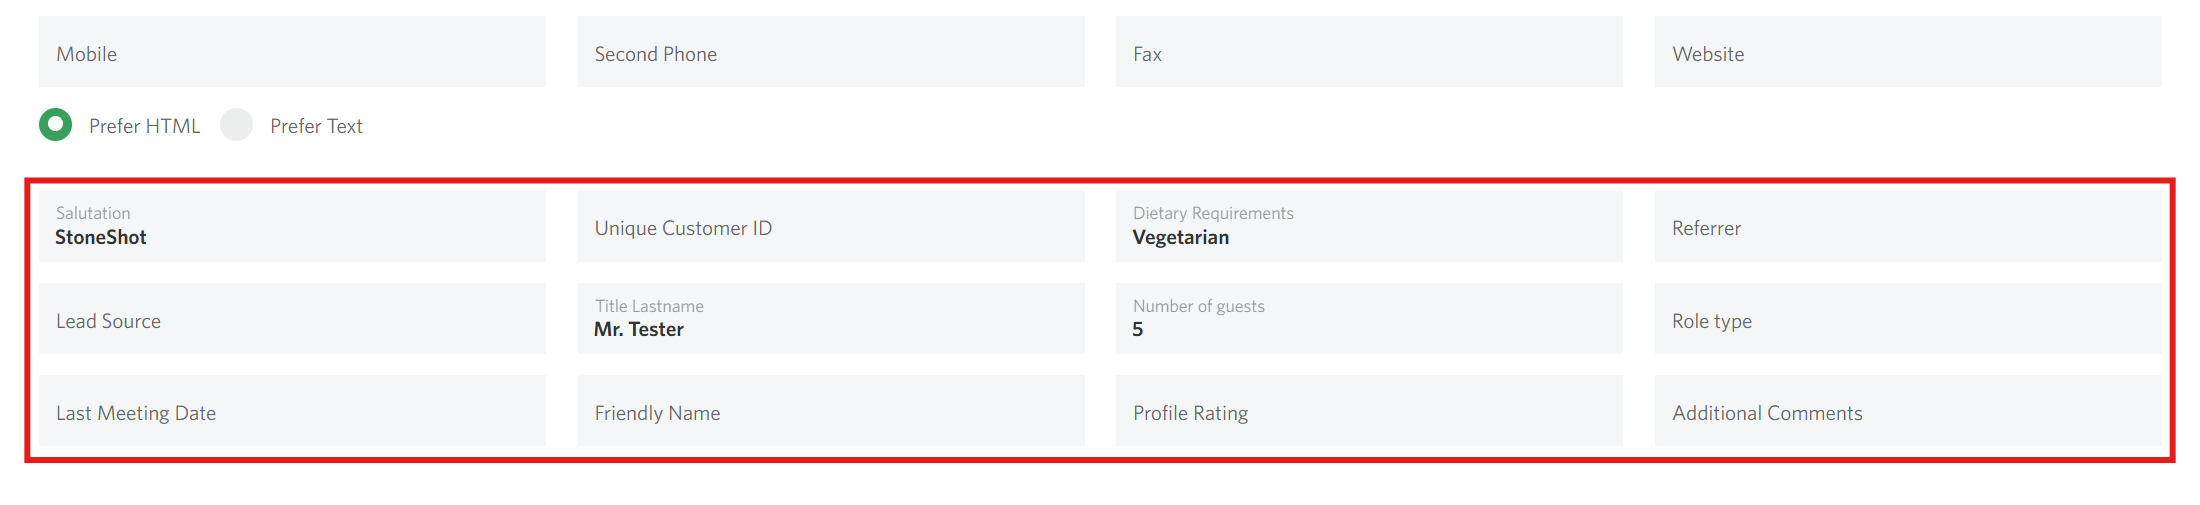
 - Contact details – The name and address fields are standard. Up to 12 custom fields can be added, in which you can store information such as salutation, dietary requirements or travel arrangements. We normally use the salutation field to personalise our emails, which is why you’ll often see “Dear {CUSTOM1}” in the emails we create.

- Segmentation – Assign contacts to preferences or segments that you have previously set up.
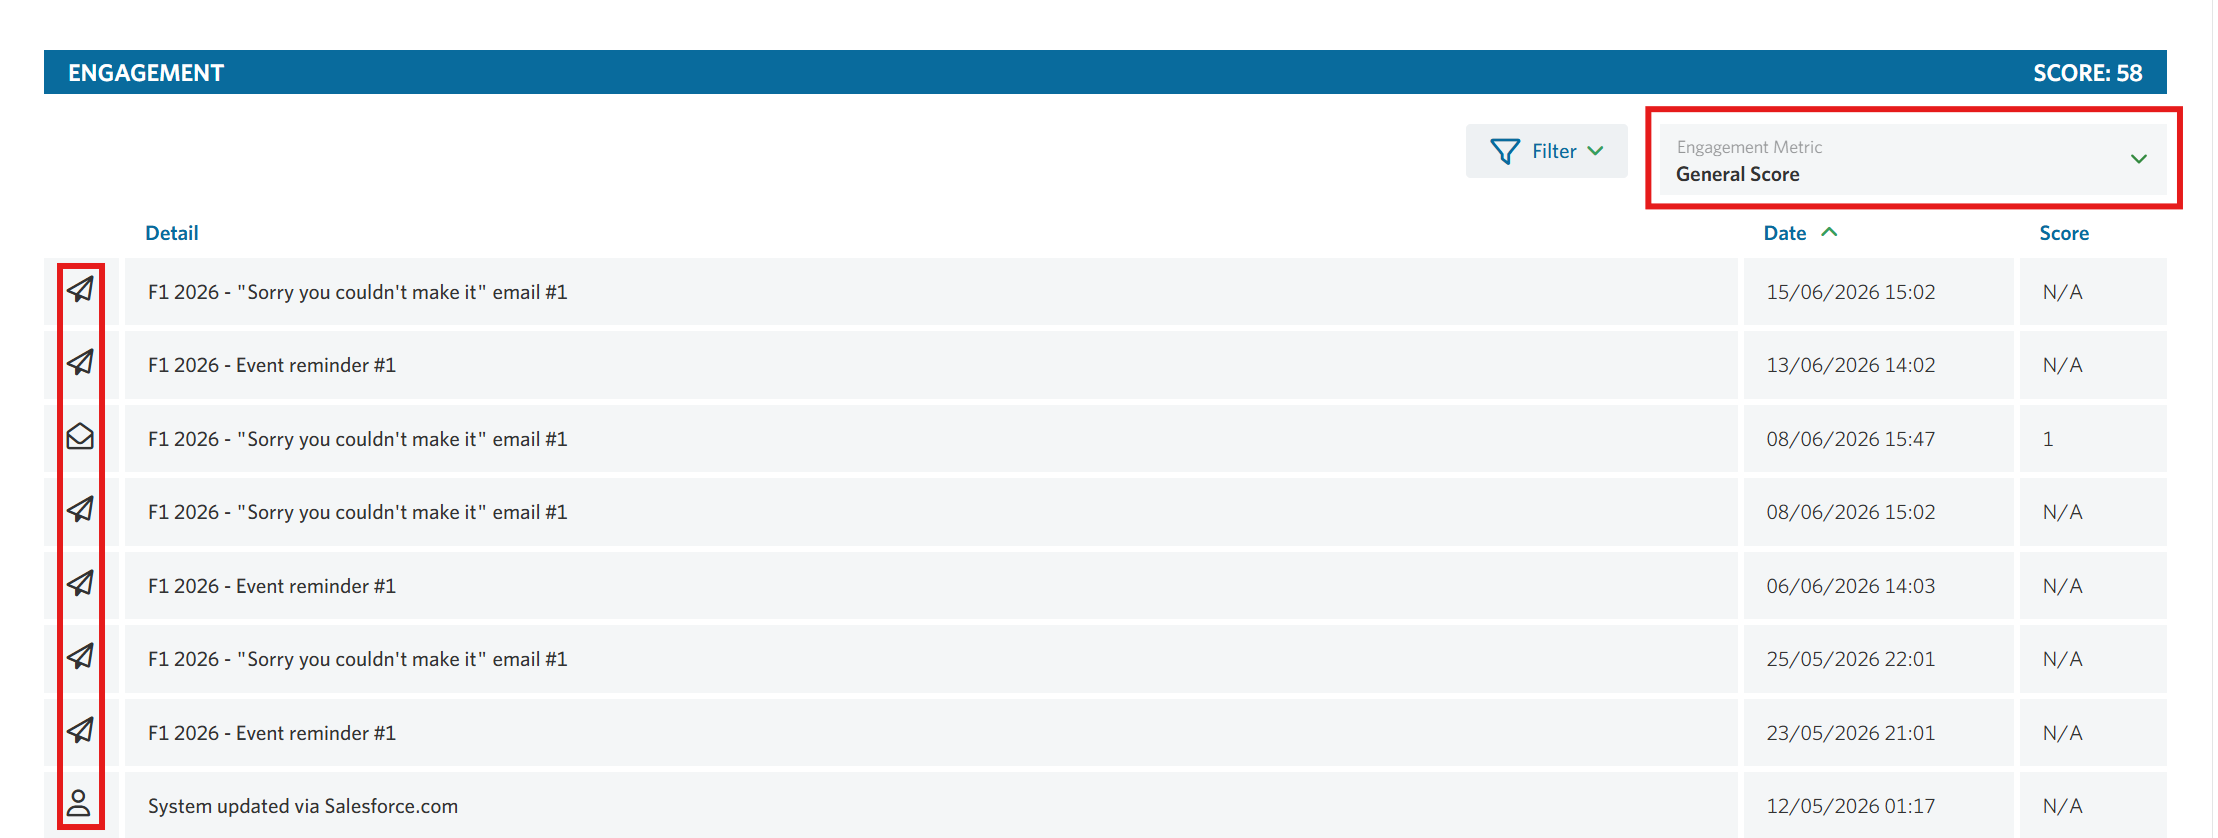
- Engagement – If engagement scoring is enabled, this section displays the points a contact has earned through their interactions with email campaigns. Use the dropdown menu to drill down into the report and view engagement scores by the configured scoring tags. You can also use the icons on the left to view detailed engagement activity for individual emails.

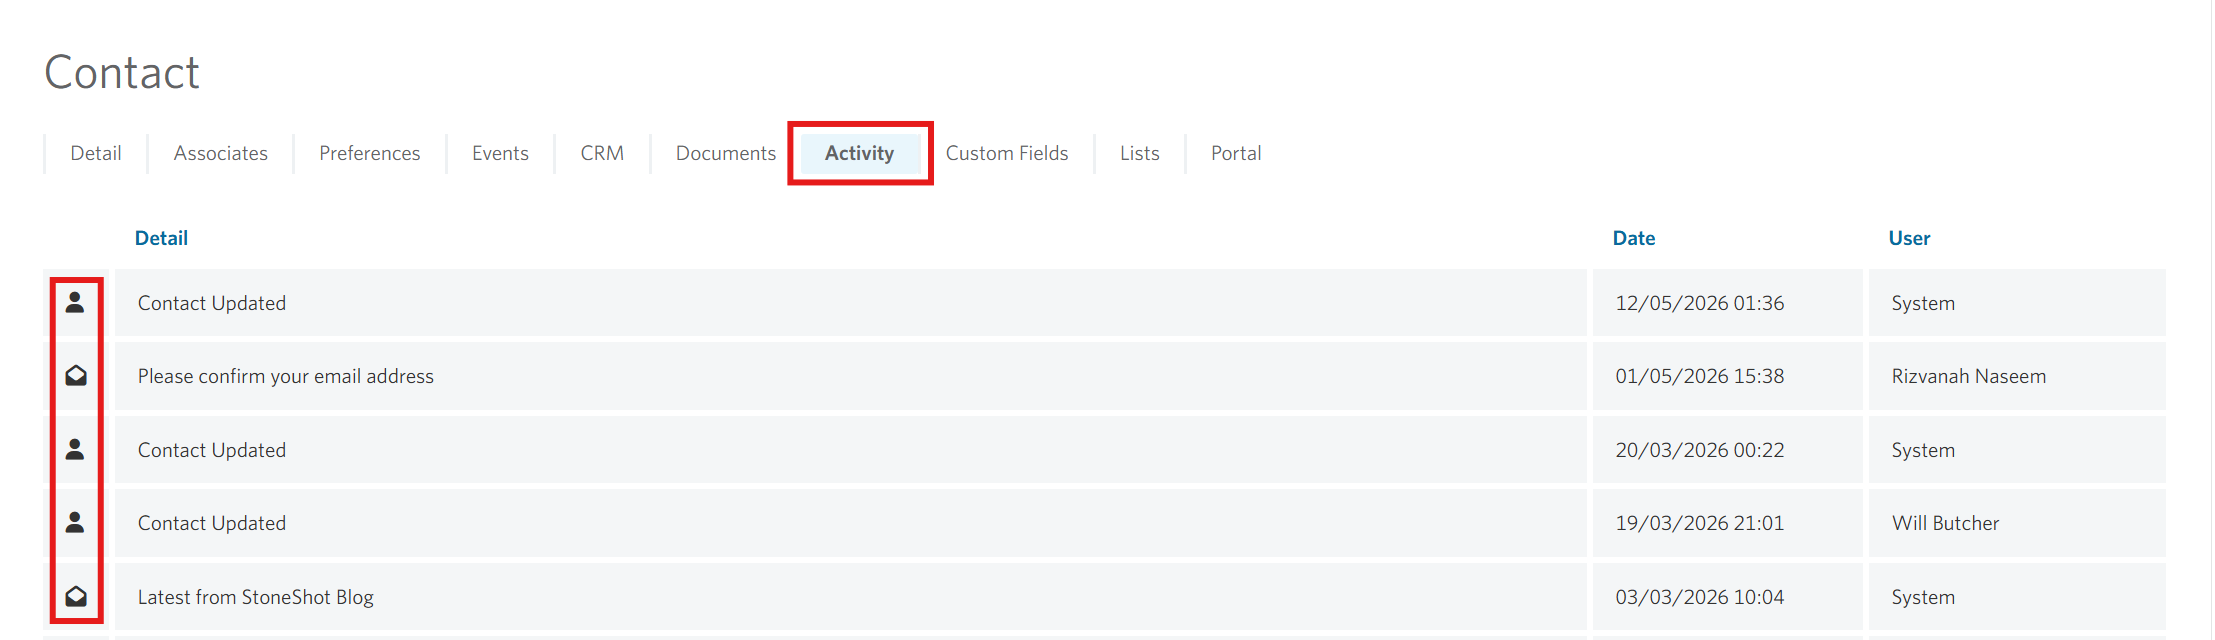
- Activity – Either at the bottom of the page or in the Activity tab, you’ll see a list of every interaction that your contact has had. You’ll see everything such as when contact information was updated, any emails that have been sent, opened or clicked, and also any form submissions. You can click on each icon to see what action was taken.
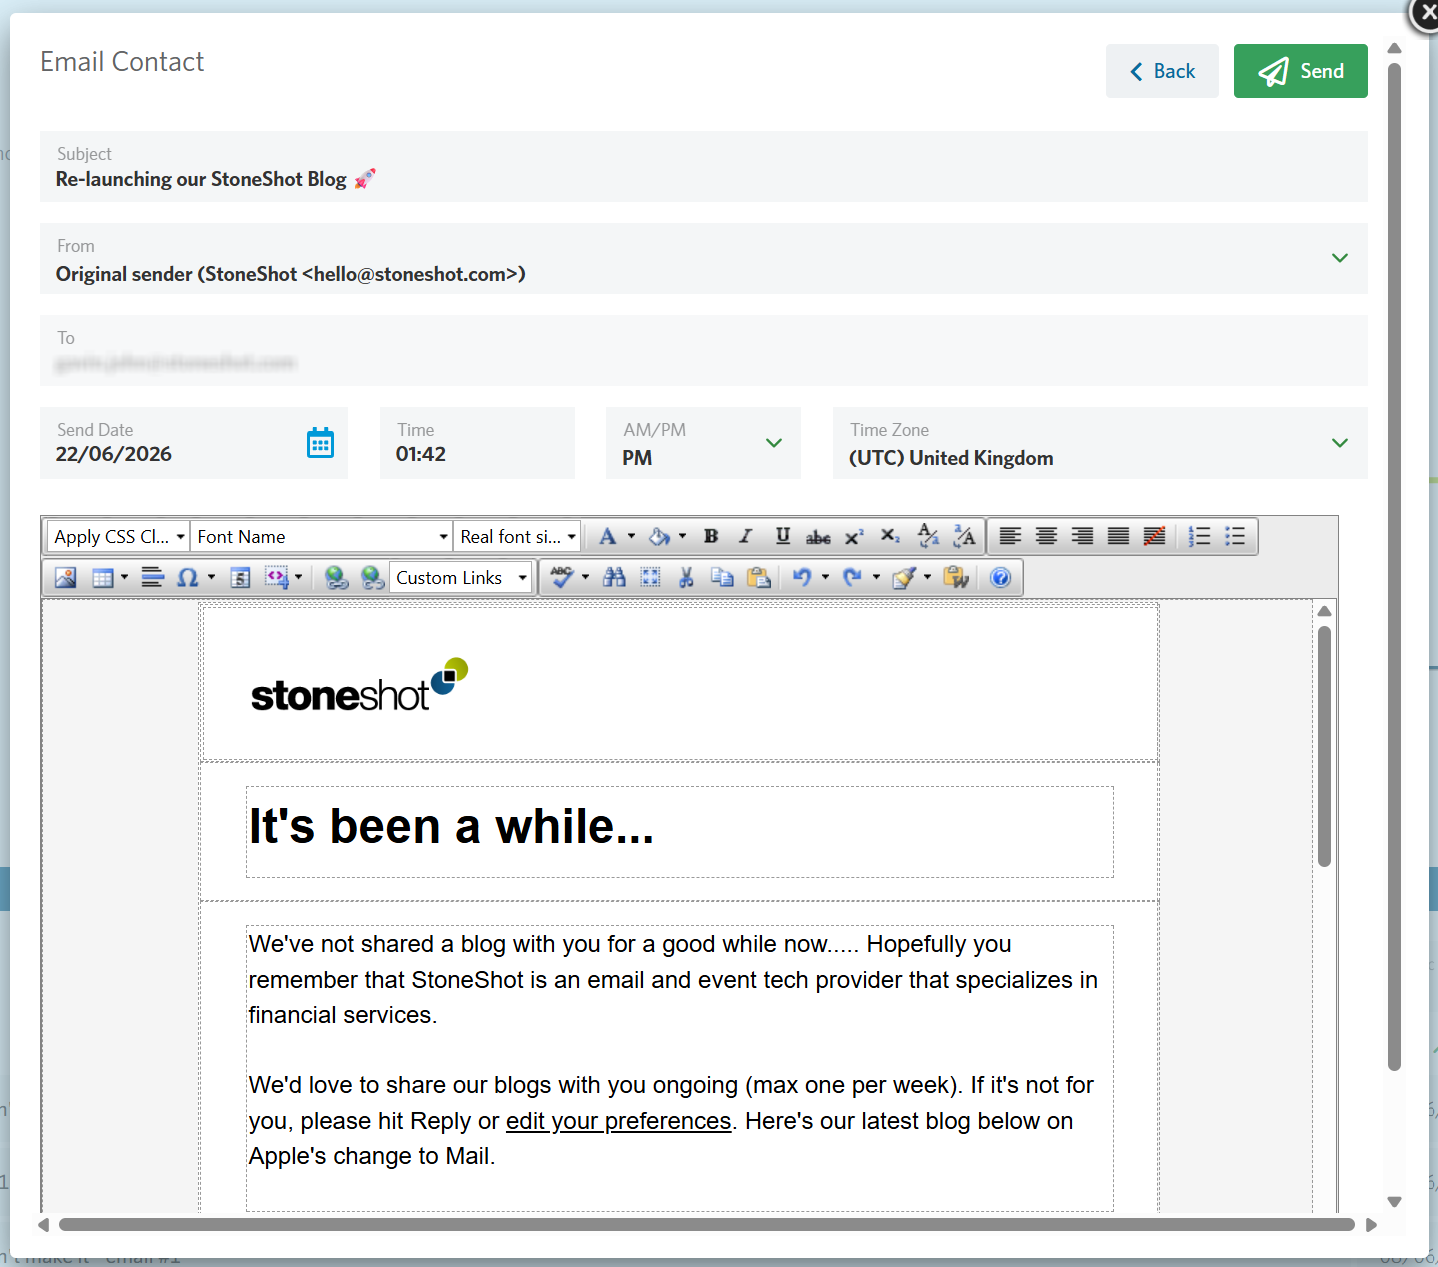
- Send Email – You can send an individual email to a contact by selecting this option. Begin by clicking the Search Templates field and entering a few characters to locate and select the required template. Click Next, then review and amend the sender details, subject line, or email content as needed. If required, adjust the scheduled send date and time before clicking Send.


Merging contacts
You don’t technically need to worry about duplicate contacts as StoneShot will dedupe for you when you send an email – even if you select multiple lists with the same contacts in each one.
That said, keeping your lists clean makes it easier to attribute activity to a single contact. You can dedupe in StoneShot by merging contacts together, choosing the “best” fields to keep on each contact. Here’s how to do it.
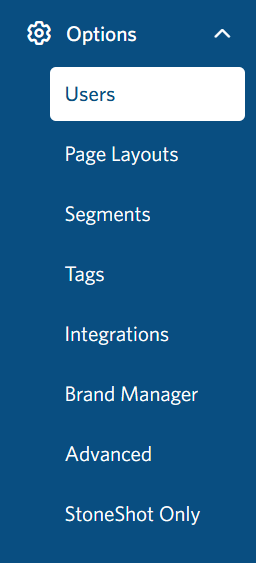
- Open the app and, on the left-side menu, select Options and then Advanced.
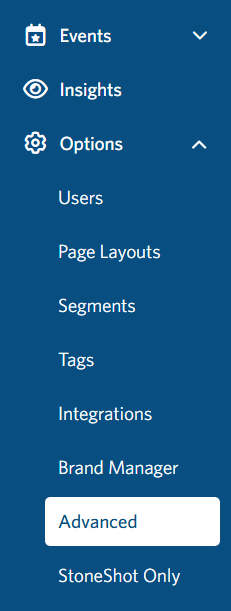
- In Advanced you’ll see the General options by default. To access the contacts’ merge feature, you can click on the Contact Management tab in the sub-navigation.

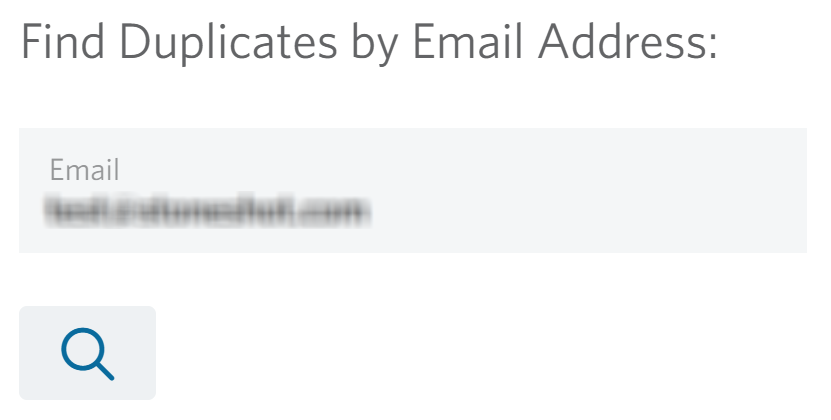
- On this page, you can search for duplicate email addresses:
- in a specific list, where you can use the dropdown to choose which list to use.
- or by email address. Just type in or paste the email address to search for.
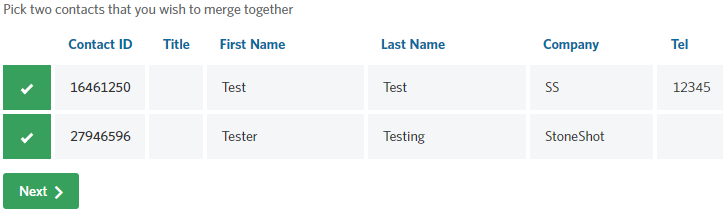
- The search results will display all the duplicate contact records existing in your account. You can tick the checkbox next to the two contact records you’d like to merge and click the green button Next >.
- Select the primary contact you’d like to keep by clicking the Set Primary button. If you’d like to keep the oldest contact record, you can see its contact ID and check which number is the smallest. That’s the oldest contact record.

- After selecting which contact to set as the primary one, you’ll then be able to select which fields from each contact you’d like to keep in the unique contact. Select the fields from the left or right column depending on which data you’d like to keep

- Finally, click the Merge button on the bottom right of the page to merge the two contact records.
Note: you cannot merge two contact records who both have CRM IDs as each contact record is linked back to your CRM.
Changing the number of contact records I see on a page
In the Contacts section, you can edit the number of records you’d like to appear on the page.
To do this, follow the steps below:
- Navigate to Options > Users

- Click into Preferences. On this page you’ll be able to edit the number of records displayed via the Page size dropdown. Hit Save once you’ve made your selection.

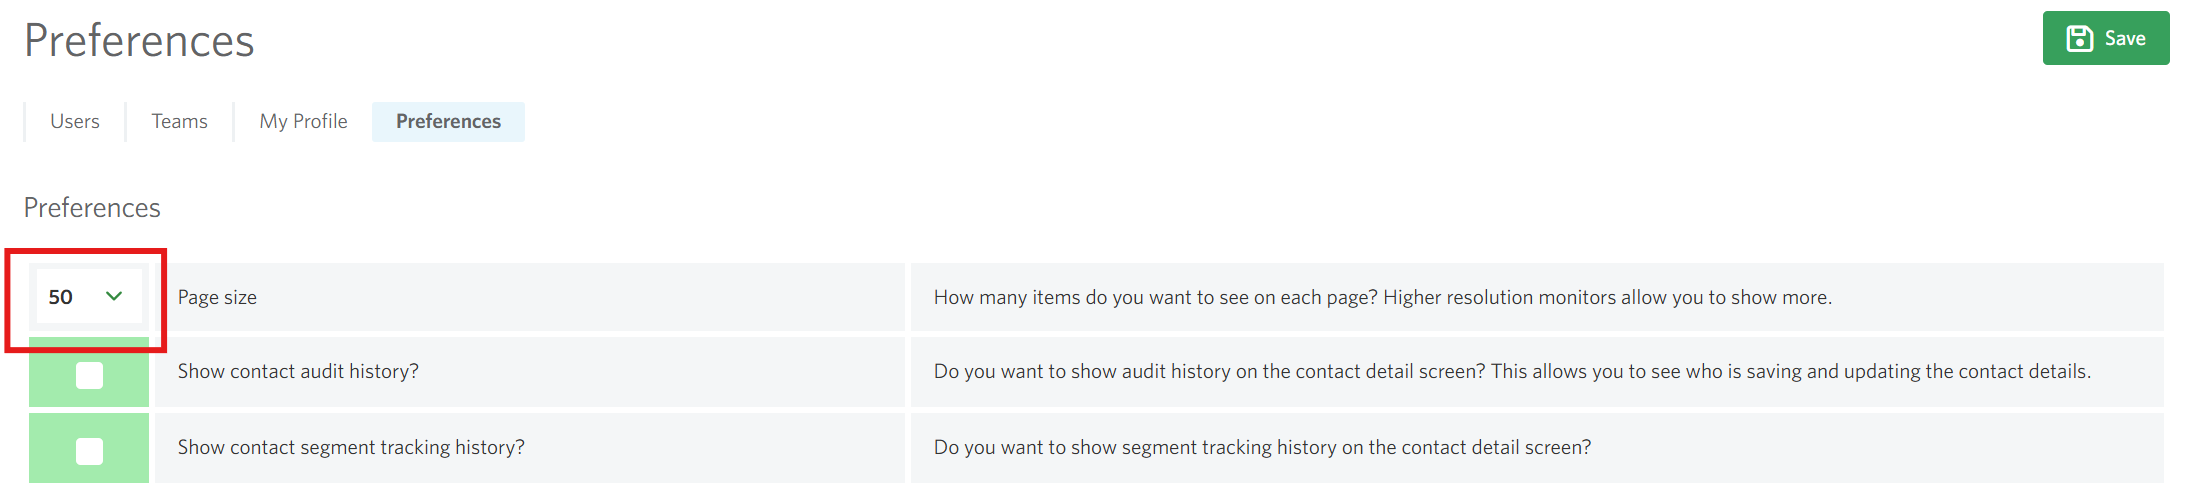
Note: This method is not accessible by StoneShot for Sales users.
See how many emails a contact gets in a month
The Contacts section within the StoneShot platform provides a series of tools to help manage your contact records and their information. To view the number of emails a contact receives in a month; you will need to create a list – this can be either static or dynamic depending on what best suits the task at hand.
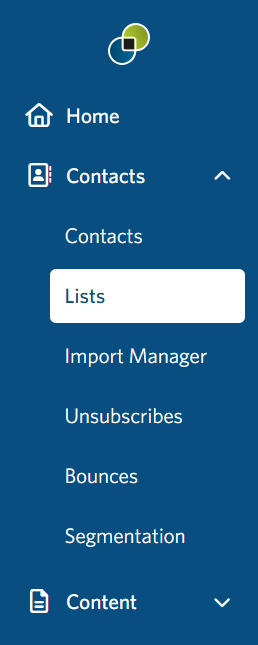
- Navigate to Contacts > Lists
- Create a new list using the New List dropdown (For this example, we’re using a Static list).

- Once you’ve set up the list with your contact(s), open the Search and Filter tab by clicking the blue arrow located on the top right of the page. This edit panel allows you to build up information on your list.

- Type in “sent” in the search bar to add the Sent column to your list. This is also where you can edit the time span via the Report Range dropdown.

- You should now see the new column added to the display like below. The number of sent emails will now be visible for each contact.

FAQ
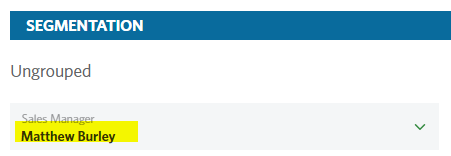
How do I reassign contacts sales managers?
Via contact profile segmentation for individual contacts
Or via the Bulk assign tool for multiple contacts.
More detailed instructions can be found on our Dynamic Sender page.
How do I change the number of contact records I see on a page?
In the Options > Users > My Profile > Preferences area, you will see the page size dropdown. StoneShot for Sales users can’t access this.

More detailed instructions can be found on the Managing Contacts page.
I have contacts that have email addresses that are continually changing between upper and lower case, why is this?
This occurs due to differences in how email addresses are handled between systems. If an email address is stored in uppercase in your CRM, it will sync to StoneShot retaining that formatting. However, when contacts are imported via a list, the import process automatically converts email addresses to lowercase. During the next sync, StoneShot reverts the email address format to match what’s in the CRM. This back-and-forth can cause the casing to appear inconsistent, although functionally, email addresses are case-insensitive.
How can I see what has changed on a contact's record?
You can view changes made to a contact record from the contact’s Activity page :
- Go to Contacts > Contacts and open the contact’s record. Select the Activity tab to view a complete history of the contact’s interactions and updates.
- The activity log shows when changes were made to the contact’s details and what information was updated, helping you identify when and how the record was modified.
Can we automatically delete contacts, activity or lists after a certain time period?
Yes. For contacts and activity, we have an automated process that can remove data older than a specified number of years. Contact our Support team and we can enable this setting for your account. Lists cannot currently be deleted automatically. However, we can schedule regular list clean-ups (for example, every few months) to help keep your account organised and running smoothly.
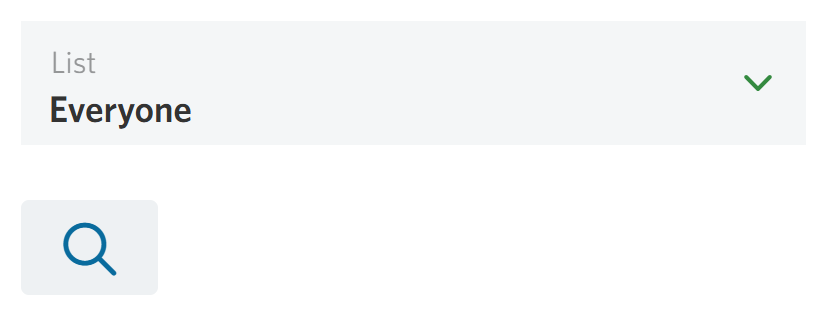
Why can't I see 'Everyone' when searching in the Contacts section?
This is usually due to your Team permissions. Admin users can view all contacts regardless of Team allocations, whereas standard users can only view contacts, lists, emails and assets assigned to the Team they belong to.
If you can no longer see the Everyone option, please check that you have been assigned to the correct Team. Your account administrator may need to update your Team permissions if your access requirements have changed.