










StoneShot Learning > Event Marketing > Inviting Contacts
Inviting Contacts
So you’ve created your registration form, checked (and double-checked!) your sessions, and set up your schedule. Your event is now ready to accept registrations.
The final step is to assign your invitees and let the schedule do the rest.
You could, of course, send an invitation email to a list of contacts manually. However, it’s usually better to assign contacts to one or more sessions and let the schedule do the work for you. You’ll also gain valuable insights into your conversion rates, such as how many invitees go on to register, which can help you decide how many contacts to invite to future events.
Invite List
If you’re running a roadshow, you could invite your clients to attend all sessions and have them pick the one that’s most convenient. Or you could pick and choose the sessions you’d like each client to attend. Either way, the schedule will handle sending invitation emails.
There are two ways to assign contacts to an event – via the list or within the Event Builder. Let’s look at both.
Pushing invitees from a list
This approach uses the Bulk assign contacts option on the Actions dropdown within a list. All we need to do is go into the relevant list, pick your event and session(s) and pick the Invited status. Here’s an example.
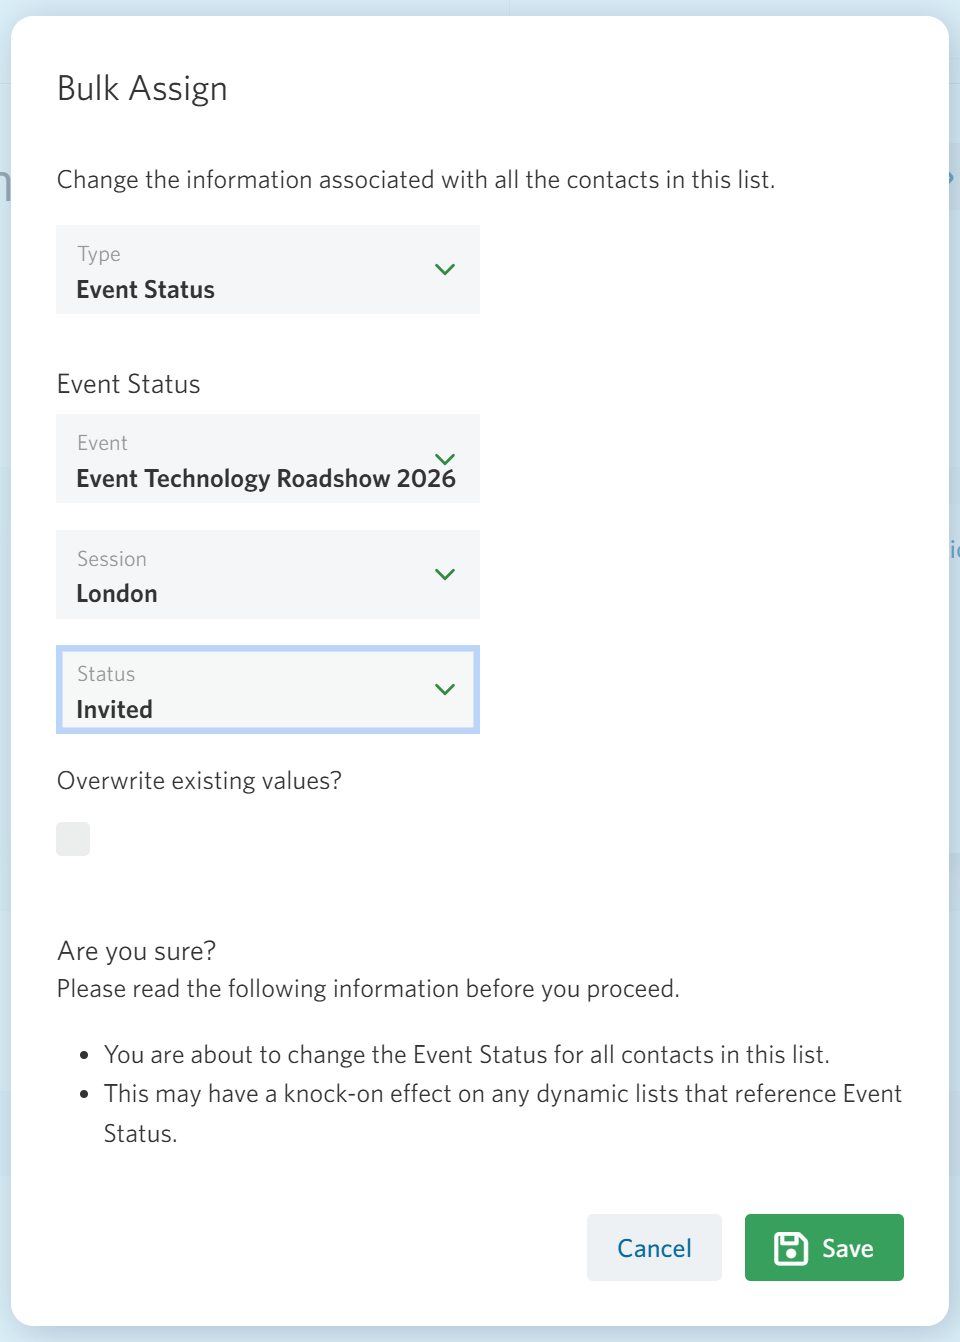
If you leave Overwrite existing values unchecked, it will only update contacts that don’t have an event status for this event. That means you could invite clients at any time without affecting any that may have already registered or declined. This is our recommended approach.
Inviting within the Event Builder
This approach allows you to assign contacts without leaving the Event Builder. Click into the Session, scroll down to the Contacts Table and click on Add Contacts. You can then select Search for contacts or By list. Let’s go through both.
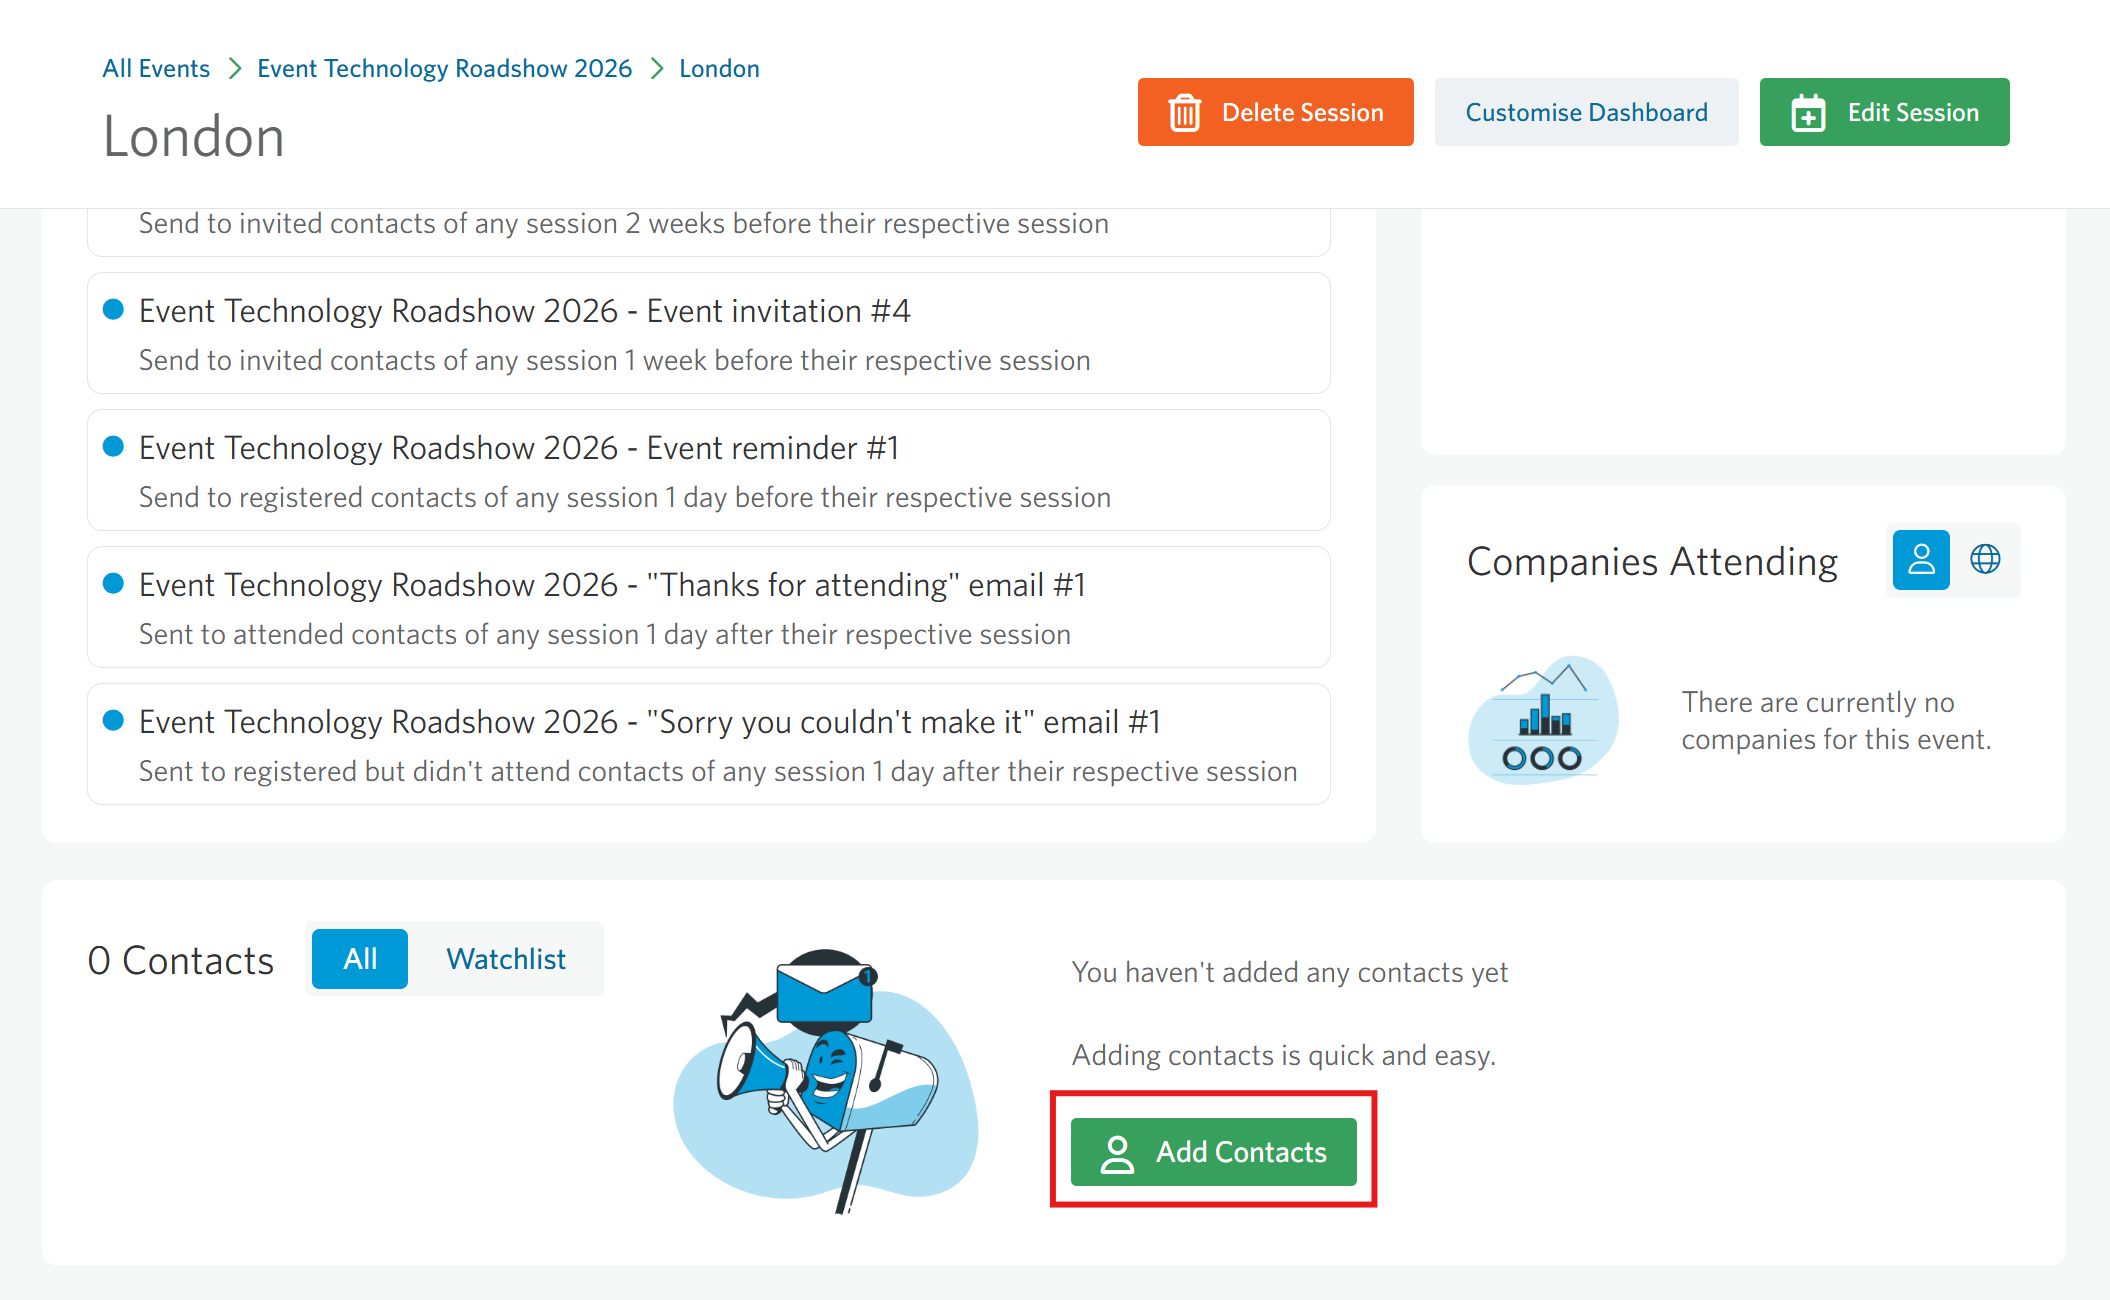
When inviting from a list, you can pick a list, select “Invited” and click Add contact. This will assign each contact as Invited against the sessions you’ve selected and you’ll then see the list of contacts. You can add more lists again by picking Add contacts.
When inviting from individual emails, you can simply search for the contact’s record, set the Status to “Invited” and click Add Contact.
Editing Event Lists
In addition to importing, you can edit the list against an event at any time.
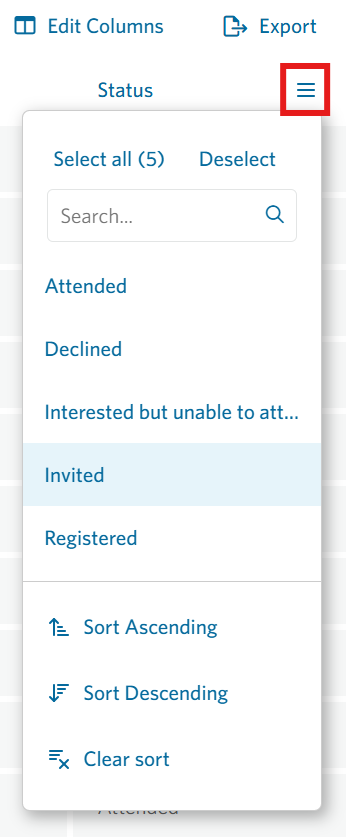
Go into Events from the main navigation and click into the event. Then click into the Session, click on the filter icon and check Invited. This will show all invited contacts as well as Registered, Attended, etc.
You can now click to select one or many contacts and click Change Status.
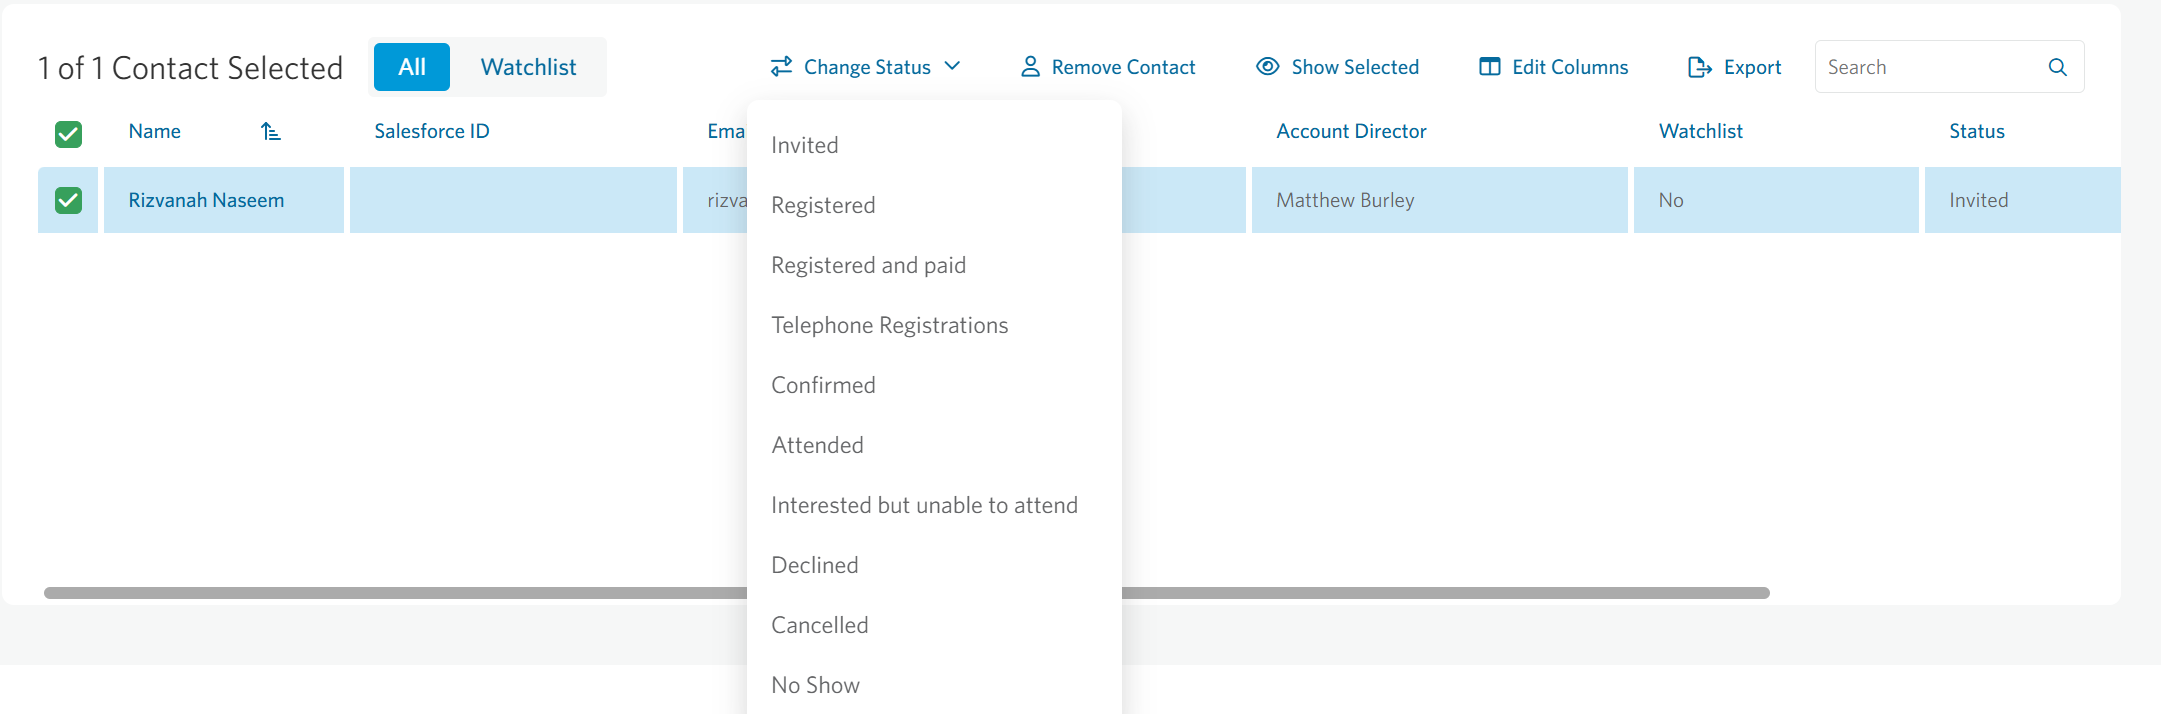
There is also the option to Remove Contact which will clear the event status and remove the selected contacts from the event.

That’s it – you’re all set. Now is a great time to put your feet up and relax. You’ve earned this moment. Let our tech do it’s stuff.
FAQ
Can we add a Seed List to an event email schedule?
No, Seed Lists cannot currently be added directly to an event email schedule. This functionality is planned for a future release.
In the meantime, there are two alternatives:
- Bulk assign the Seed List contacts to the same Event Status used by the schedule trigger. For example, assign them as Invited for an invitation email or Attended for a “Thanks for attending” email.
- Clone the event email into the main Emails section, select the Seed List as the recipient list, and send the email manually.