


StoneShot Learning > Reporting > Unsubscribe and Bounce Reports
Unsubscribe and Bounce Reports
We have released a new reporting feature which allows you to easily create and schedule an unsubscribe or bounce report (as well as date of last email received, date of last opens). You create these reports from our Lists section, exporting the report as an Excel or PDF file and having the ability to receive a monthly or weekly update direct to your inbox.
Unsubscribes Report
You can generate this report in Contacts > Lists and create a new dynamic list by clicking the New List button on the top-right corner of the page. This list may take up to a few minutes to create, depending on the number of contacts you have on your account.
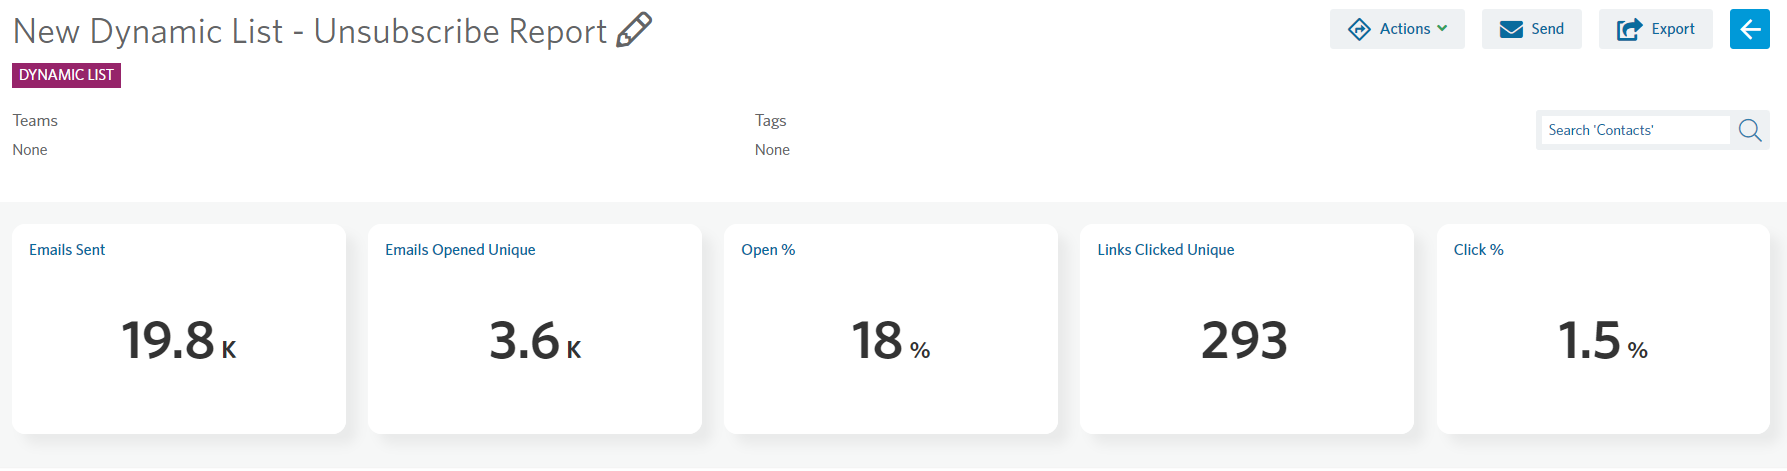
As this is a dynamic list, you now need to filter in the contacts you would like to add to your report. They could be assigned to a specific Sales Manager, to contacts who have been recently emailed or to another specific segment.
You can add these filters by clicking the top-right corner Edit button and selecting Filters. For this example, we will use the filter Contacts and only show opted-out contacts.
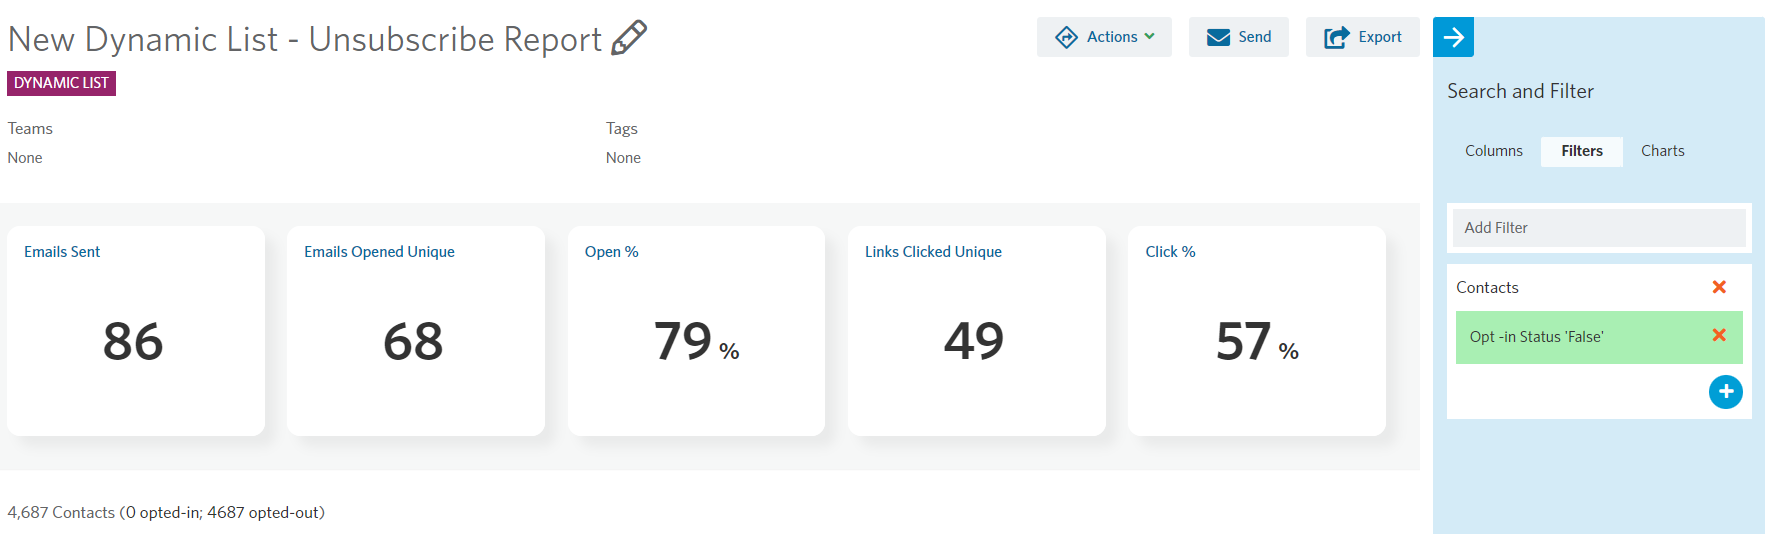
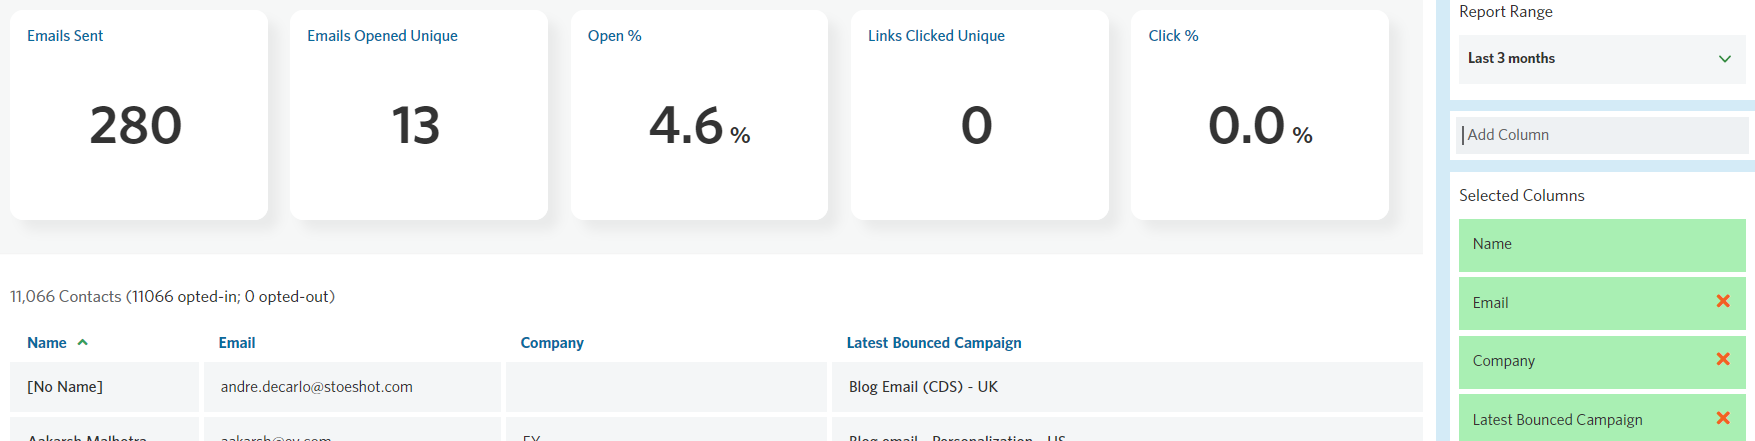
Now we need to add the right columns to the report.
Click in the blue box on the right where your filters are and click on the Columns link. Here you’re able to change the date range of the report. In this case, we will use the monthly option. Additionally, you can add new columns. Select Add column and scroll down to find the Last Unsubscribe Date and the Last Unsubscribe Campaign fields. Then, click to add them to your list.

Bounces Report
You can generate this report in Contacts > Lists and create a new dynamic list by clicking the New List button on the top left corner of the page. This list may take up to a few minutes to create, depending on the number of contacts you have on your account.
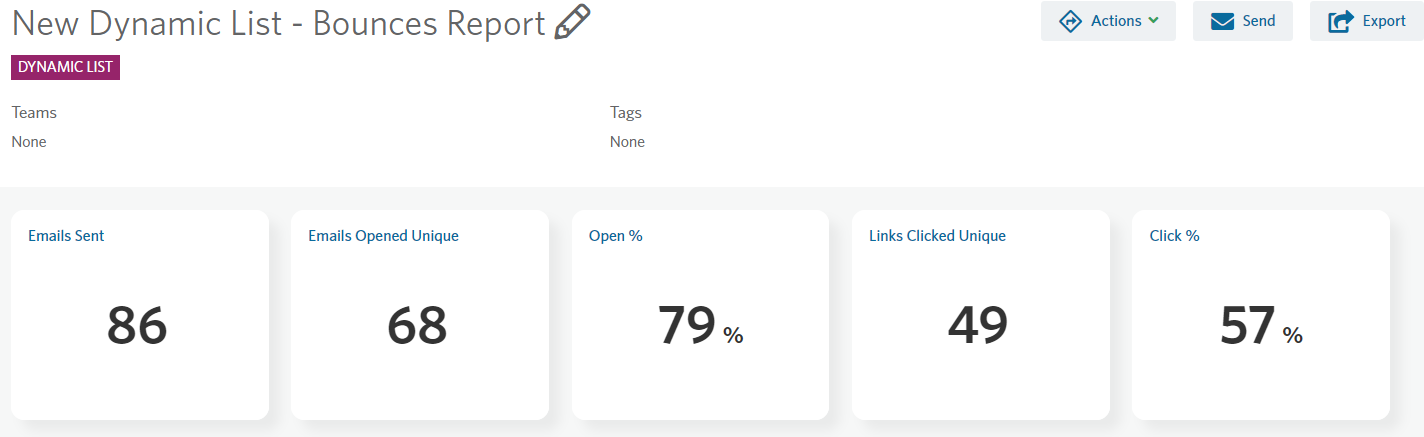
As this is a dynamic list, you now need to filter in the contacts you would like to add to your report. They could be assigned to a specific Sales Manager, to contacts who have been recently emailed or to another specific segment. You can add these filters by clicking the top right corner Edit button and selecting Filters. For this example, we will use the filter Contacts and only show bounced contacts.
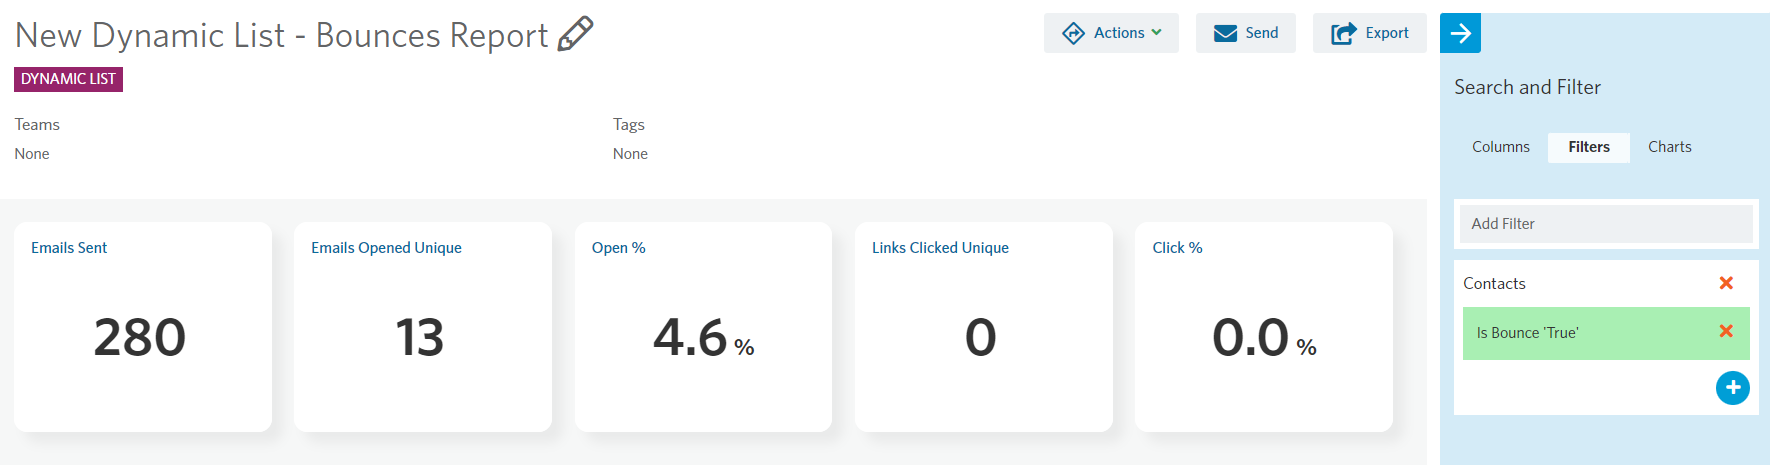
We now need to add the right columns to the report.
Click in the grey box on the right where your filters are and click on the Columns link. Here you’re able to change the date range of the report. In this case, we will use the monthly option. Additionally, you can add new columns. Select Add column and scroll down to find the Last Bounce Date, Total Bounces and the Last Bounced Campaign fields. When you find them, click to add them to your list.
Exporting your report
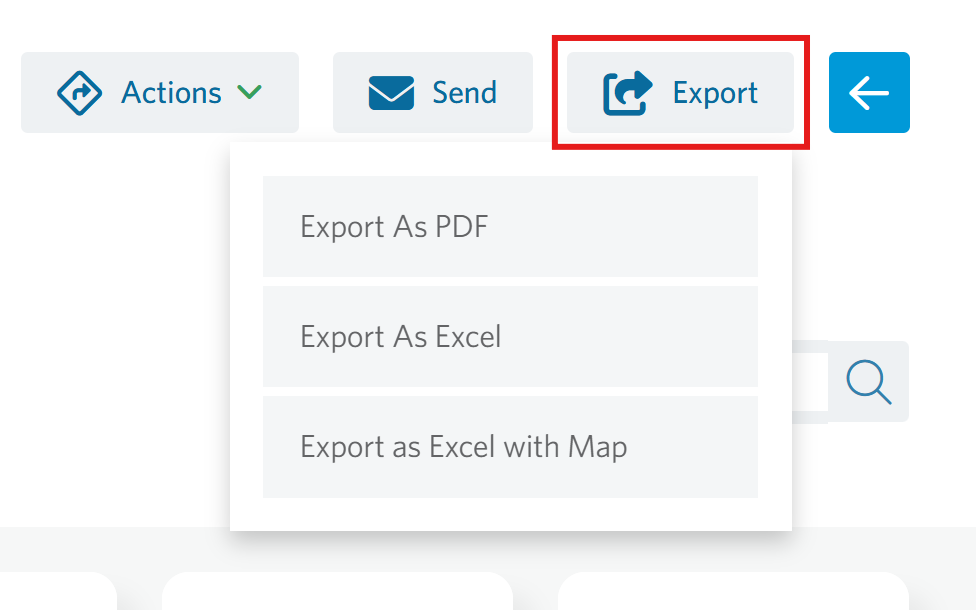
Once the report is ready, you can export it as a file. Click the Export button on the top-right corner of the page. Here you could choose to export as a PDF, as an Excel file or as an Excel file with an export map.
Sending your report
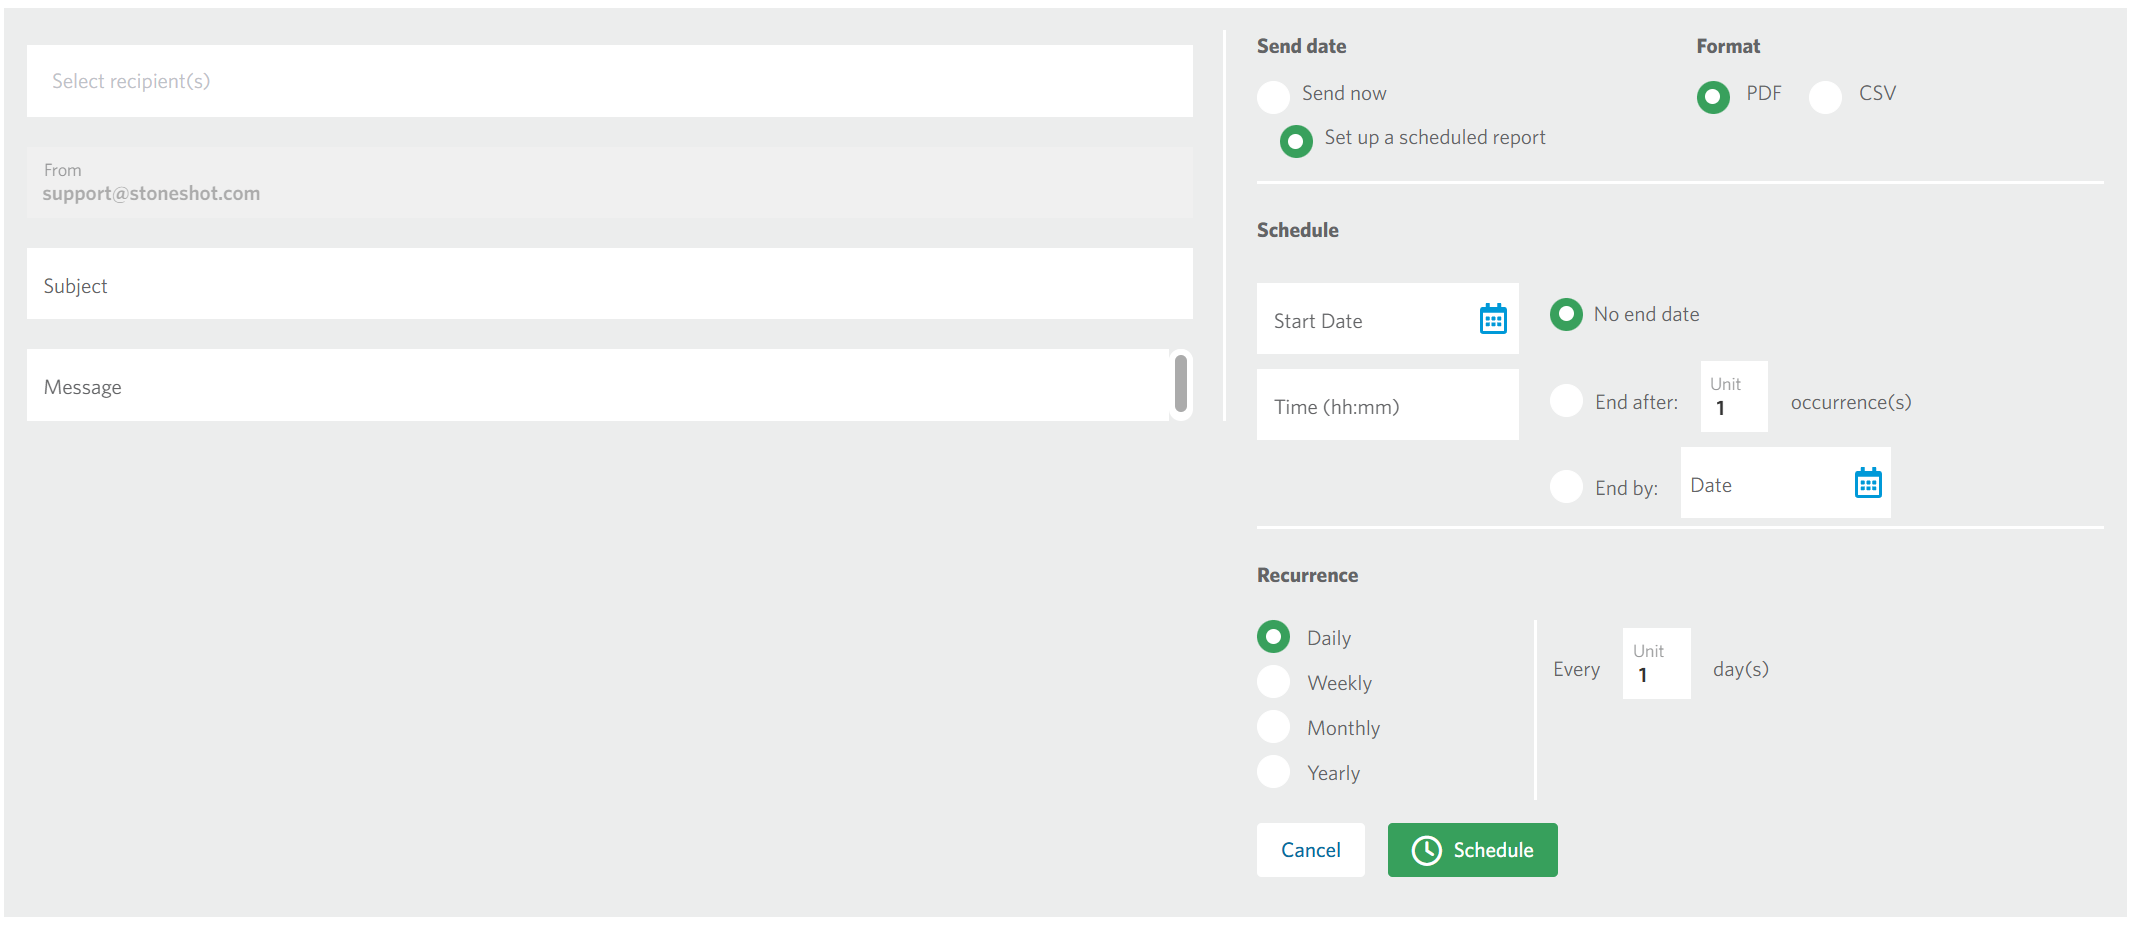
You can also receive this report to your inbox on a regular basis, or send it to your colleagues and stakeholders. Click the Send button on the top-right corner and fill out the information below like you would in your email client. Make sure to add one (or more) recipient(s), the subject line for your email and the message you would like to add. Then you can select if you’d like the report to be sent as a CSV file or PDF.
Finally, you can setup a schedule. You can select a start date and how often you’d like to receive the report. For example, you could set up your two reports to show anyone that has unsubscribed in the last month, and your second report to show anyone that has bounced in the last month. These could both be scheduled to come to you automatically every month in your inbox, to save you having to manually create and pull this report each month.
For more information on how to get started, please contact the StoneShot support team who will be able to help.
Below you’ll also find our Unsubscribe and Bounce Report video too.
