


StoneShot Learning > Integrations > Salesforce Embeds
Salesforce Embeds
We’ve recently implemented a major overhaul introducing two new embeds for Salesforce. One for the ‘Contact screen, and one for the Account screen. This gives you more control and more functionality without having to go into the StoneShot Canvas and keeps you within the contact or the account.
What have we added?
- Custom dashboards to see engagement metrics, active hours, location and more…
- A timeline that shows activity as it happens with drill-down for more info
- Easy event and email preference management
- The ability to manage contacts in workflows
We’ll dive into each embed in more detail below.
Contact embed
We have 5 sections within the embed, each giving that extra insight and control into your contacts.
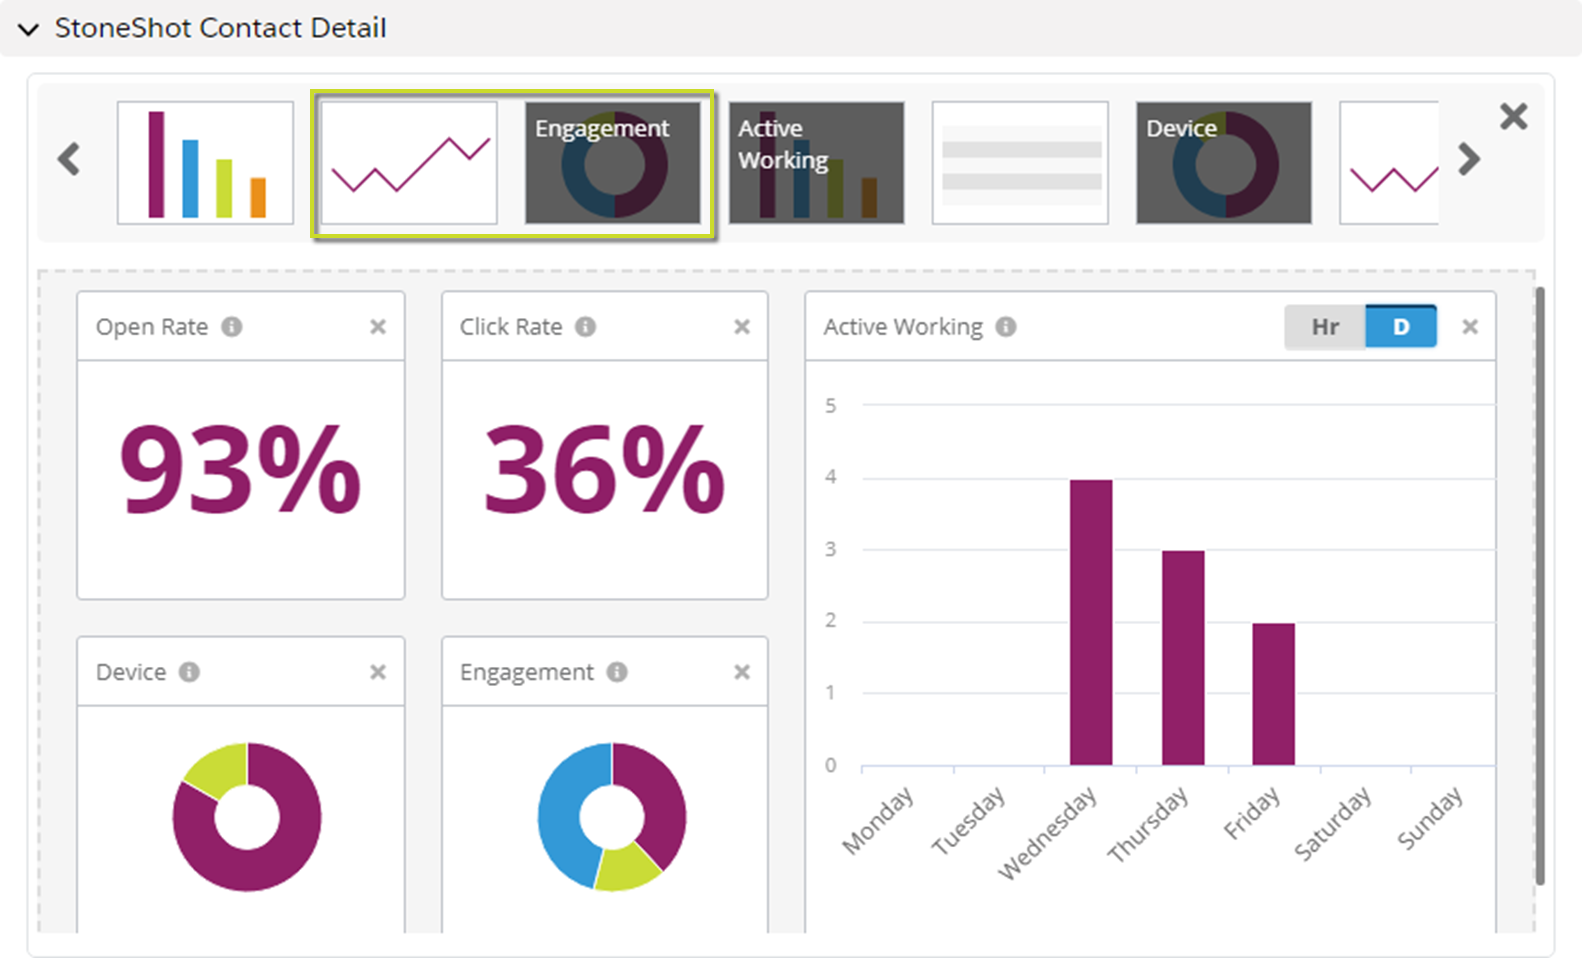
Dashboard
The first tab that loads up is a dashboard specific to the contact. You’ll see a selection of charts that you can customise by clicking the cog icon, giving you full flexibility on the stats that are important to you.
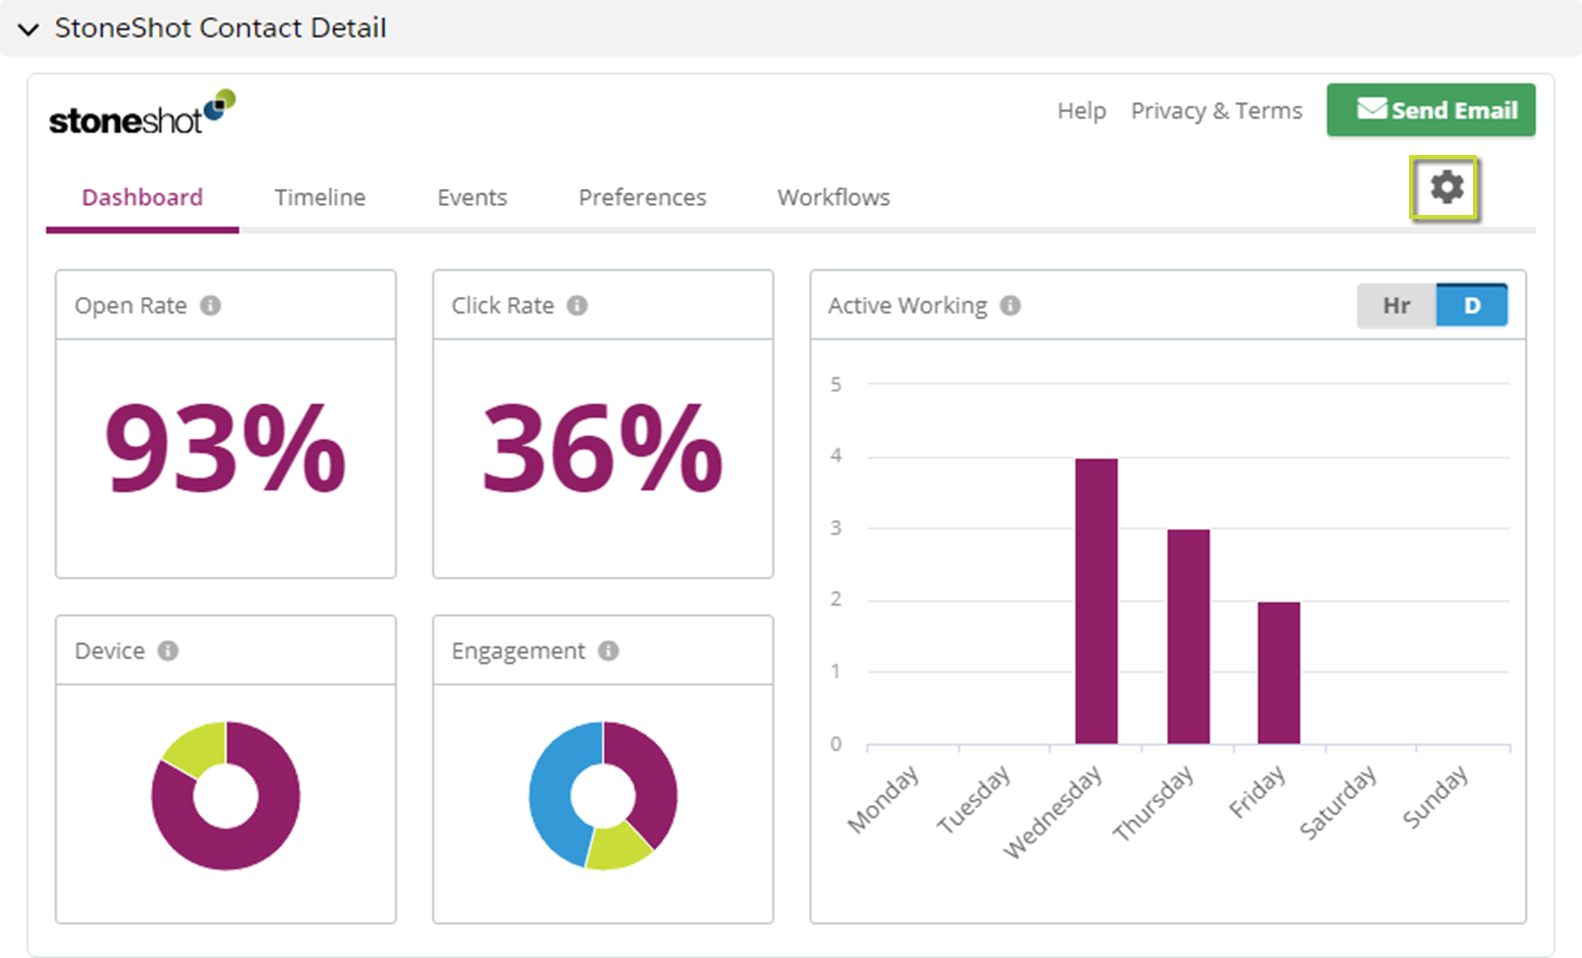
Simply click on the chart or metric you want to include from the top row and click the X on the chart or metric you want to remove from the main area.
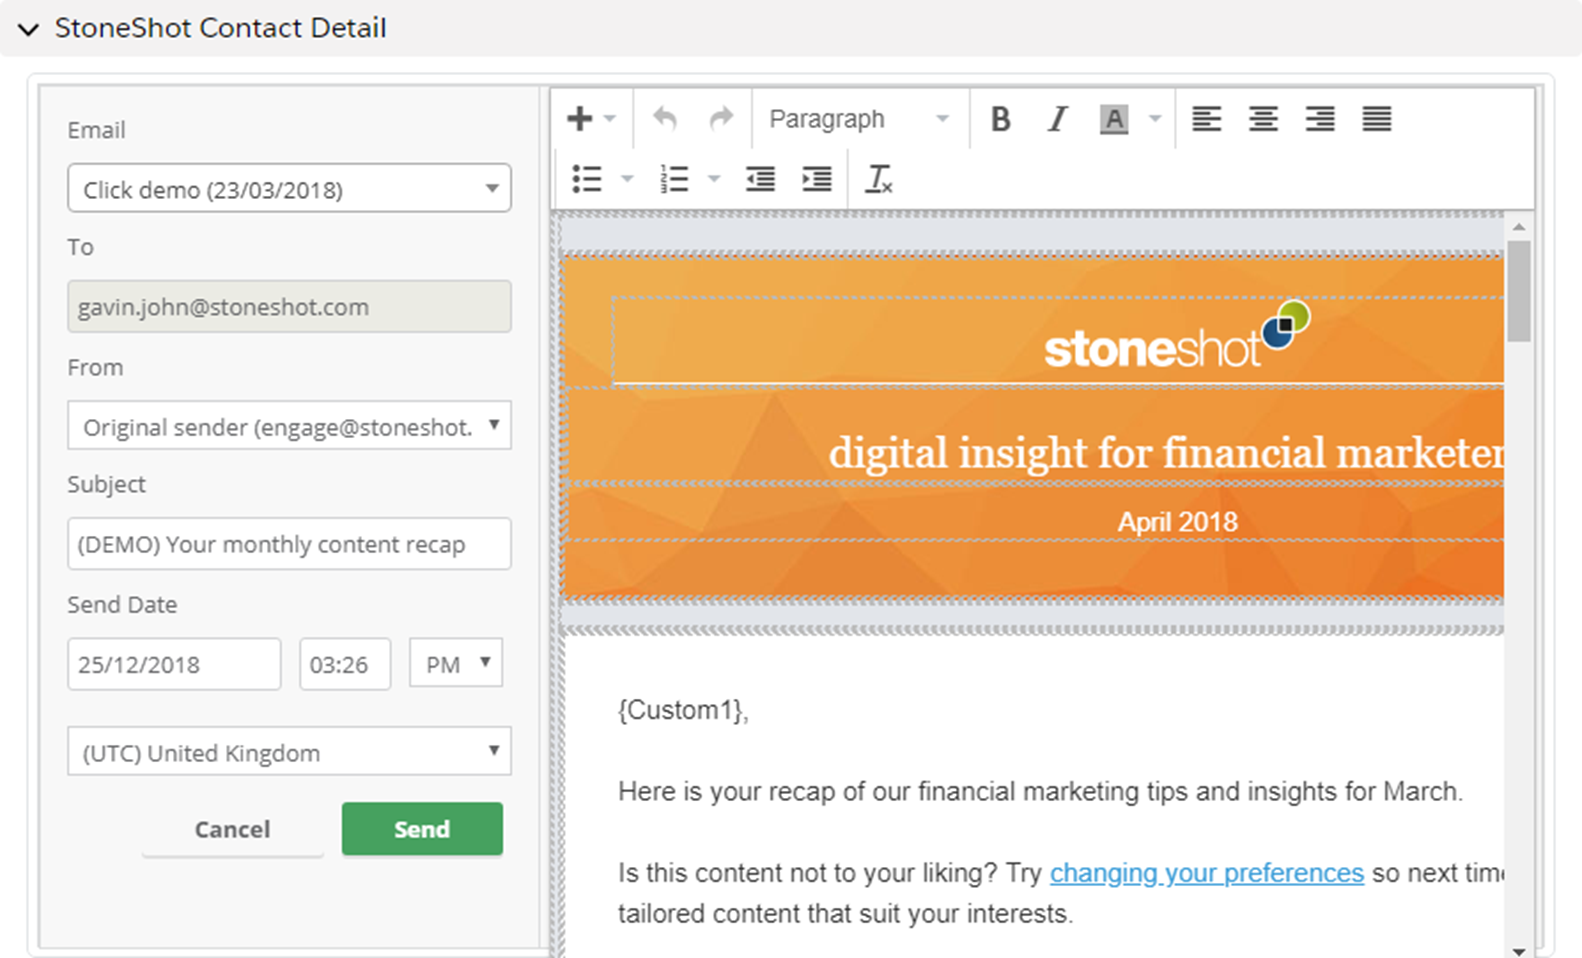
Send Email button
Clicking on the Send Email button opens up a wizard allowing you to send a pre-created email to your chosen contact. For example, you could use this to send an event invitation to a contact not on the original invite list.
You get all the advantages of sending out from the main StoneShot canvas application, including full activity tracking, a fully on-brand email, and a mobile responsive template.
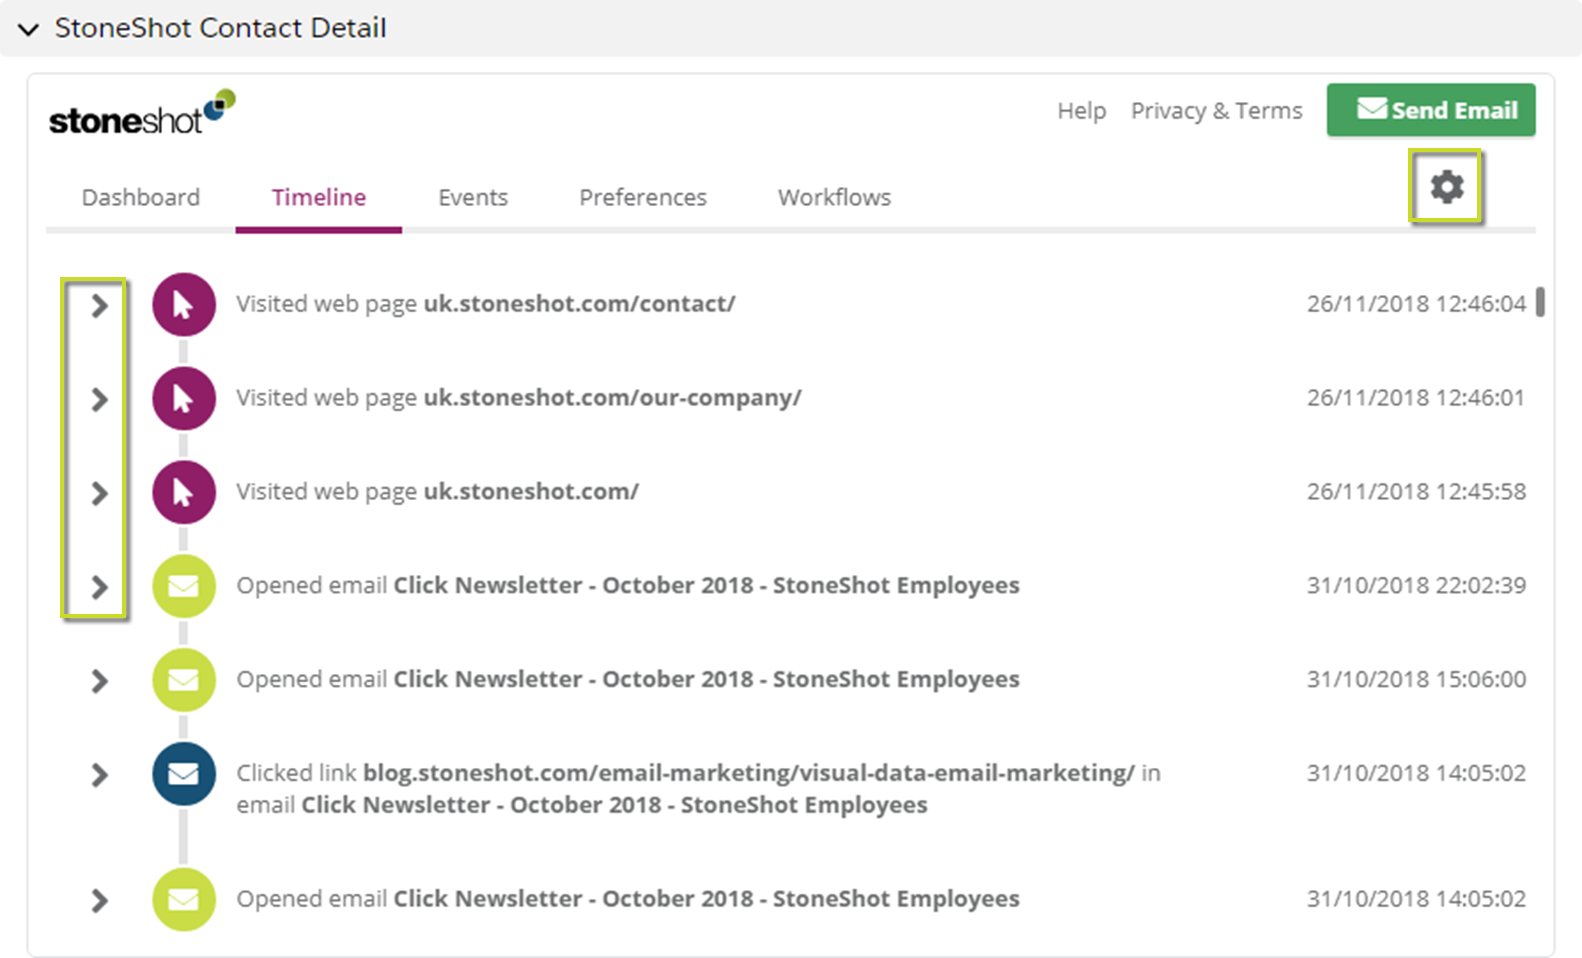
Timeline
Our timeline tab gives you an overview of your contacts’ interactions with StoneShot. This will include emails opened, links clicked, and even what web page they’ve accessed if you have our integration set up. You can use the cog icon to choose what information to see on this screen.
Events
The events tab allows you to see what stage your contact is for particular events, and allows you to move contacts in between events and update their status. Again, using the cog icon allows you to filter what events you see.

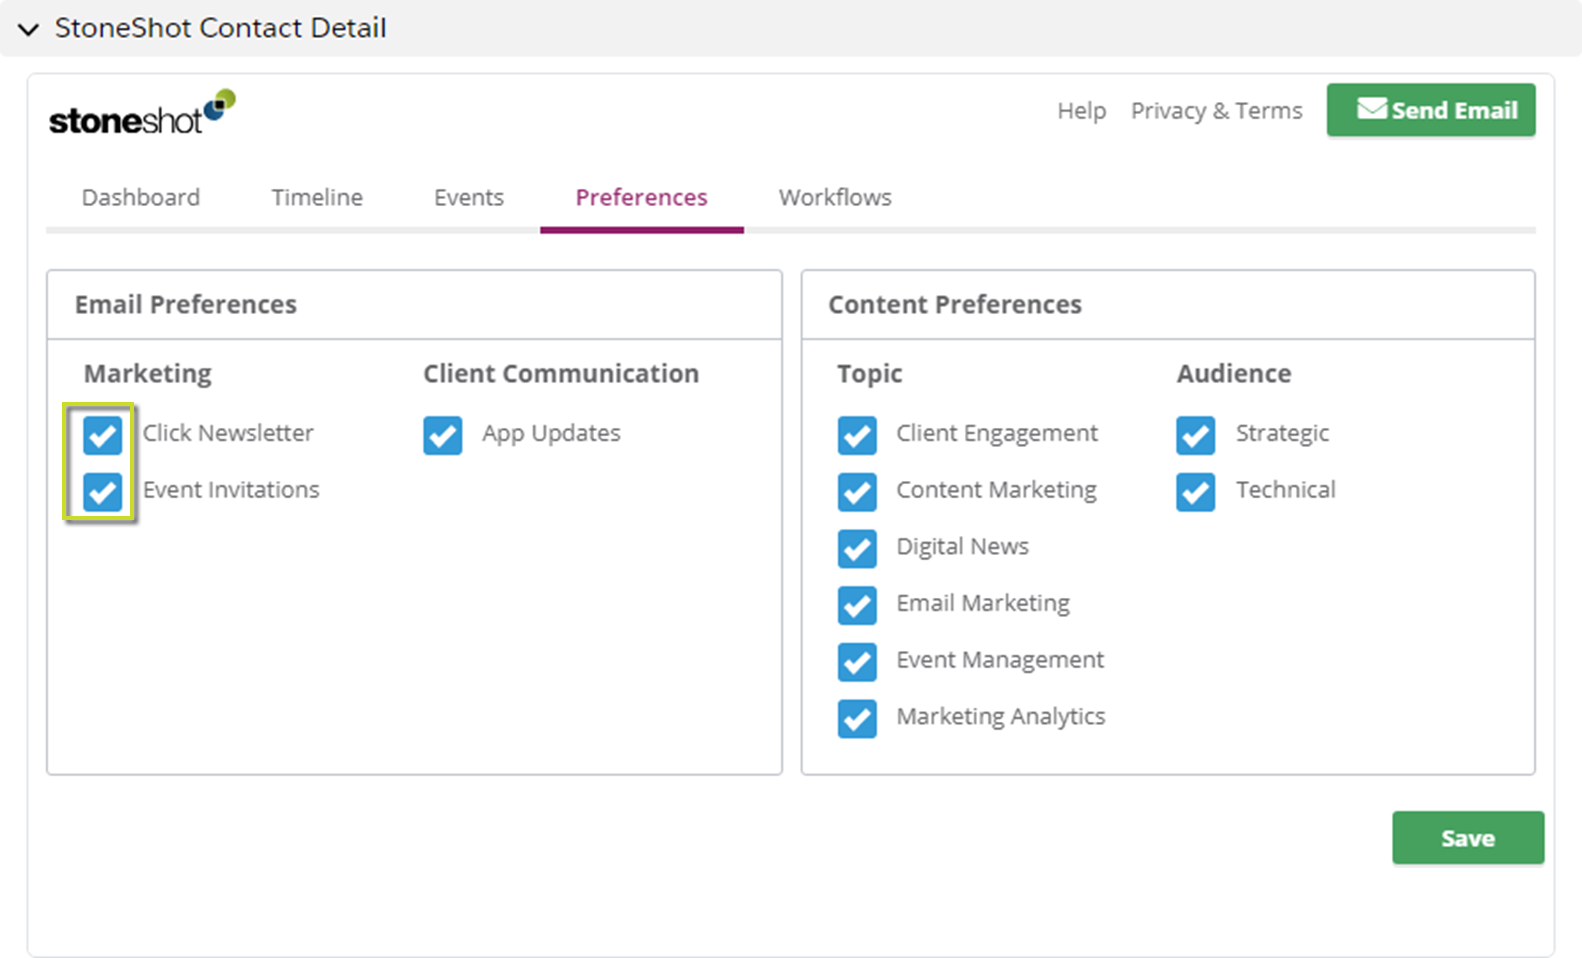
Preferences
Manage Email and Content Preferences allowing you to add or remove your contact from the preference pool as you need to.
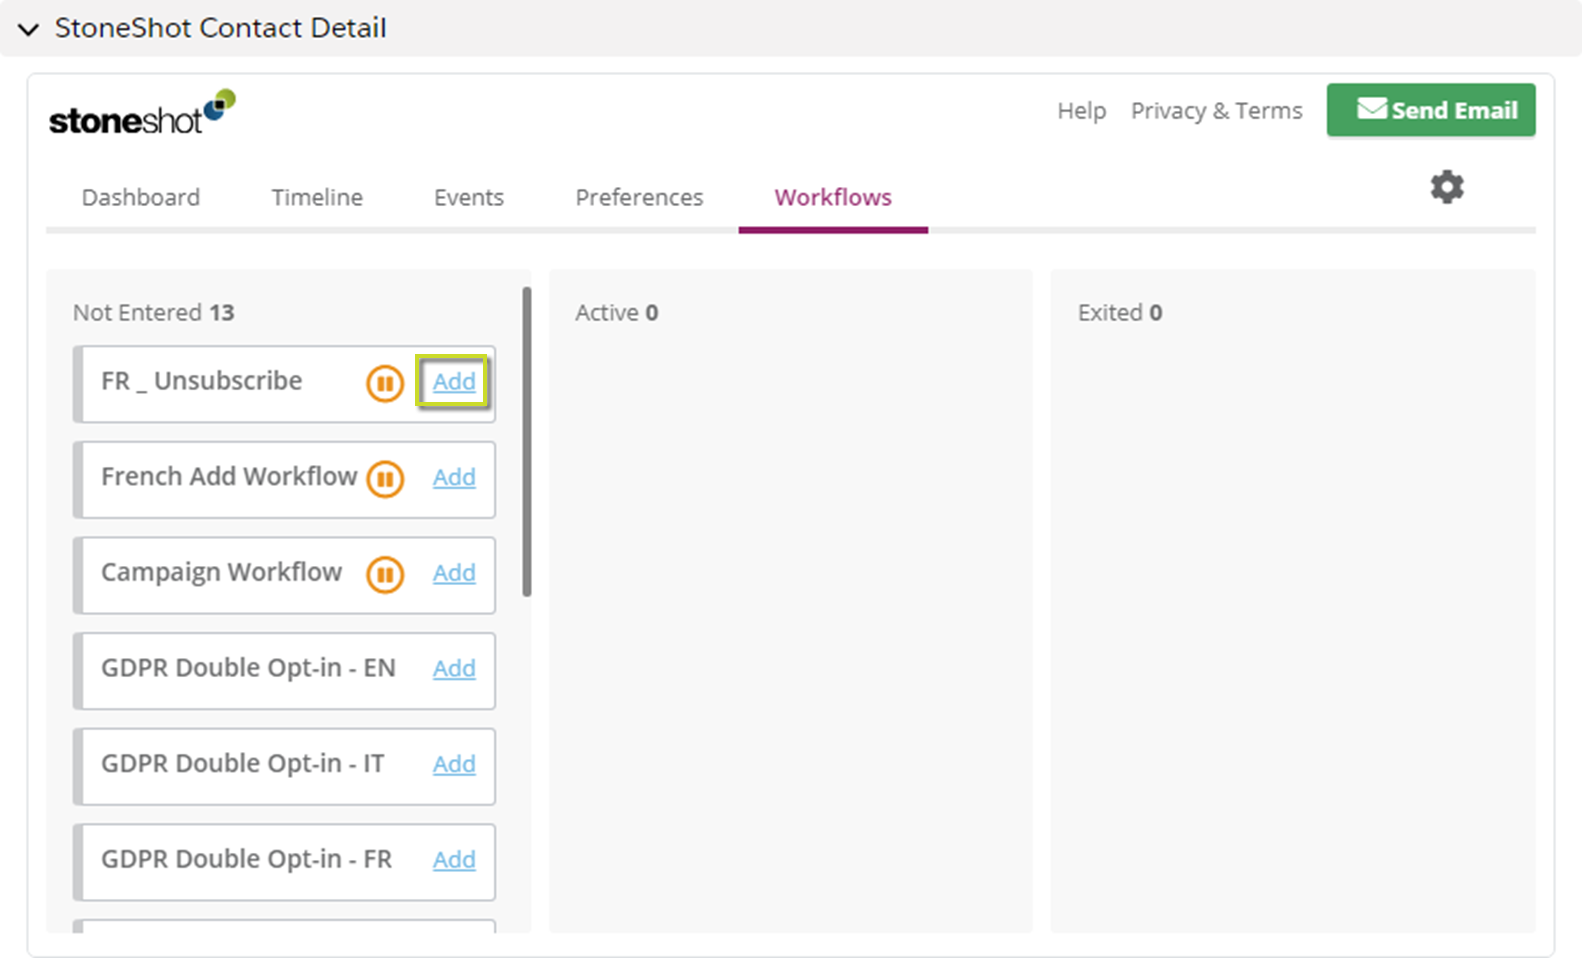
Workflows
Our kanban approach on our Workflows tab allows you to see what workflows your contact has entered, has exited, and hasn’t yet been added to. You can move your contact into a workflow by clicking Add against a workflow name, and once they’re in, you can remove them again by simply clicking on the workflow.
Account embed
Our brand-new Account embed gives you the ability manage your contacts for that account all in one place. You can assign contacts to events, workflows, and even update their preferences. Let’s have a look at how you can do that.
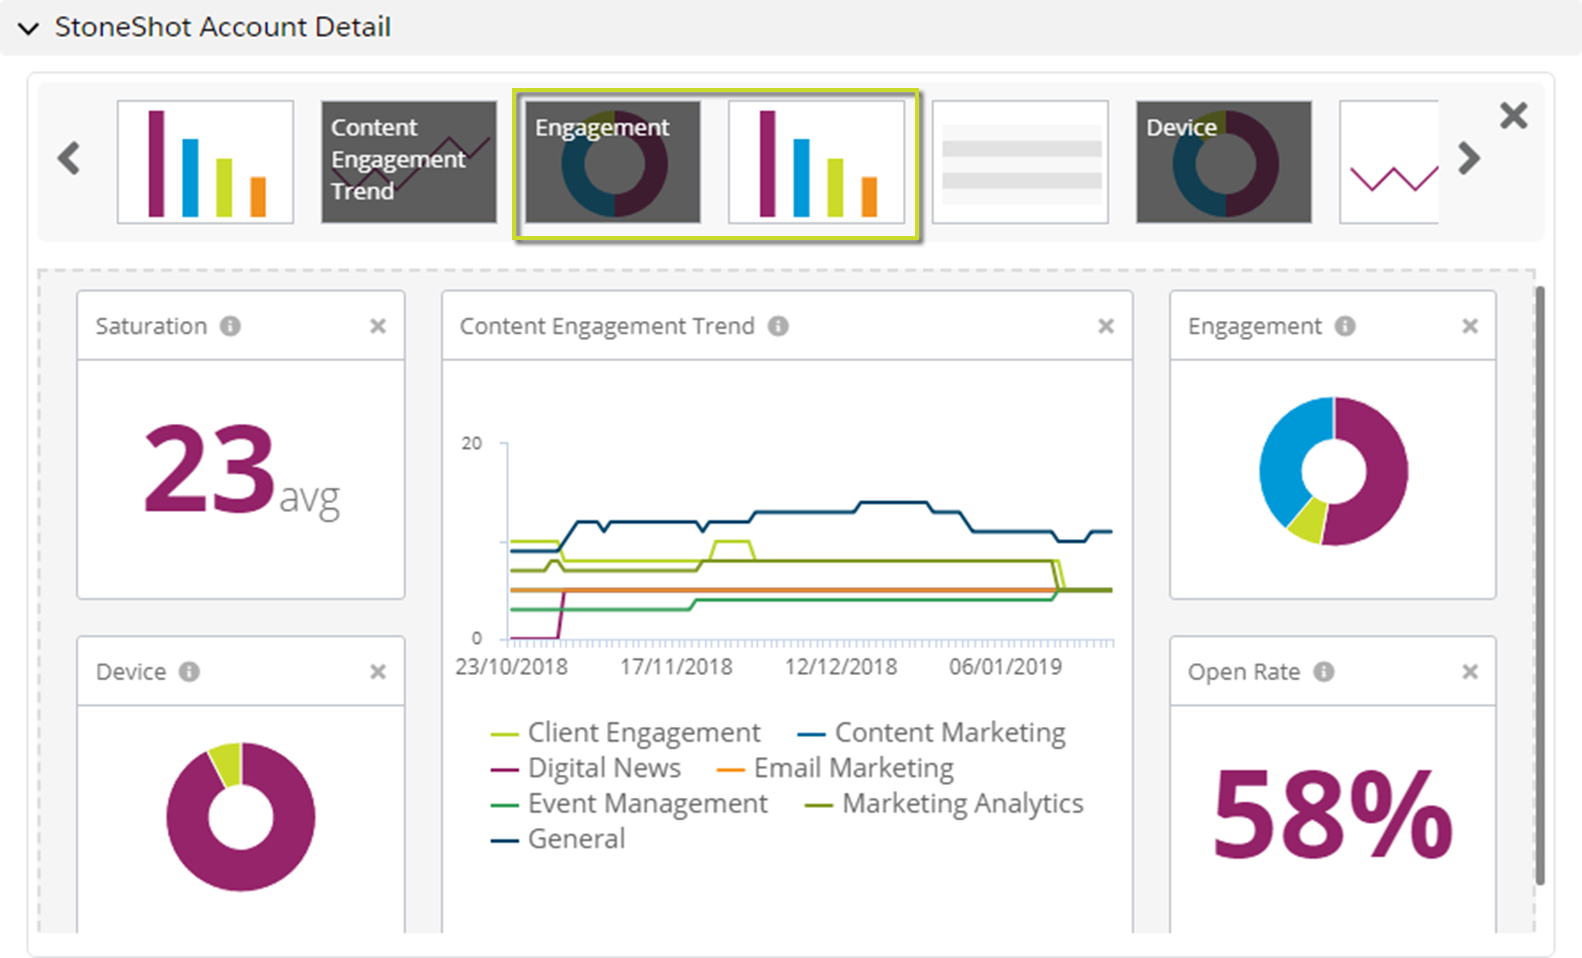
Dashboard
At a glance, you can now see the stats for the entire account against your content. You can use the cog icon to customise what charts and metrics you want to see too.

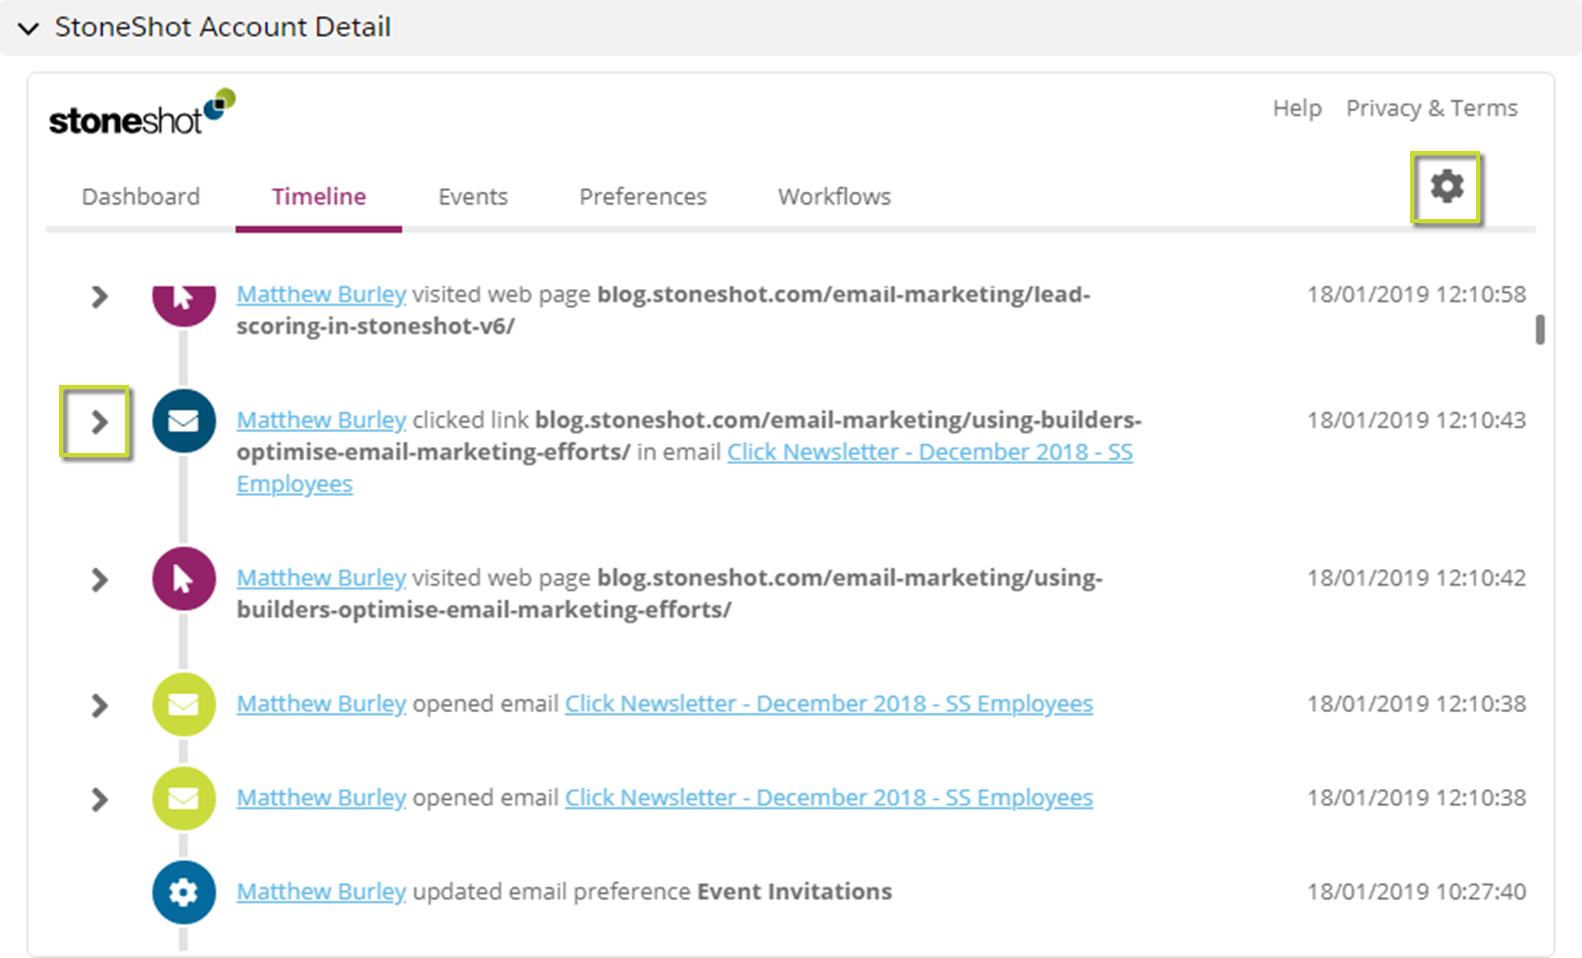
Timeline
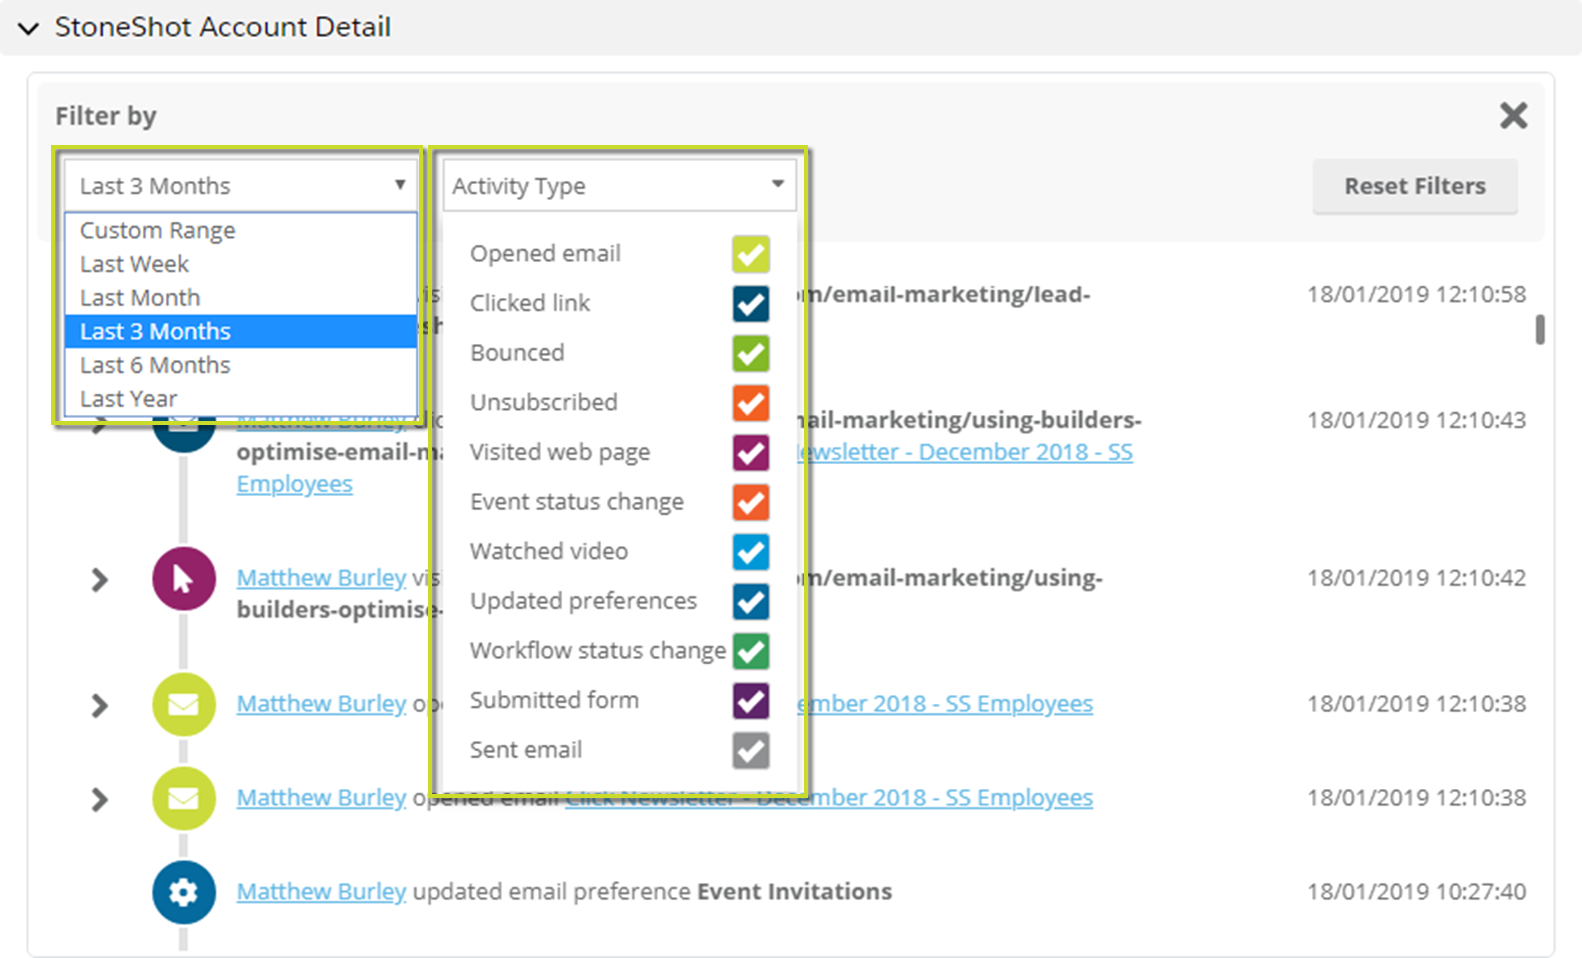
The Timeline tab gives you a run down of all activity that contacts at this account have had with your content. You can expand out each activity to get more information, such as seeing a preview of the email that they opened. By clicking on the cog icon, you’re able to filter the activity type and the date range of the activity.
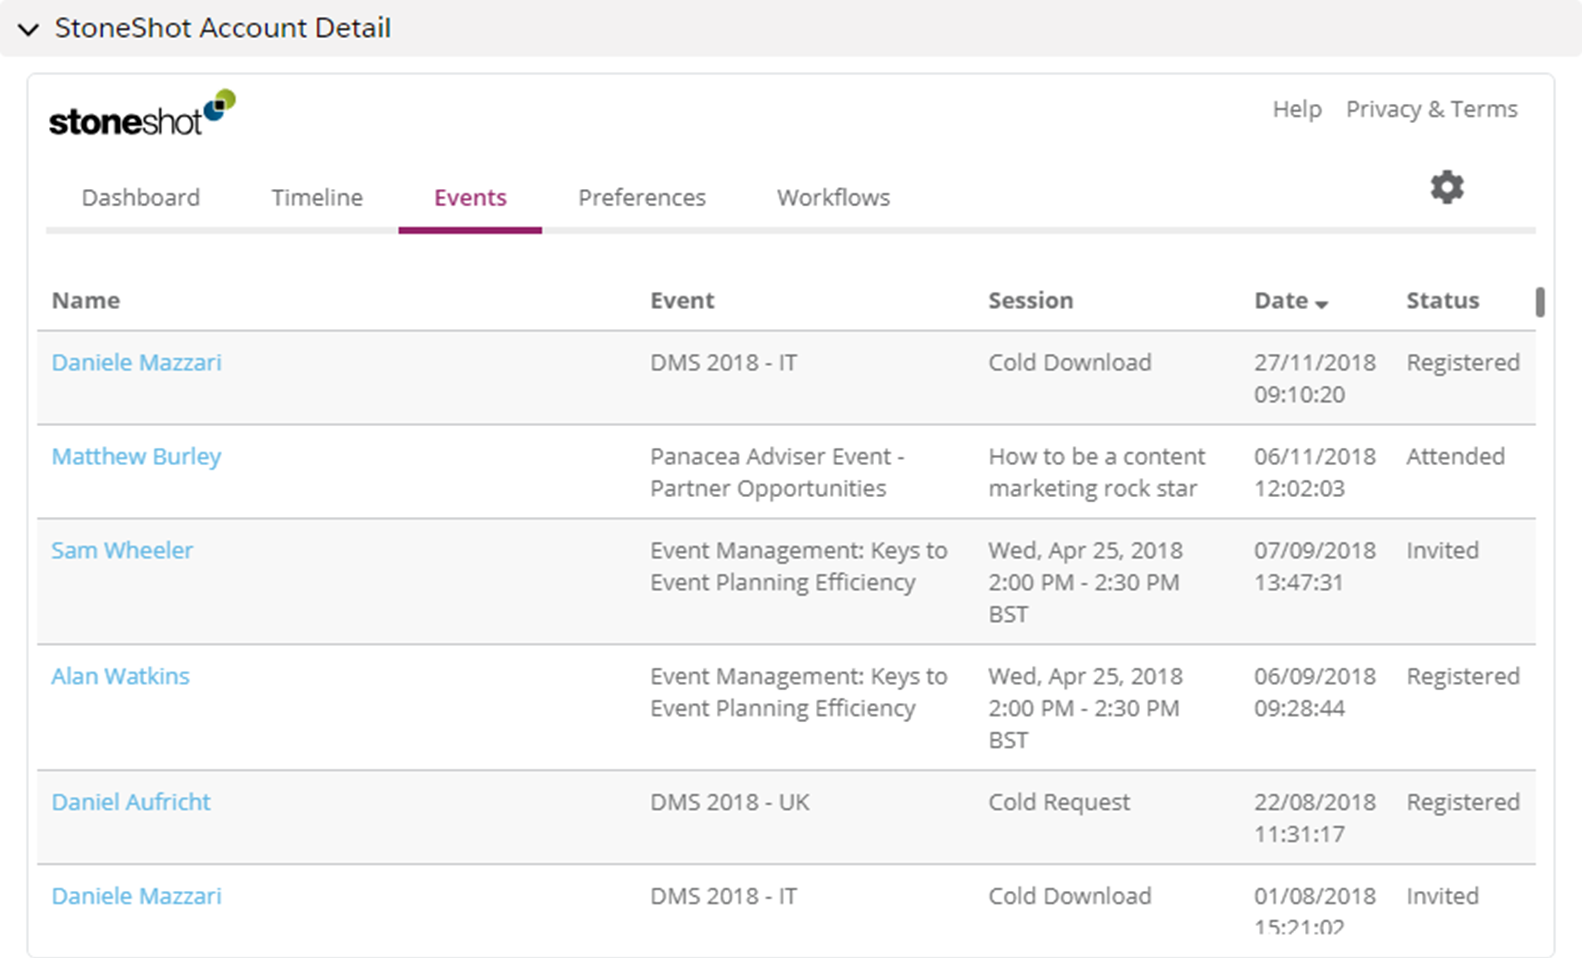
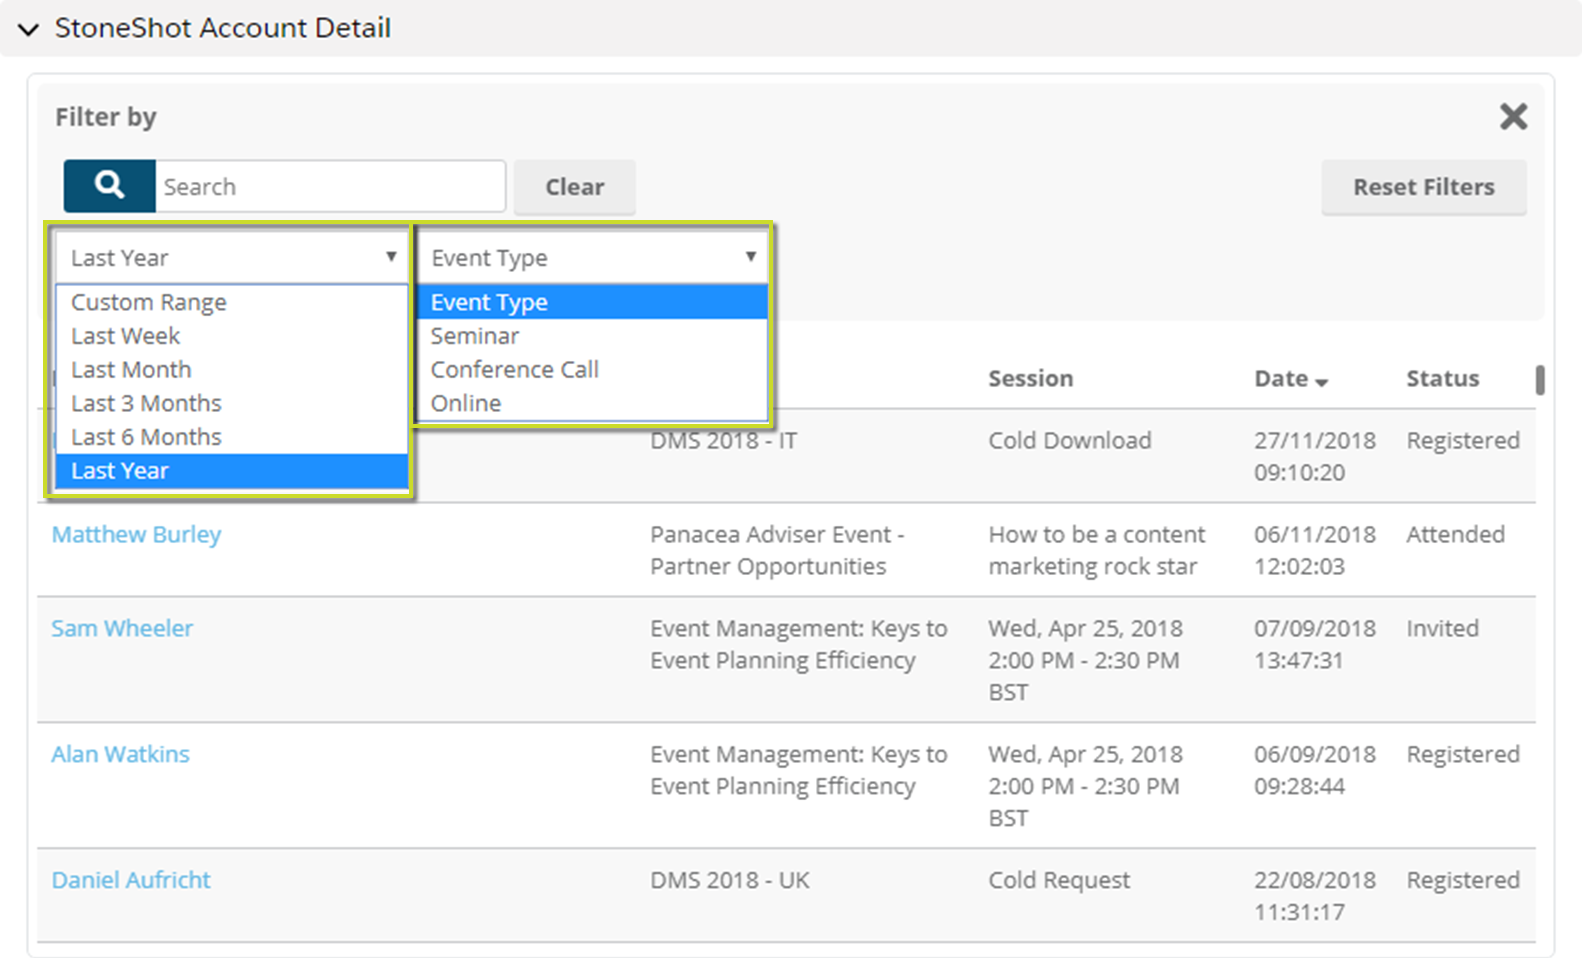
Events
Our events tab gives you the ability to see the latest event interactions across an account. Using the cog icon, you’re able to filter the event type and the date range that you want to view.
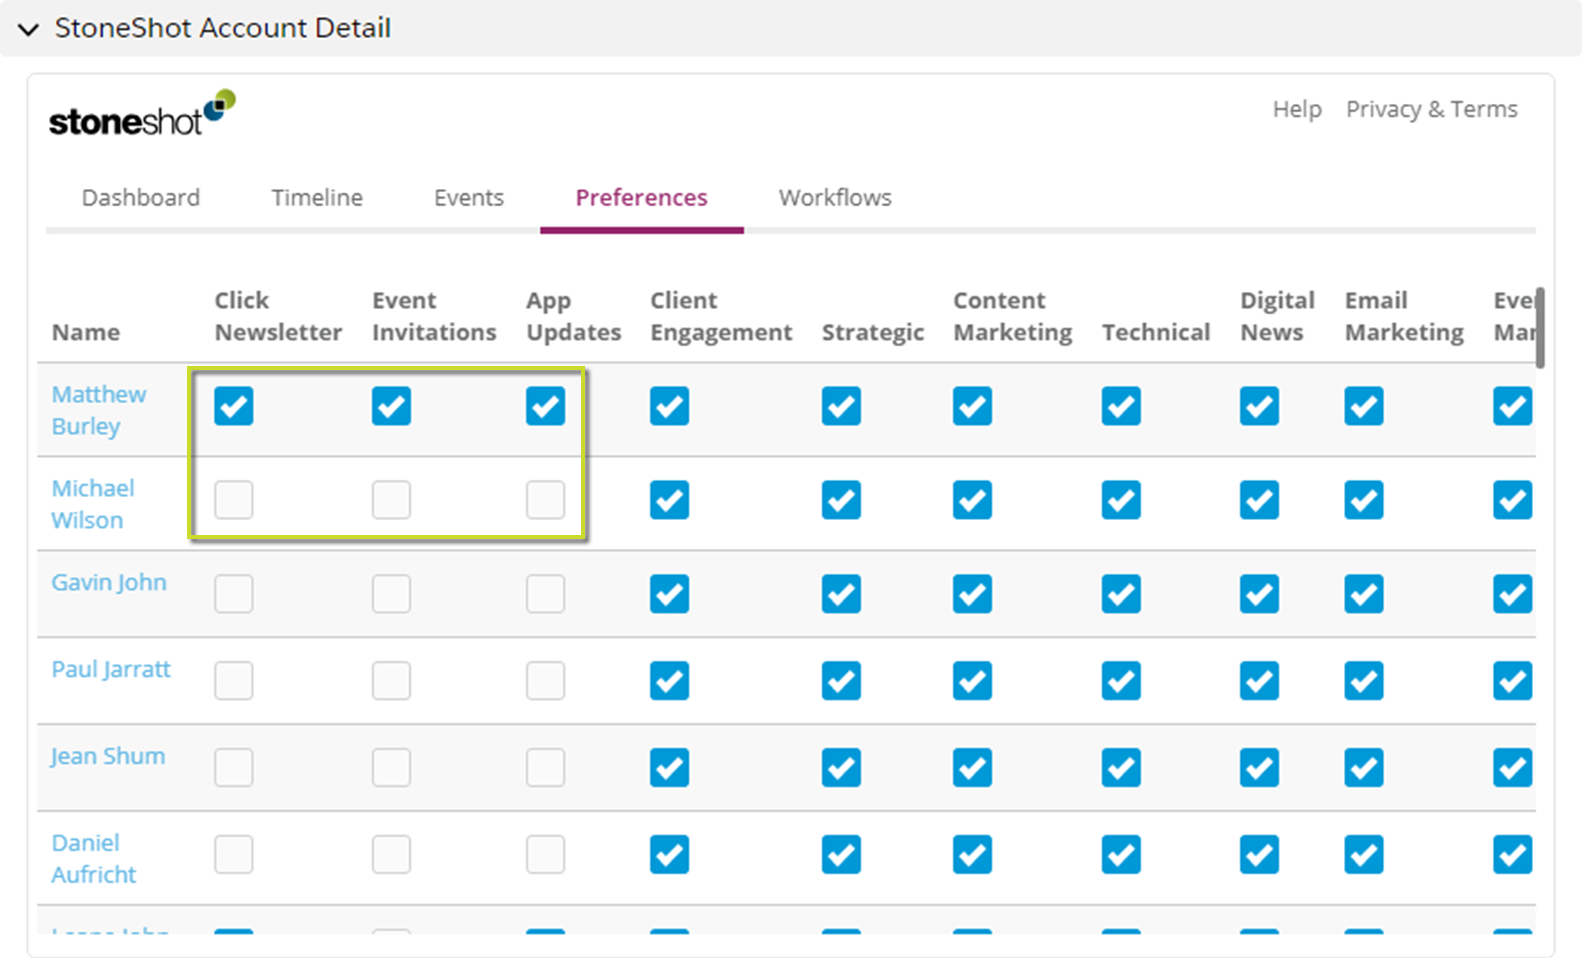
Preferences
Using our Preferences tab, you’re now able to update preferences for every person within the account. You’ve always been able to do this through an individual contact, but now you can do this in bulk. This is particularly useful when you have a new account and you want to sign every contact up to your newsletter for example.
Workflows
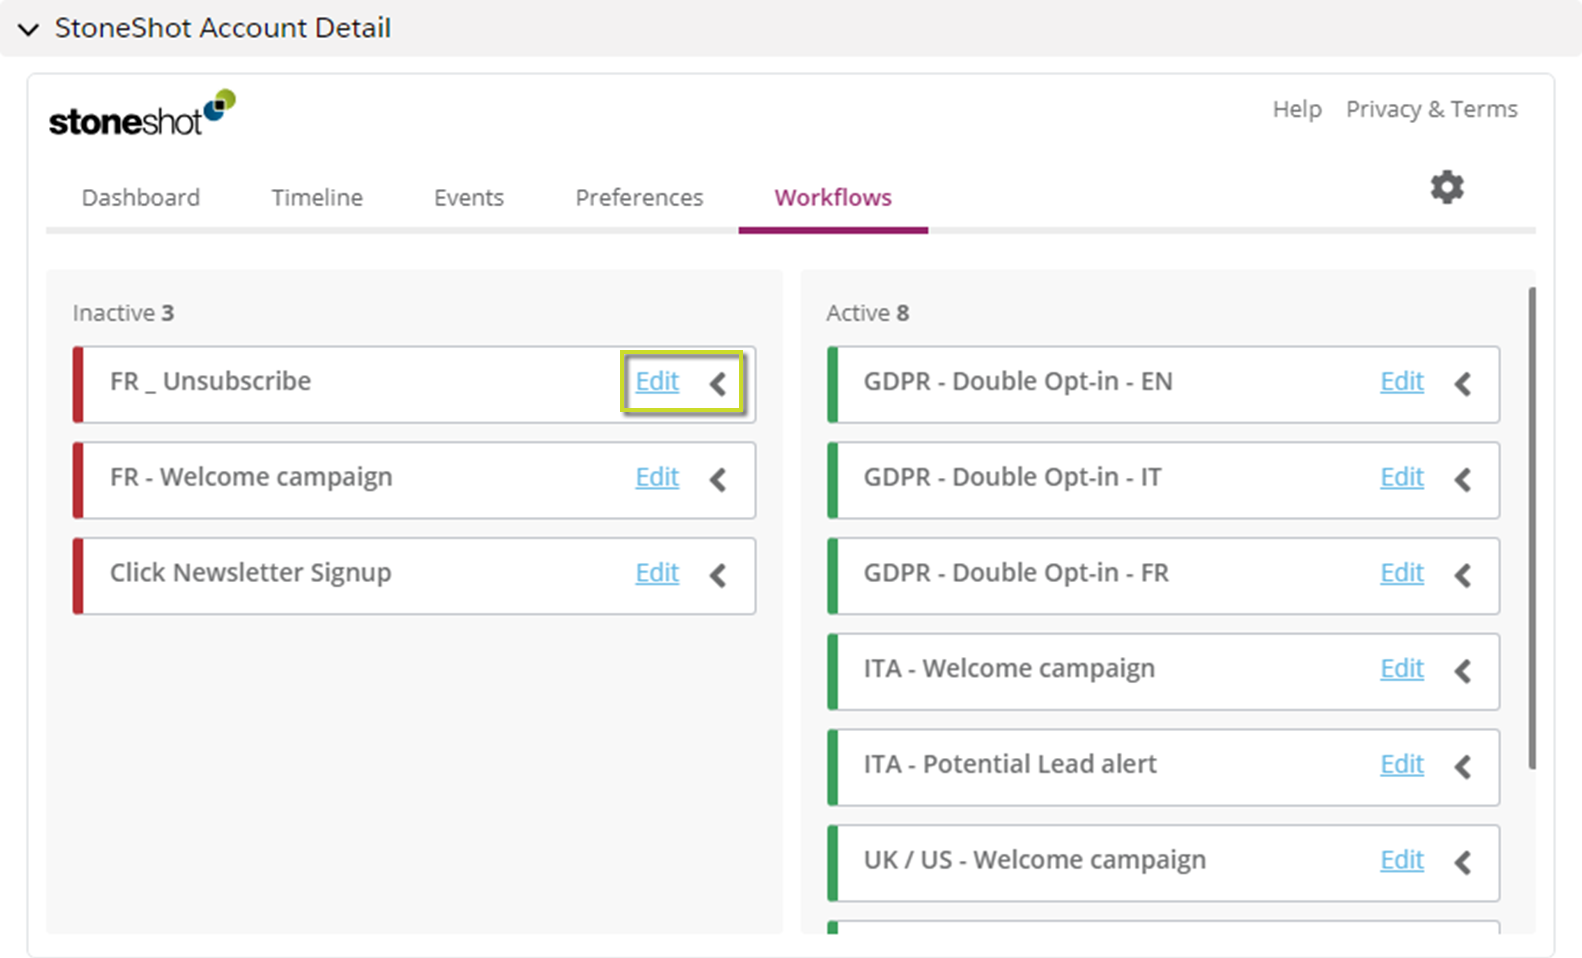
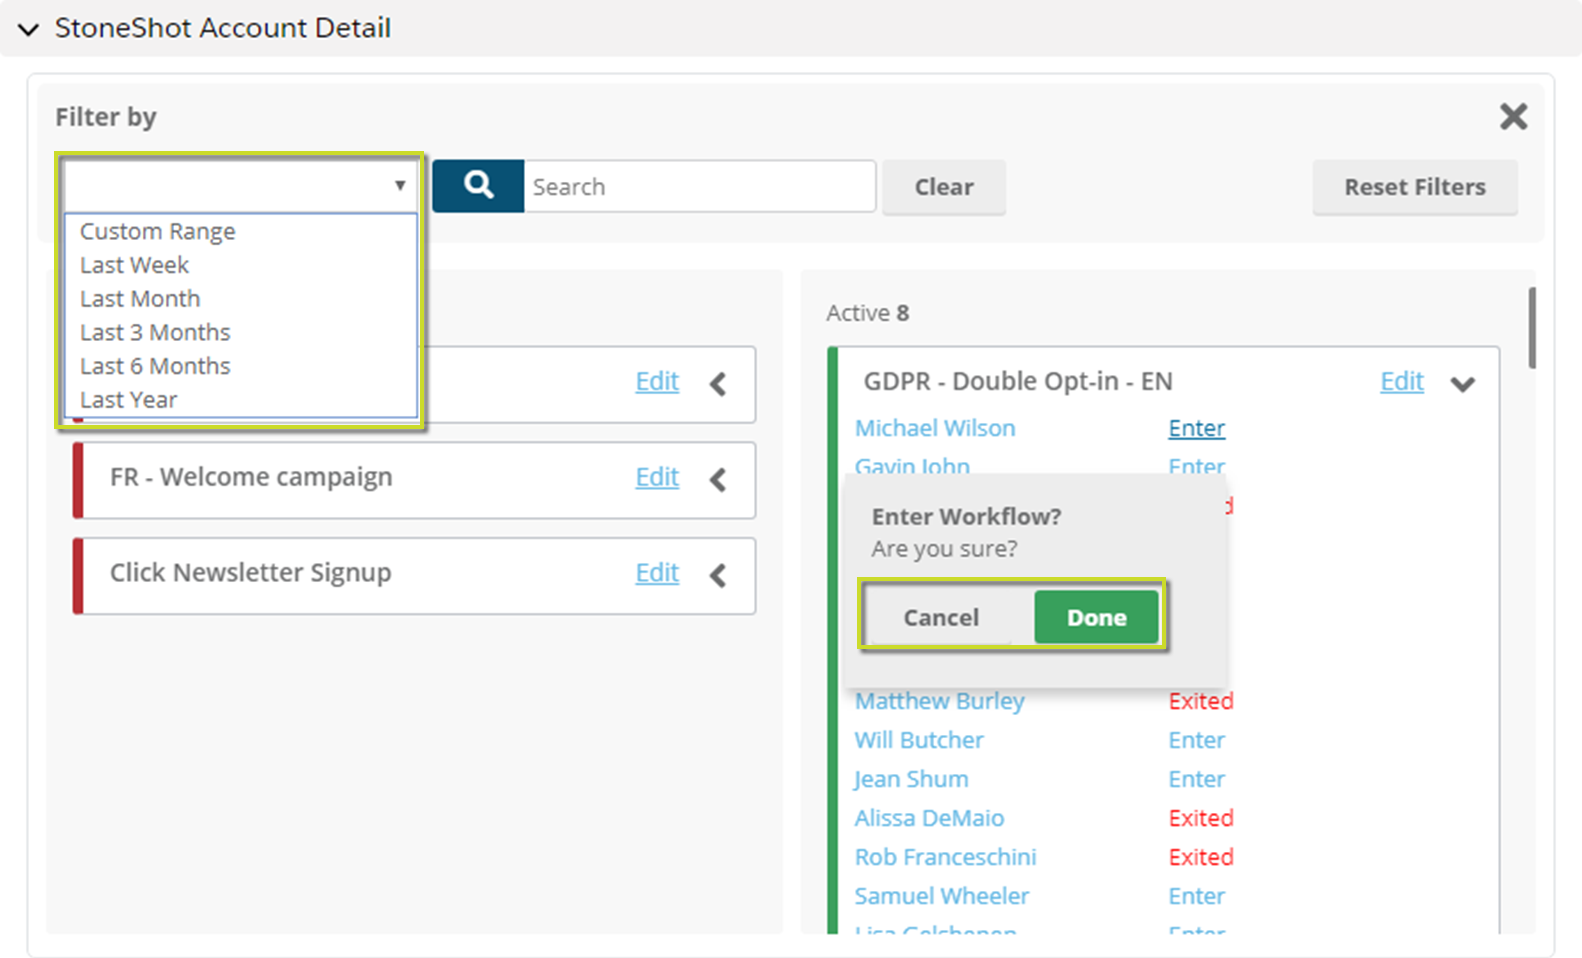
Our Workflows tab uses Kanban panels to show you which workflows are active and which aren’t.
You’re able to start or pause a workflow just by clicking on the Edit link. You can also expand each workflow to see a contact’s status within that workflow.
It could be that they aren’t in the workflow (it will show Enter against their name), are in the workflow and going through it (it will show Exit against their name), or that they have gone through and left the workflow (it will show Exited against their name).
You can move the contact into or out of the workflow by clicking on Enter or Exit. (Once they have Exited, they’re not allowed to go through the workflow again).
Also by using the cog icon, you’re able to filter your time range and search for a specific contact.
Take a look at the Salesforce Embeds video below for more on this.
