


StoneShot Learning > Integrations > Salesforce
Salesforce
The StoneShot integration provides both sales and marketing users the full range of StoneShot functionality to create, send and report on email campaigns, but from directly within the Salesforce environment.
It tackles three major issues for clients – how to streamline the process of list management, how to provide Sales with feedback and metrics from marketing activities and how to provide an integrated way of managing event promotion and registration.
In this overview we’ll cover four key points:
- How to authenticate and use the application for the first time
- How the Salesforce Canvas application works
- How StoneShot is embedded into contact records
- How the data sync between Salesforce and StoneShot works
Authentication
The first step in using the application is to authenticate as a user. To use the full functionality within Salesforce you will need both a StoneShot and Salesforce login credentials. This authentication only needs to take place the first time you use the application.
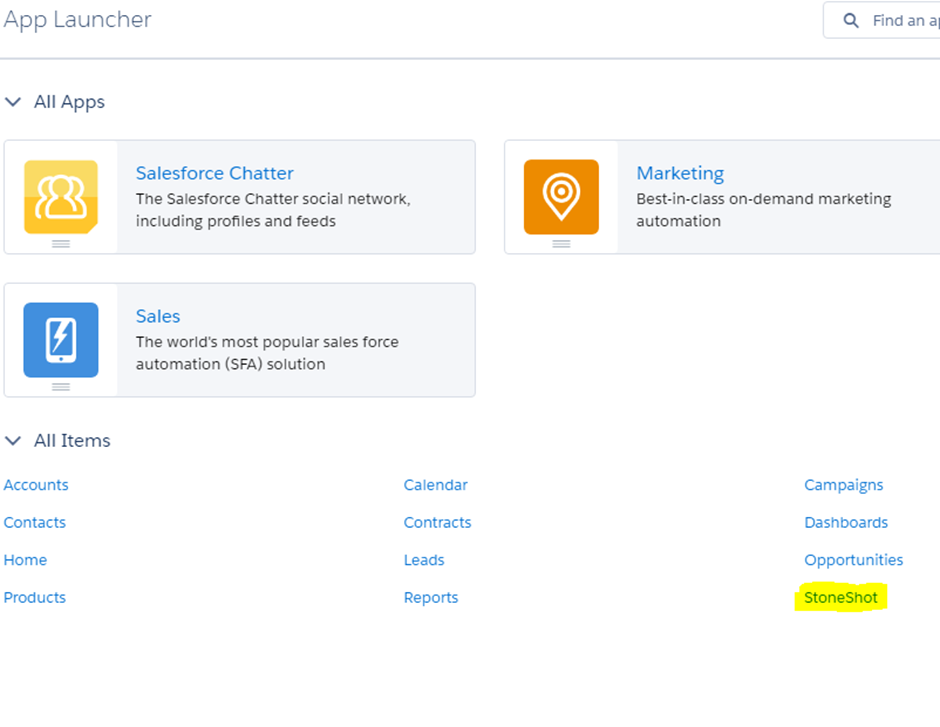
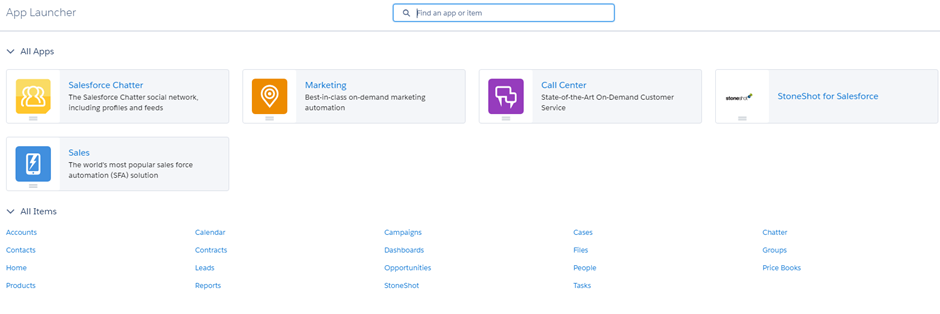
1. Go to the App launcher and hit the StoneShot for Salesforce link:
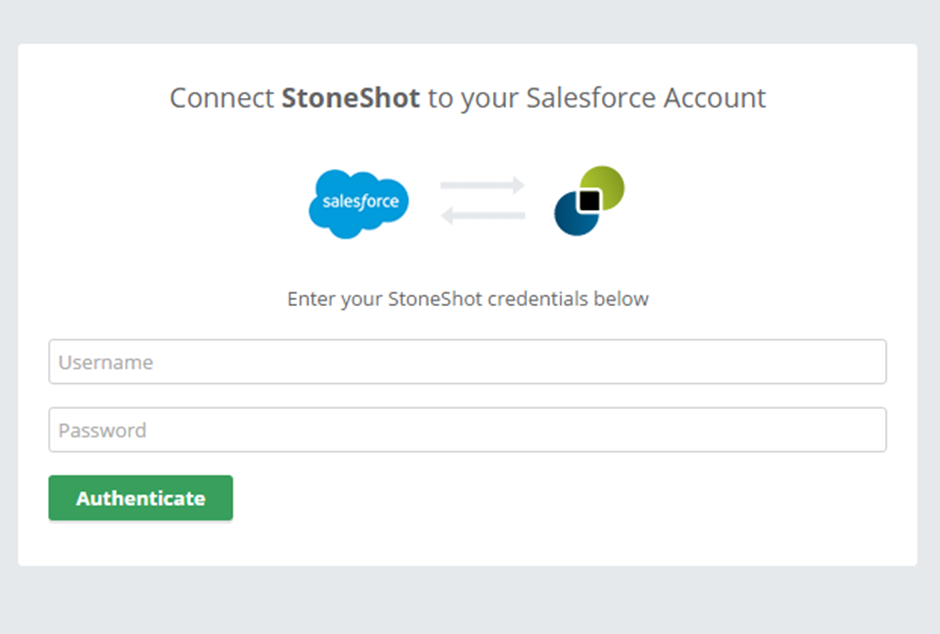
2. Enter your StoneShot login credentials (if prompted to):
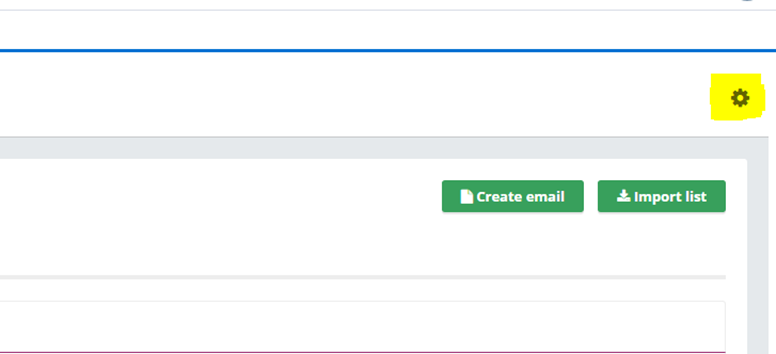
3. That gives you access to the Canvas application; to complete the full authentication you need to also authenticate the connected app. To do that click on the cog icon in the top right hand corner of the StoneShot tab in Salesforce.
4. Complete the authentication process by pressing “Connect” on the Connected App Authentication button:
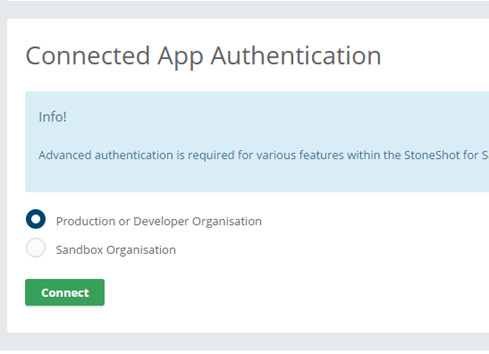
Once complete Salesforce will remember the credentials so you won’t need to do this again.
StoneShot application in Salesforce
The new Canvas application embeds virtually the entire StoneShot application into the Salesforce environment, allowing you to access, create and manage your email and event campaigns directly from within Salesforce. To access the application, simply go to the StoneShot for Salesforce link:
You’ll then see the StoneShot application:
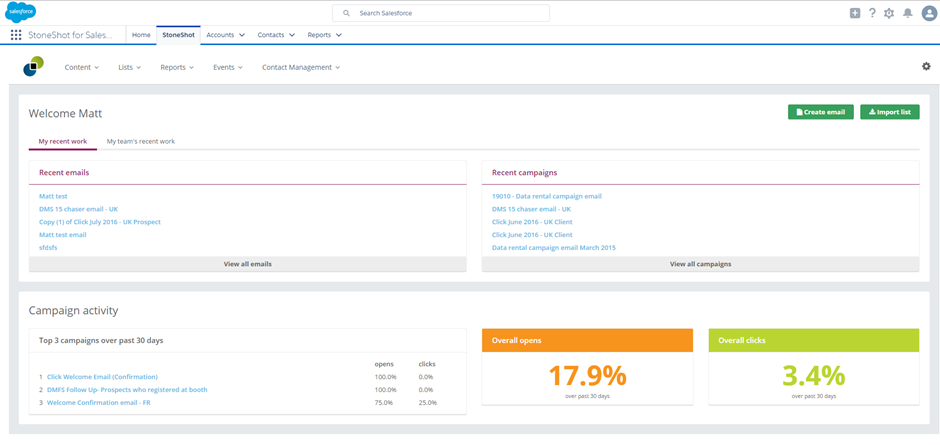
This then works in exactly the same way as the web application which is accessed via stoneshot.com/app/login.
Contact data sync
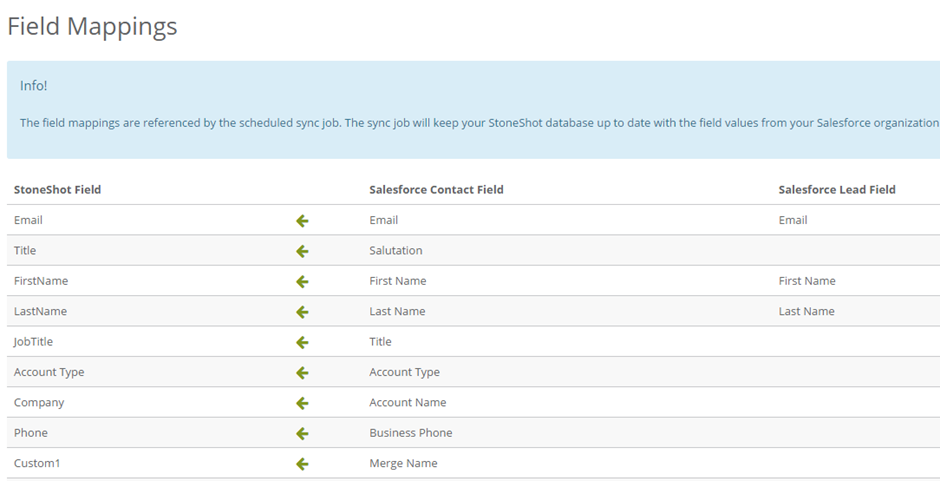
Finally, the integration also provides a constant synchronisation of contact data between Salesforce and StoneShot. Lists and reports can still be imported for individual mailings, but any changes to the contact records in Salesforce (email address, name, salutation etc) will be replicated in StoneShot. This means that you’re always using the correct client information in mailings.
The exact fields that are synced across and the frequency of the sync are maintained by the admin, but typically include standard fields synced every half an hour:
Changes to the web application (Marketing users)
For the most part there will be very little difference in how marketing users access StoneShot using the web application; there are however a few significant changes to be aware of, along with some significant benefits.
Single instance
There is a new StoneShot feature, Teams, which allows users to show/hide contacts and assets based on the region and coverage team they’re in. Each list, email, report and event will be assigned to one or more teams, and that will determine who can see each one. You can also create a piece of content and make it available to other teams instantly by ticking their boxes:
Contact visibility
As well as lists being confined to individual regions, you’ll also see more limited contact visibility. By default each contact will have a contact owner, defined by Salesforce, and only StoneShot users in the same team as the contact owner will be able to see the contacts.
Creating emails
Creating emails in the StoneShot web application works in the same way as before, with two small changes.
The first is that when you’re creating an email from a master (blank) template you will have to choose the tracking URL that this email uses.
Once you’ve chosen the tracking URL it will be fixed for this email, and any copies of the email that you make, you won’t have to choose again.
The second change is that you can now create an email and choose whether or not to share it with other teams.. If you tick the boxes to enable other teams, their users will also see the email when they log in and will be able to copy and distribute it to their clients:

Lists
One significant area of change is how you import distribution lists into StoneShot – via a CSV file import or via a Salesforce report.
1. CSV import
You create your CSV file, navigate to the StoneShot application Contacts/Lists page, and click on “Import contacts”. However you should also include the Salesforce ID against each contact and import by that ID, to prevent the system creating duplicate records:
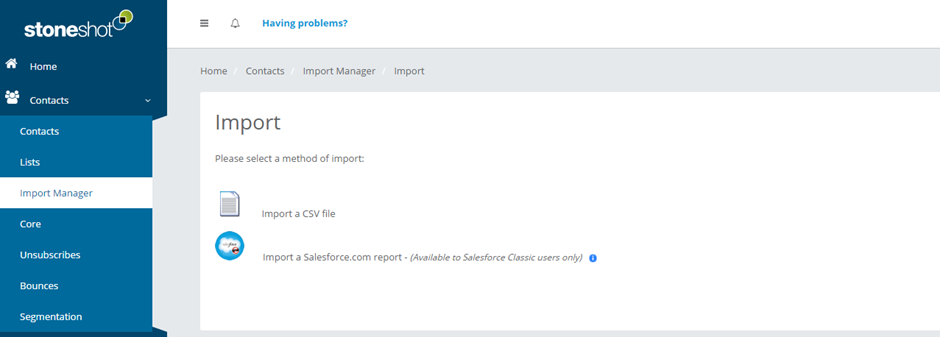
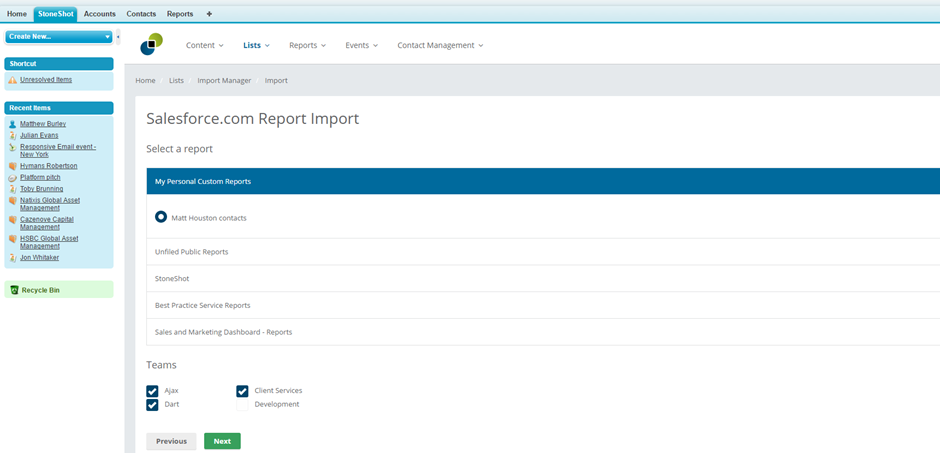
2. Importing a Salesforce report
However you can also now import a report directly from Salesforce without having to export it into Excel first. Simply pick “Import a Salesforce.com report” and browse through your Salesforce report folders to find the one you want (you can also assign a team at this point):
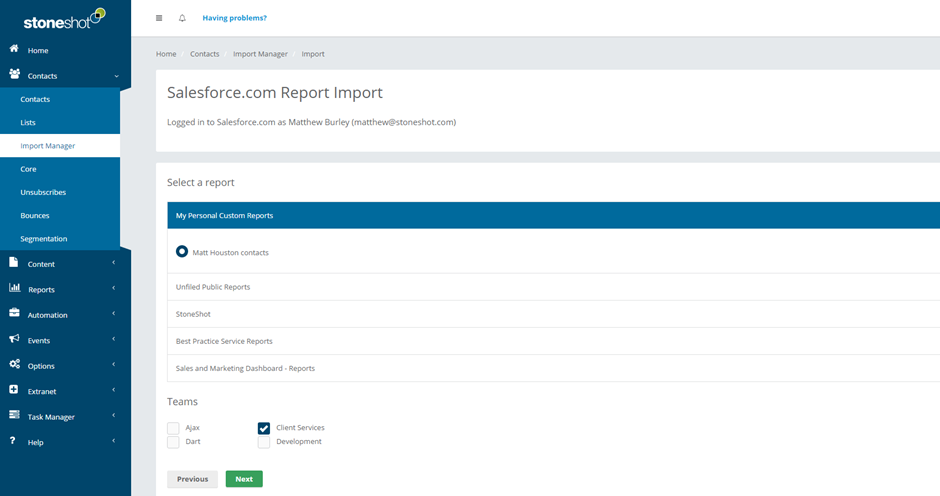
*Important: Due to a known restriction in Salesforce, you must be using Salesforce Classic view to import the reports.
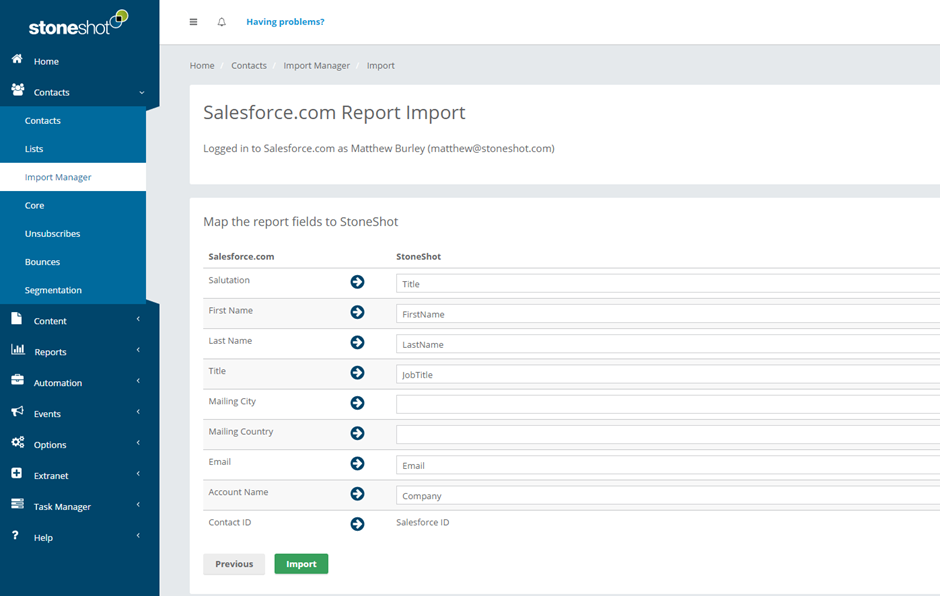
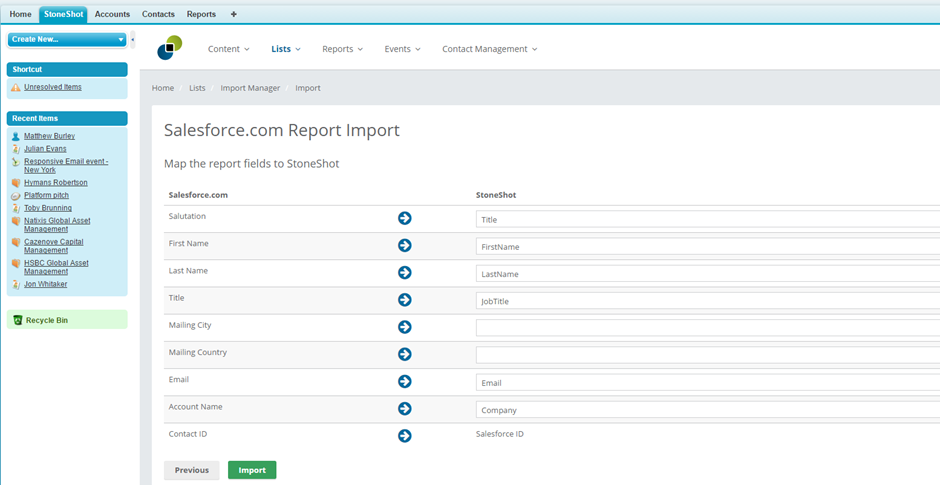
You can now choose the fields that you want to include in your import. Unlike with a CSV import, any additional fields will simply be ignored by the importer, you don’t have to remove them:
Salesforce Canvas application (Sales and Marketing users)
One of the key changes with the Salesforce integration is that now both sales and marketing users have access to the whole range of StoneShot tools, directly through the Salesforce interface.
This means that there are significant sales and marketing alignment benefits – marketing can create content that sales teams can then personalise and distribute directly to clients through Salesforce, and then can then see the results of those digital engagements themselves in CRM.
In this section of the guide we’ll cover:
- How to log in
- How to create a distribution list for a mailing
- How to create and send an email
- Viewing the email reports and engagement
- Viewing contact-level activity
- Events
Logging in
The first step then is to log in to Salesforce. After the first-time authentication detailed before there is no separate log in process, it is single sign-on. Once you’re logged into Salesforce, you can access StoneShot through the tab.
Importing a list
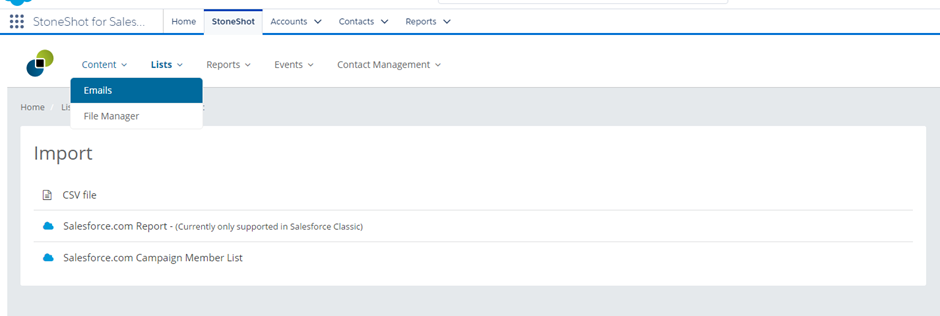
When accessing StoneShot directly through Salesforce you have three ways to import a list for a mailing – via a CSV import, from a Salesforce report, or additionally through a Salesforce campaign member list.
1. CSV import
You create your CSV file, navigate to the StoneShot application Contacts/Lists page, and click on Import contacts. However you should also include the Salesforce ID against each contact and import by that ID, to prevent the system creating duplicate records:
2. Importing a Salesforce report
However you can also now import a report directly from Salesforce without having to export it into Excel first. Simply pick Import a Salesforce.com report and browse through your Salesforce report folders to find the one you want (you can also assign a team at this point):
* Important: Due to a known restriction in Salesforce, you must be using Salesforce Classic view to import the reports.
You can now choose the fields that you want to include in your import. Unlike with a CSV import, any additional fields will simply be ignored by the importer, you don’t have to remove them:
3. Importing a Salesforce campaign member list
With this option you can choose to pull in a campaign member list from your available Salesforce campaigns:
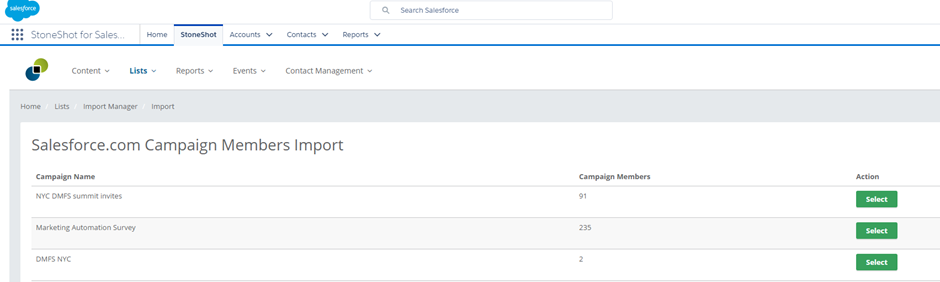
Unlike a report however, you don’t have to map the fields that you want to import; it follows the standard admin-configured settings.
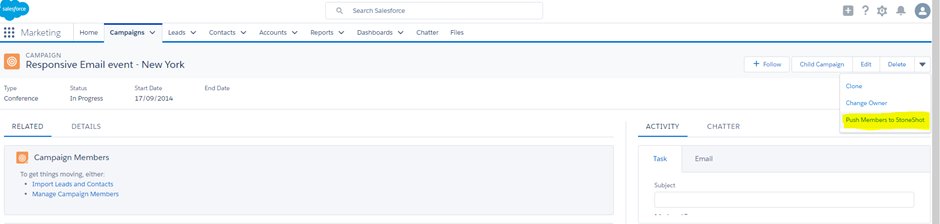
You also have the option to push the campaign member list directly from the campaign screen in Salesforce instead:
Creating an email
To create an email you can go to the content/emails section and either create something from scratch or copy one of the existing emails that are available to you:
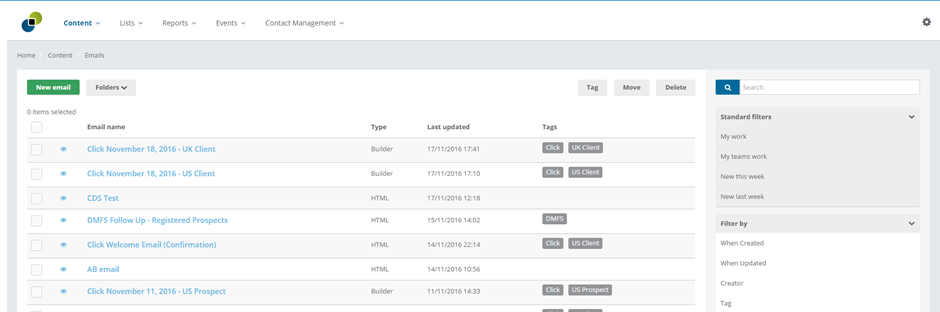
Emails and tags
Tags allow you to organise your emails, lists and campaigns. You can create a tag that’s open to everyone or that only you have access to. To create a tag simply select your email, list or campaign, and start typing in the Tags box.
Email production options
There are two ways to create an email – using our HTML editor or using our Email Builder. Our editor gives you complete control over the whole email. You could copy an email created previously or work from scratch. You could also use an external editor such as Adobe Dreamweaver to create an email and drop in the HTML code. Our builder has been designed to make it easy to create emails that have a consistent layout.
Creating an email
Click on Content and hit the New Email icon and choose a blank email or your email template. Alternatively you can click into any of the emails that have already been created, click on “copy” and work from a previously-built email.
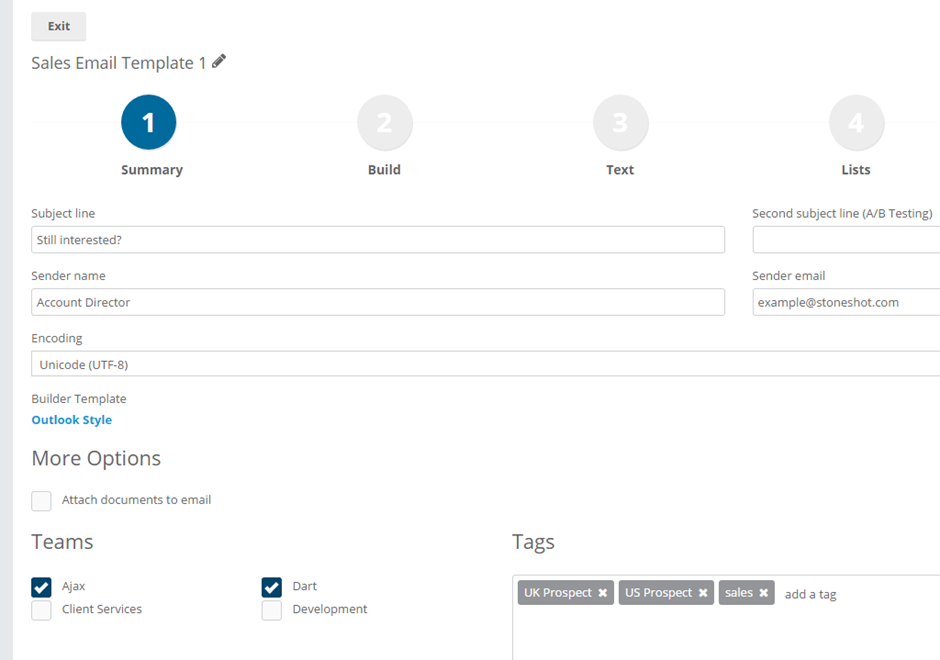
There’s a logical sequence that goes through naming the email, creating the HTML, creating the Text version, picking a recipient list, testing and finally launching. You can however create the email in any sequence you like using the numbered tabs shown below.
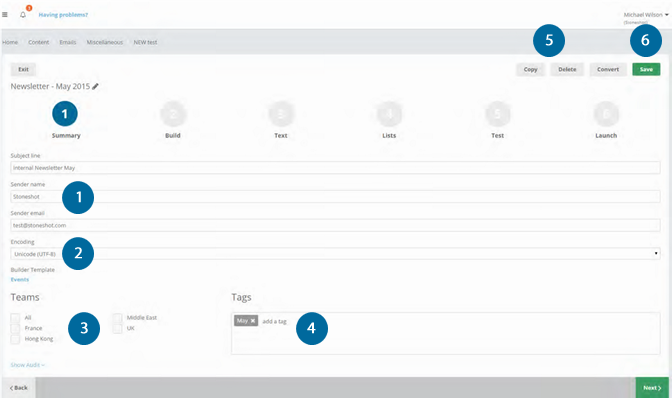
1 – This is the information the client will see when the mailing arrives in their inbox.
2 – By default, this is set to ‘Unicode (UTF-8)’. This will work for all languages, but if you’re using Chinese, Japanese, Korean or Russian, select that from the dropdown BEFORE creating your email.
3 – Select who your template is visible to.
4 – Categorise your template by assigning tags to your email template. These will also be assigned to the campaign once you have launched your template.
5 – Copy or Delete your template.
6 – Save any changes by clicking here or ‘Next’
Build tab
If you’ve selected an Email Builder template, step 2 will say ‘Build’. You’ll then see the template you have selected:
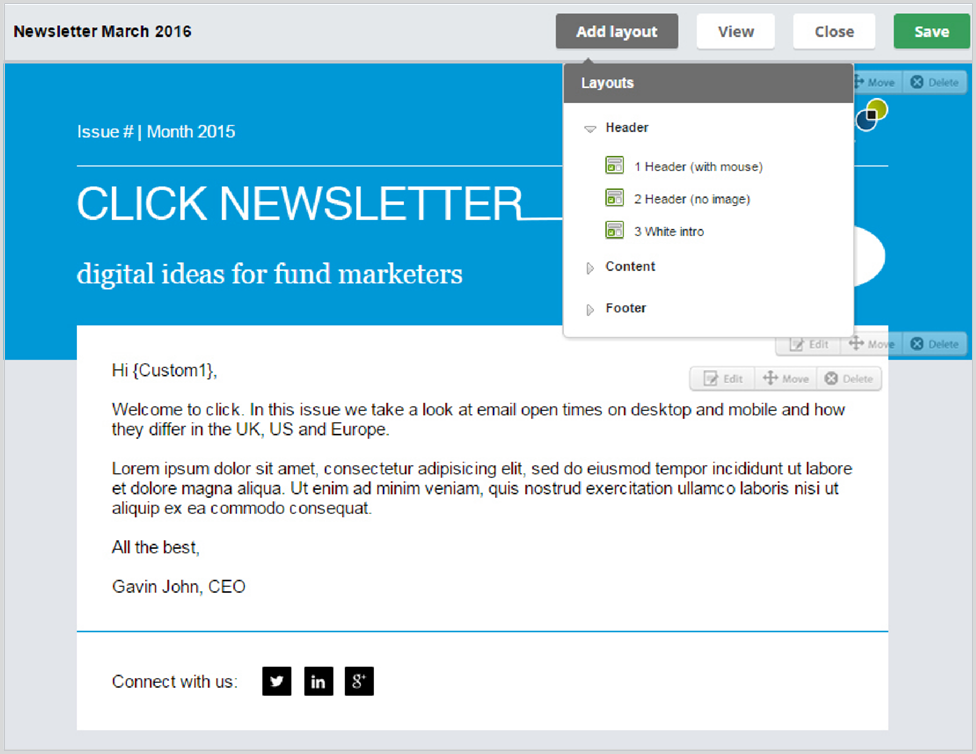
You’ll have the ability to create your template using building blocks. You can then edit these blocks by inserting images and copy as you go along.
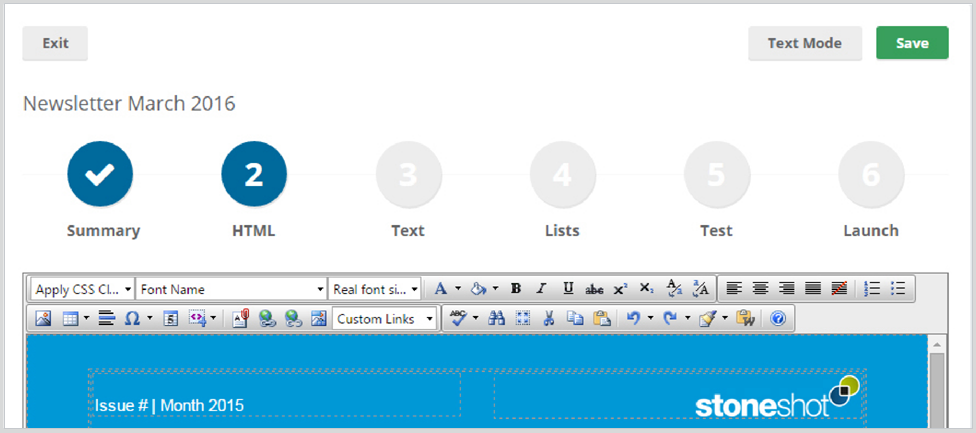
HTML tab
If you have selected ‘Blank’ on the template screen, stage 2 will state ‘HTML’. Click here and you’ll see the HTML editor. This is a feature-rich editor that allows you to create an email from scratch or paste in HTML from an email that’s been created previously or externally. Here’s how it looks.
Text tab
Ok, next comes the Text version of the email.
Emails are sent from StoneShot in ‘multipart’ format whereby an email contains both HTML and Text elements. Recipients don’t see both parts, but can decide which format they’d like to see in their email client.
The Text version of the email is also used as a preview in some email clients. Click onto the Text tab. You can now either paste (or type) the copy in here or click the Regenerate from HTML button which will copy just the text from the HTML version you created.
If you make any changes to the HTML and go back to the Text tab, the app will know something has changed and prompt you to copy the text again.
Lists tab
Next hit Save before going to the Lists tab shown below.
The recipient list is the group of contacts that will receive the email you’ve created when you launch. You can choose a list of internal contacts (Seed List) that will receive the email too. This is handy when you’re working on an e-shot with a team of people who’d like to know when it has been launched.
Hit Save when you’ve selected the lists and you’ll see the number of recipients selected. Note the two options for ensuring you don’t over-email your contacts or send the same email to a recipient twice.
Finally, you can select a sub-set of the recipient list you selected in Limit reach to. So here we have 26 recipients in our ‘Client Services UK’ list – we could limit the reach to 10 and perhaps try another subject line with the remainder.
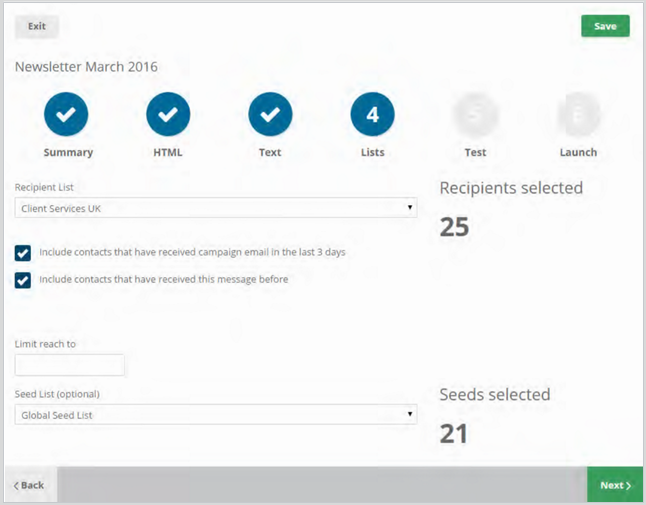
You also have the option to send to a seeds list. You might use this to send a copy of the campaign to a group of internal stakeholders. By using a separate list and not including them in the main mailing list, you ensure that your campaign statistics are kept separate and the seeds list doesn’t interfere with your statistics.
Test tab
This is probably the most important stage of the production process. The test tab conducts a series of tests of the HTML and Text emails you’ve created. Link and open tracking allow you to see how recipients respond to the message you’ve sent Click Add to add tracking to the email. You want to see 4 green ticks for the HTML template, and two green ticks for the Text version.
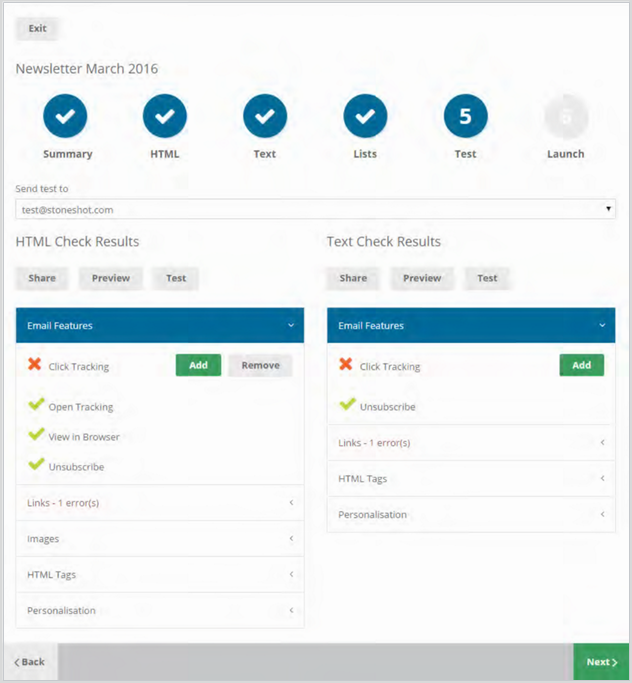
There are also 3 buttons for each template:
- Share – This allows you to send a link for someone to view the template. They don’t need to have access to the StoneShot application, so this is a useful way of sending the template around to internal stakeholders, or even your compliance department as you edit the template.
- Preview – This shows the template in a pop up in your current window, for you to quickly check through the template before testing/launching.
- Test – The test button works in partnership with the dropdown ‘Send test to:’. You need to select an email address from the dropdown, and when you hit Test, this sends a one click campaign to that email address as if they were in the live campaign. We highly recommend you do this to check that your email displays as expected, and that all the links go to the correct location.
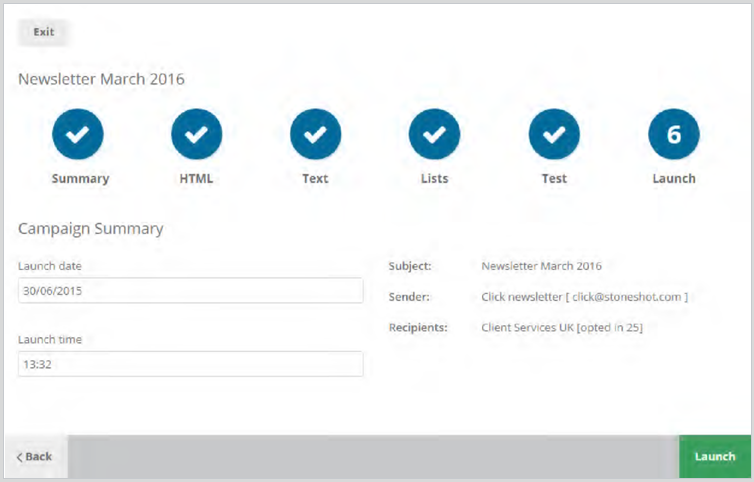
Launch tab
Finally, there’s the launch.
Double-check the campaign details are correct then enter a launch date and time and you’re done. We always recommend giving yourself at least 10 minutes when setting up a campaign. This allows for a final check on the campaign screen, but also if the campaign needs to be stopped, then you still have time to action that.
* Importing: Once the campaign has launched from StoneShot, we have no way of recalling the message.
File manager
Another tool you’ll spot under Content is the File Manager.
This is a simple tool to manage online content such as the images you add to your emails and any PDFs you’d liked hosted outside your website. When you go into the File Manager you’ll see folders and files as you might within Windows Explorer on your PC.
Viewing email reports
You’ll see the stats for each email you’ve sent by clicking into Campaigns in Reports:
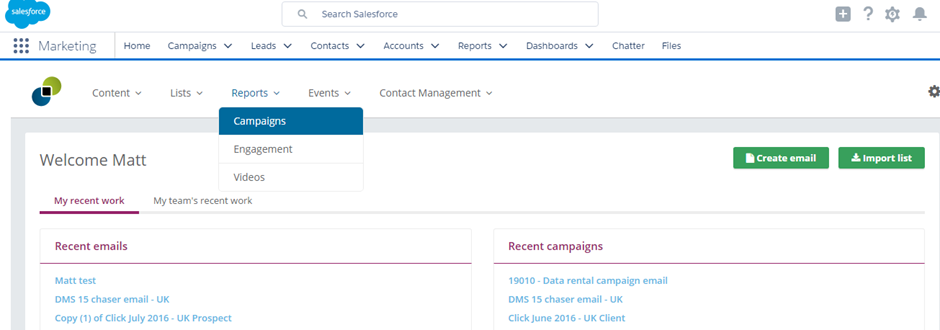
As you can see, there are five available reports for each eshot. The first report – Summary – is shown and you can navigate to the Links, Bounce, Time and Activity via the navigation. We’ll cover each report below. The reports are live so each time you click in or hit refresh in your browser you’ll see the latest stats.
Summary
This report gives you a high-level overview of your mailing. We’ll go through each component of the screen now.
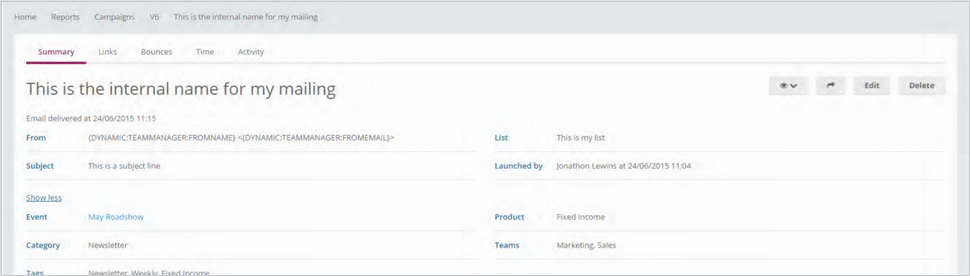
At the top of the screen you’ll see:
- The internal name of your campaign
- What time/date the campaign was launched
- The sender name and email address
- The name of the list it was sent to
- The user who set the campaign up for launch and when
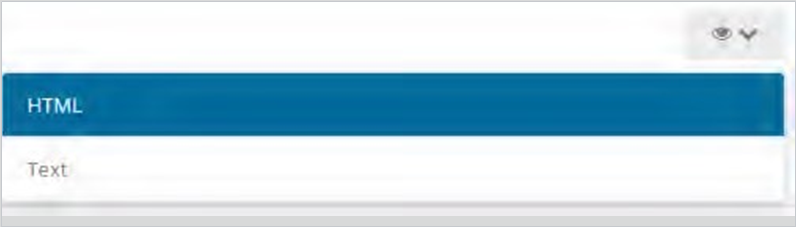
You have the ability to see a preview of your HTML or Text versions by clicking on the eye:
To edit any of the information at the top of the screen, simply click on the Edit button. You’re then able to update the following:
- Event – This allows you to associate the campaign activity with an event that you are currently running
- Category – This will get automatically set by the system, however if you wish to override it, you can amend this dropdown. This allows us to run more specific reporting comparing your mailings with others of the same type.
- Tags – This allows you to categorise your campaign to make it easier and more relevant when reporting.
- Product – This allows you to define what product type is contained in your email. This may not be relevant, in which case this can be left blank. Again, this allows us to delve deeper into the reporting for you.
- Teams – This allows you to restrict who can access the statistics generated by the campaign.
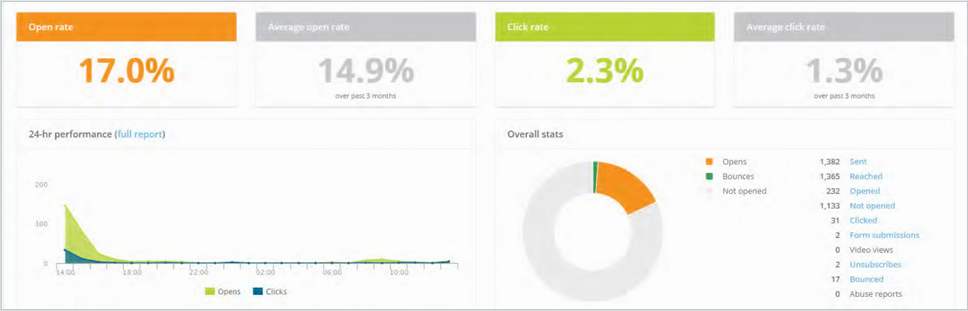
Further down you’ll see the engagement stats for the campaign. The open rate and click rate are displayed for your own campaign, and the average open and click rates for the entire account for the last 3 months are shown.
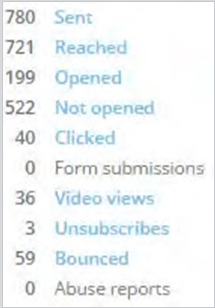
You’ll also see the 24-hour performance chart (clicking full report takes you through to the Links tab), and the Overall stats graph. This gives you a quick overview of how the campaign has performed, and each of the categories on the right-hand side are clickable and allow you to export the information into Excel.
At the bottom of the screen we see the final four sections, which help you delve deeper into how well your campaign is doing.
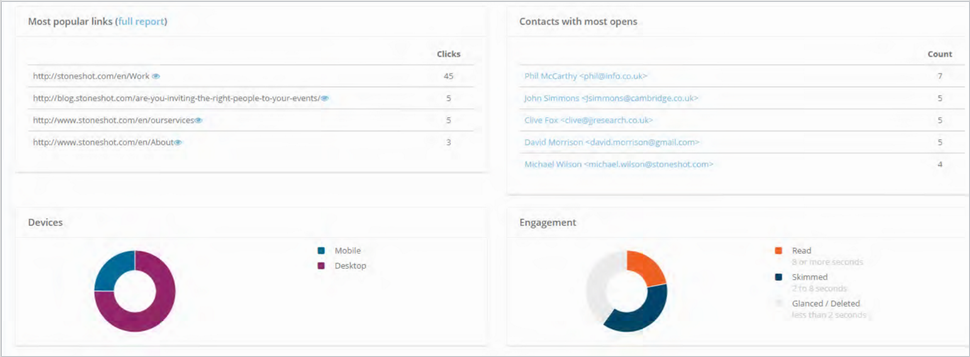
- Most popular links – This shows you what links are lighting up contacts the most.
- Contacts with most opens – This is showing you which contacts are most engaged with your email.</li
- Devices – This shows you the split of contacts on how they’re viewing your email.
- Engagement – This shows the time a contact has spent looking at your email. It is split into 3 categories: Read, Skimmed, Glanced/Deleted.
Some of the reporting however is limited to the UK clients who allow individual tracking; for CE contacts who are tracked anonymously then only campaign-level statistics are available.
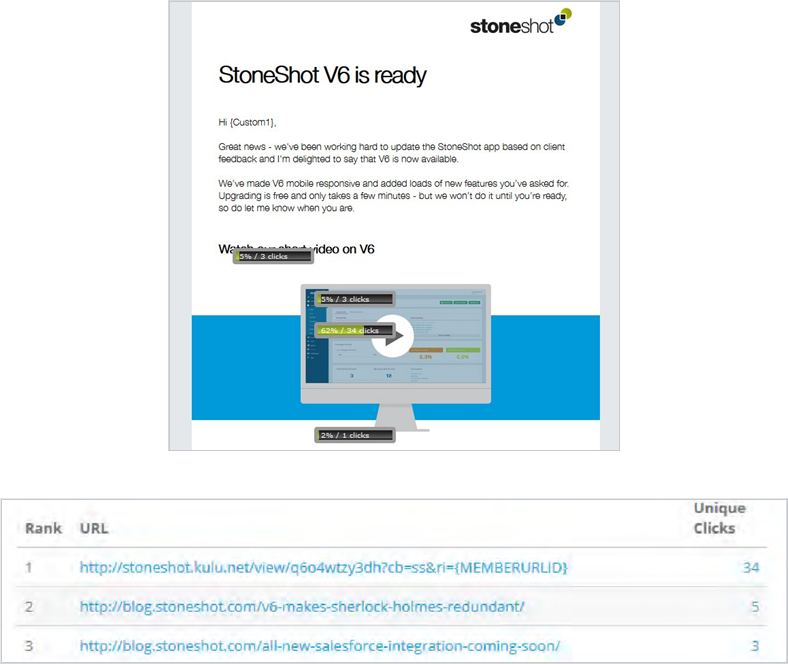
Links report
The second report shows which links in the email were clicked and where on the template. If you want to see who clicked on each link, simply click on the link in the table at the bottom and this can be exported into Excel.
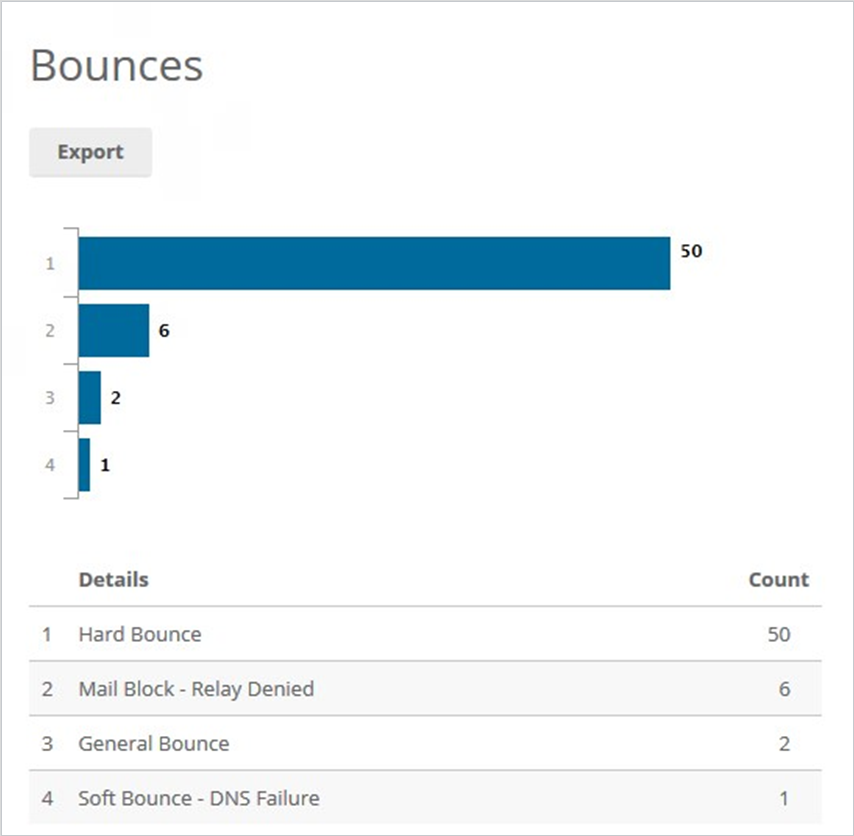
Bounces report
Very few email lists are perfect so when you send an email out it’s likely that some emails will bounce. StoneShot catches most of these undeliverable emails and presents them on the bounce report. You can export these into Excel, amend the contact details in Salesforce and StoneShot will be updated.
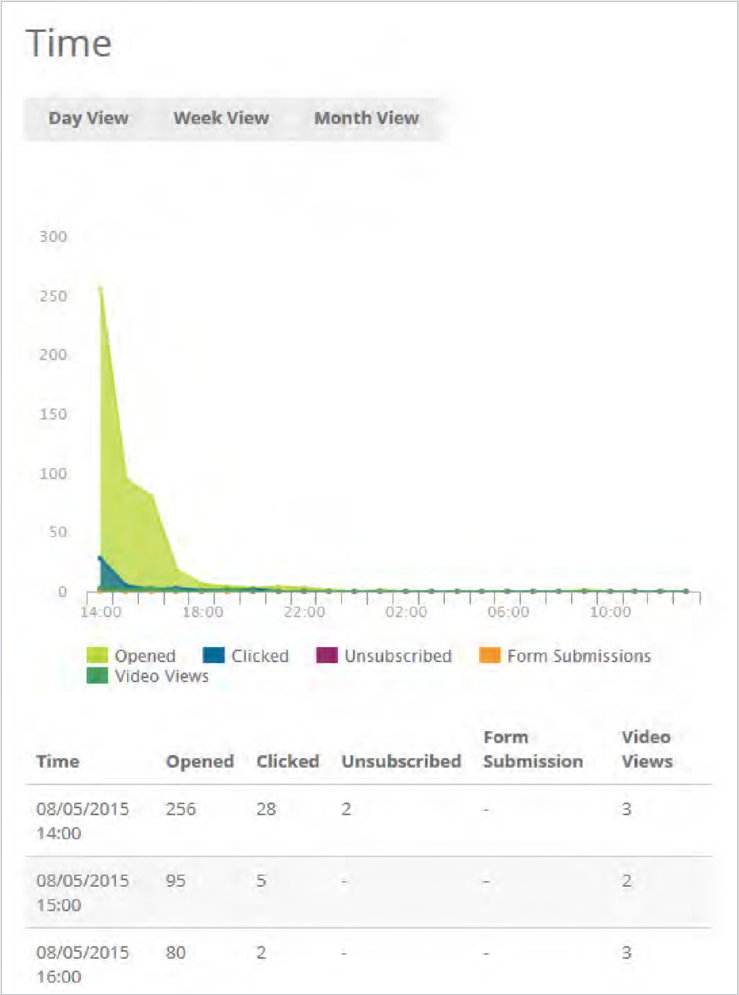
Time report
This report shows campaign activity over time. It’s used to see when your recipients are responding to the emails you send so you can optimise future eshots. There are three views – Day, Week and Month. The reports start from when you first sent the email and are supported by tabular data below.
Activity report
Finally, the list report shows email activity as it happens.
Each time a recipient opens an email, clicks a link or opts-out you’ll see it here with the most recent activity at the top.
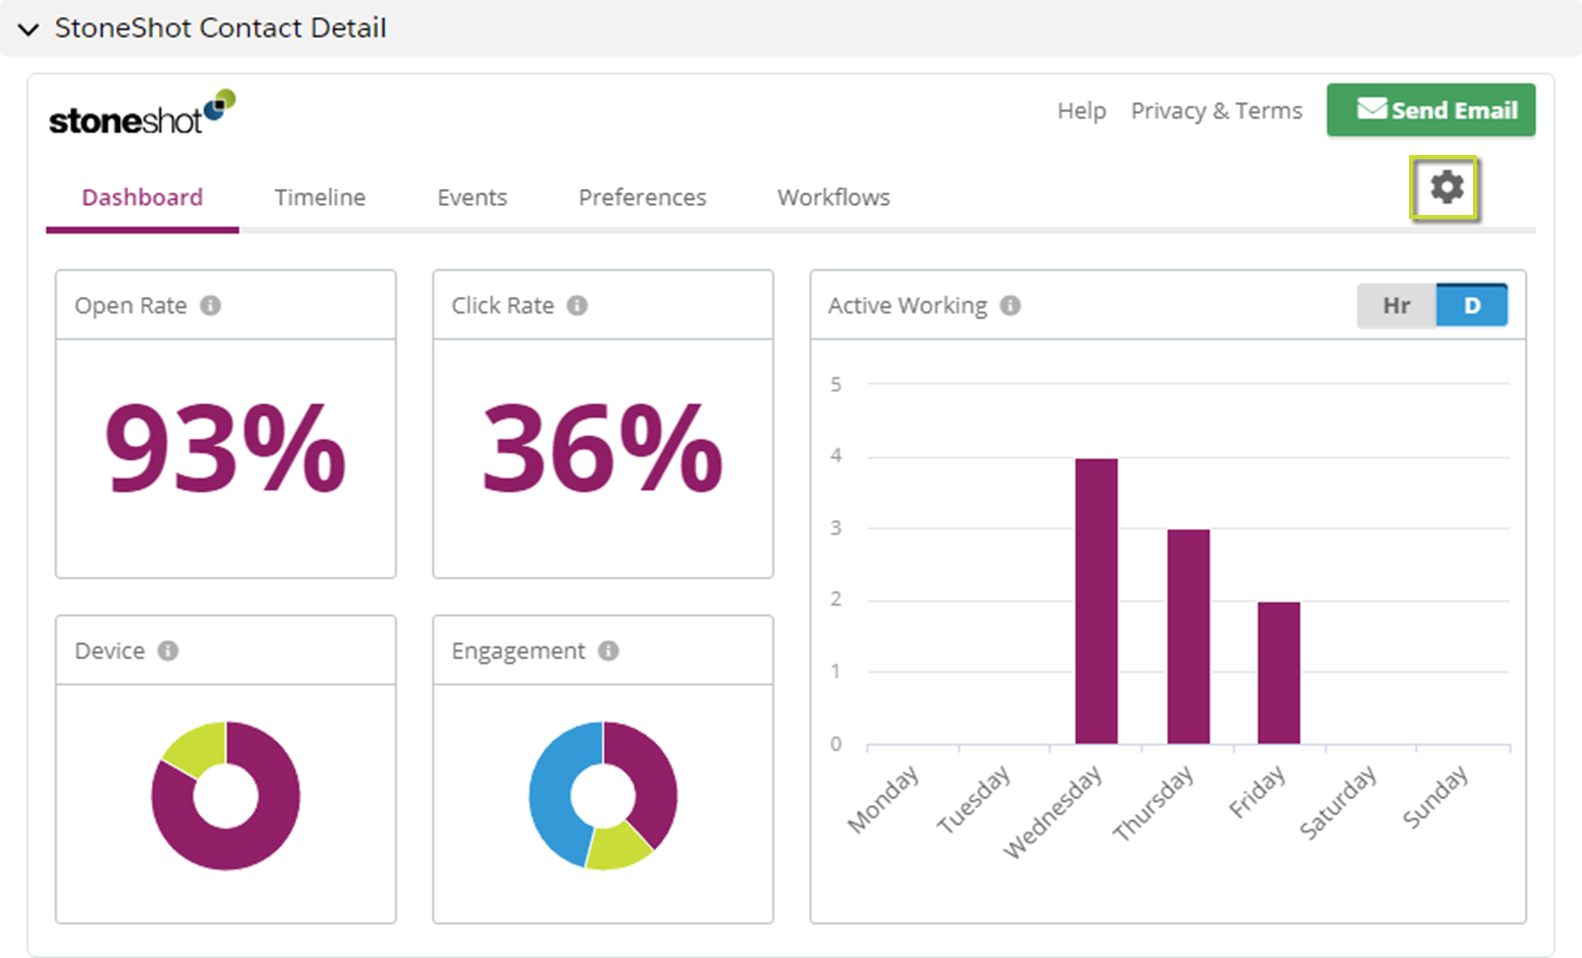
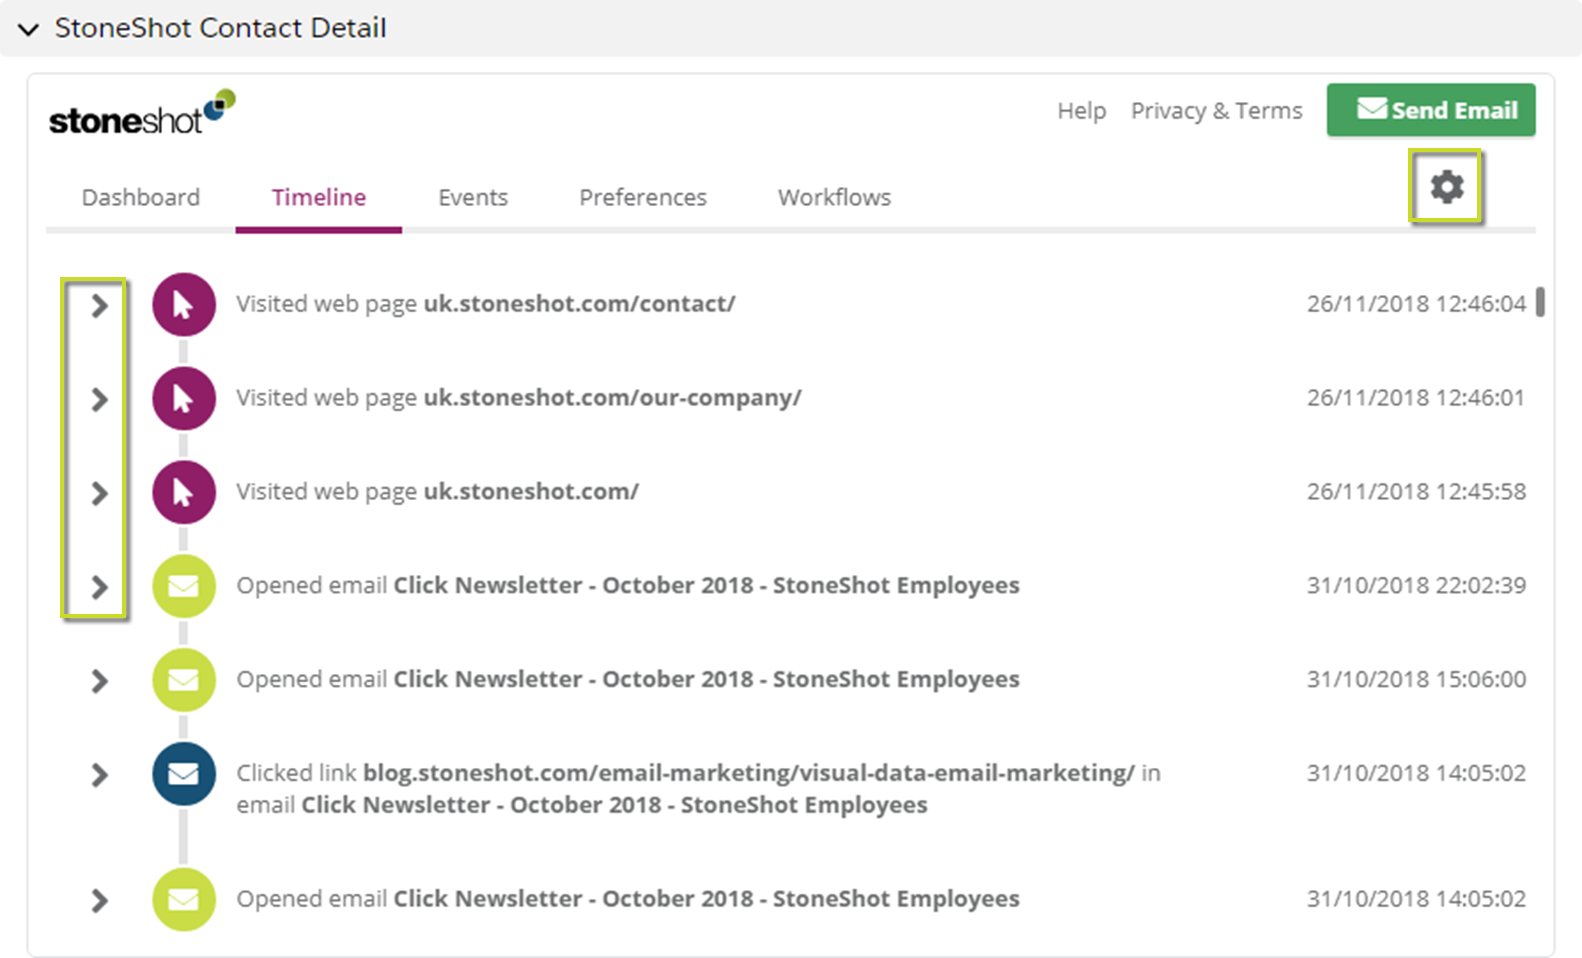
Viewing activity in the contact record
As well as seeing aggregated mailing statistics you can drill-down and see specific contact-level activity. There are Visualforce embeds into the contact record pages to show you email and event activity at an individual contact level; clicking on one of the emails will bring up a full audit of the contact’s interaction with the email.
Events
The StoneShot platform includes an event dashboard, which allows you to create registration pages, invitation emails, confirmations and reminders for client events. There’s also a CPD certificate module which can send out CPD/CE certificates after the event.
This guide will focus on how to view which clients have been invited or registered for an event, and to manually register or cancel a client.
Viewing event activity
Under the events tab you’ll see a list of all of the previous and upcoming events:

By clicking into an event you’ll see which sessions are available for the event:
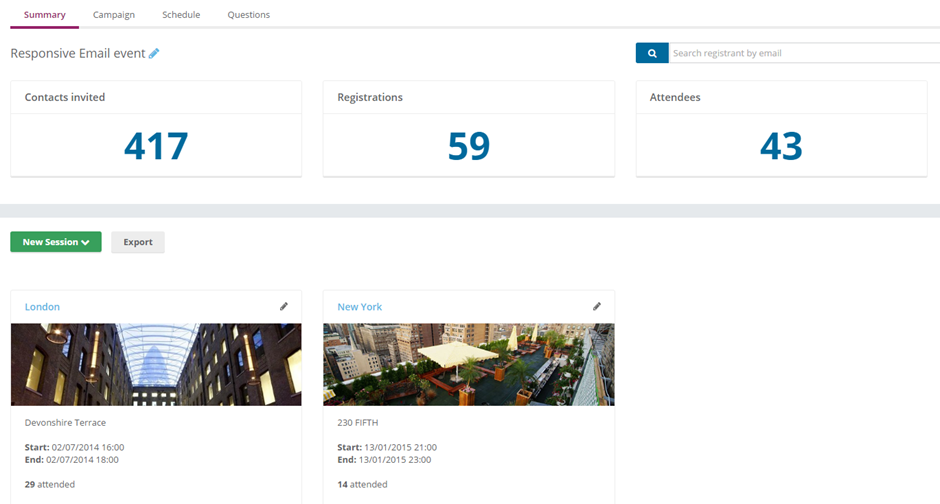
To view which clients have registered, click into the session and you can then view clients that have registered/attended/cancelled etc. You can also export the list into Excel.
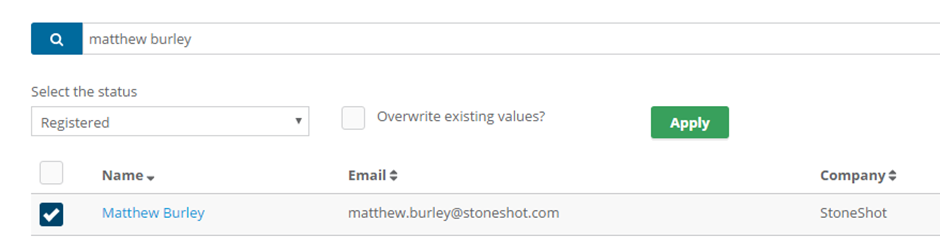
Adding clients to an event
You can also manually add a client to an event, for example to register them. If you have confirmation emails set up on a trigger then registering a client directly through the StoneShot app will send that confirmation email to the client.
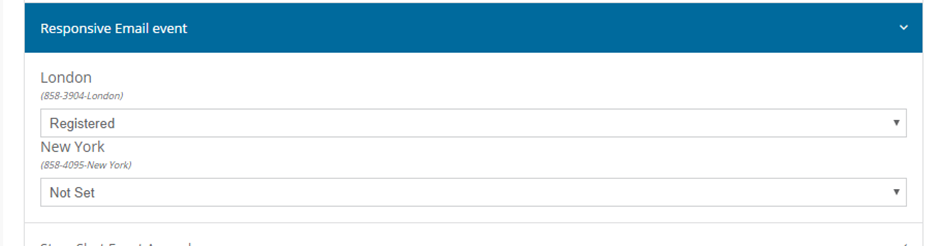
Click on the event and session that you want to register (or cancel) the client for, and click “Add contact”. You can then search for a list or for an individual contact, find them and select their status:
Finally, you can also add a contact to an event directly through the contact page in Salesforce:

Watch our Salesforce User Guide video below for a run through of our integration.
