


StoneShot Learning > Event Marketing > Creating a Registration Form
Creating a Registration Form
The Event Builder comes with its own Form Builder (yup, that is a lot of builders, we’ve had a word with our branding team).
The Form Builder has been designed to speedily create on-brand registration forms based on pre-defined templates. You can pick from a library of form templates or have us make a custom template for you. You can also use an existing StoneShot form or even create your own externally.
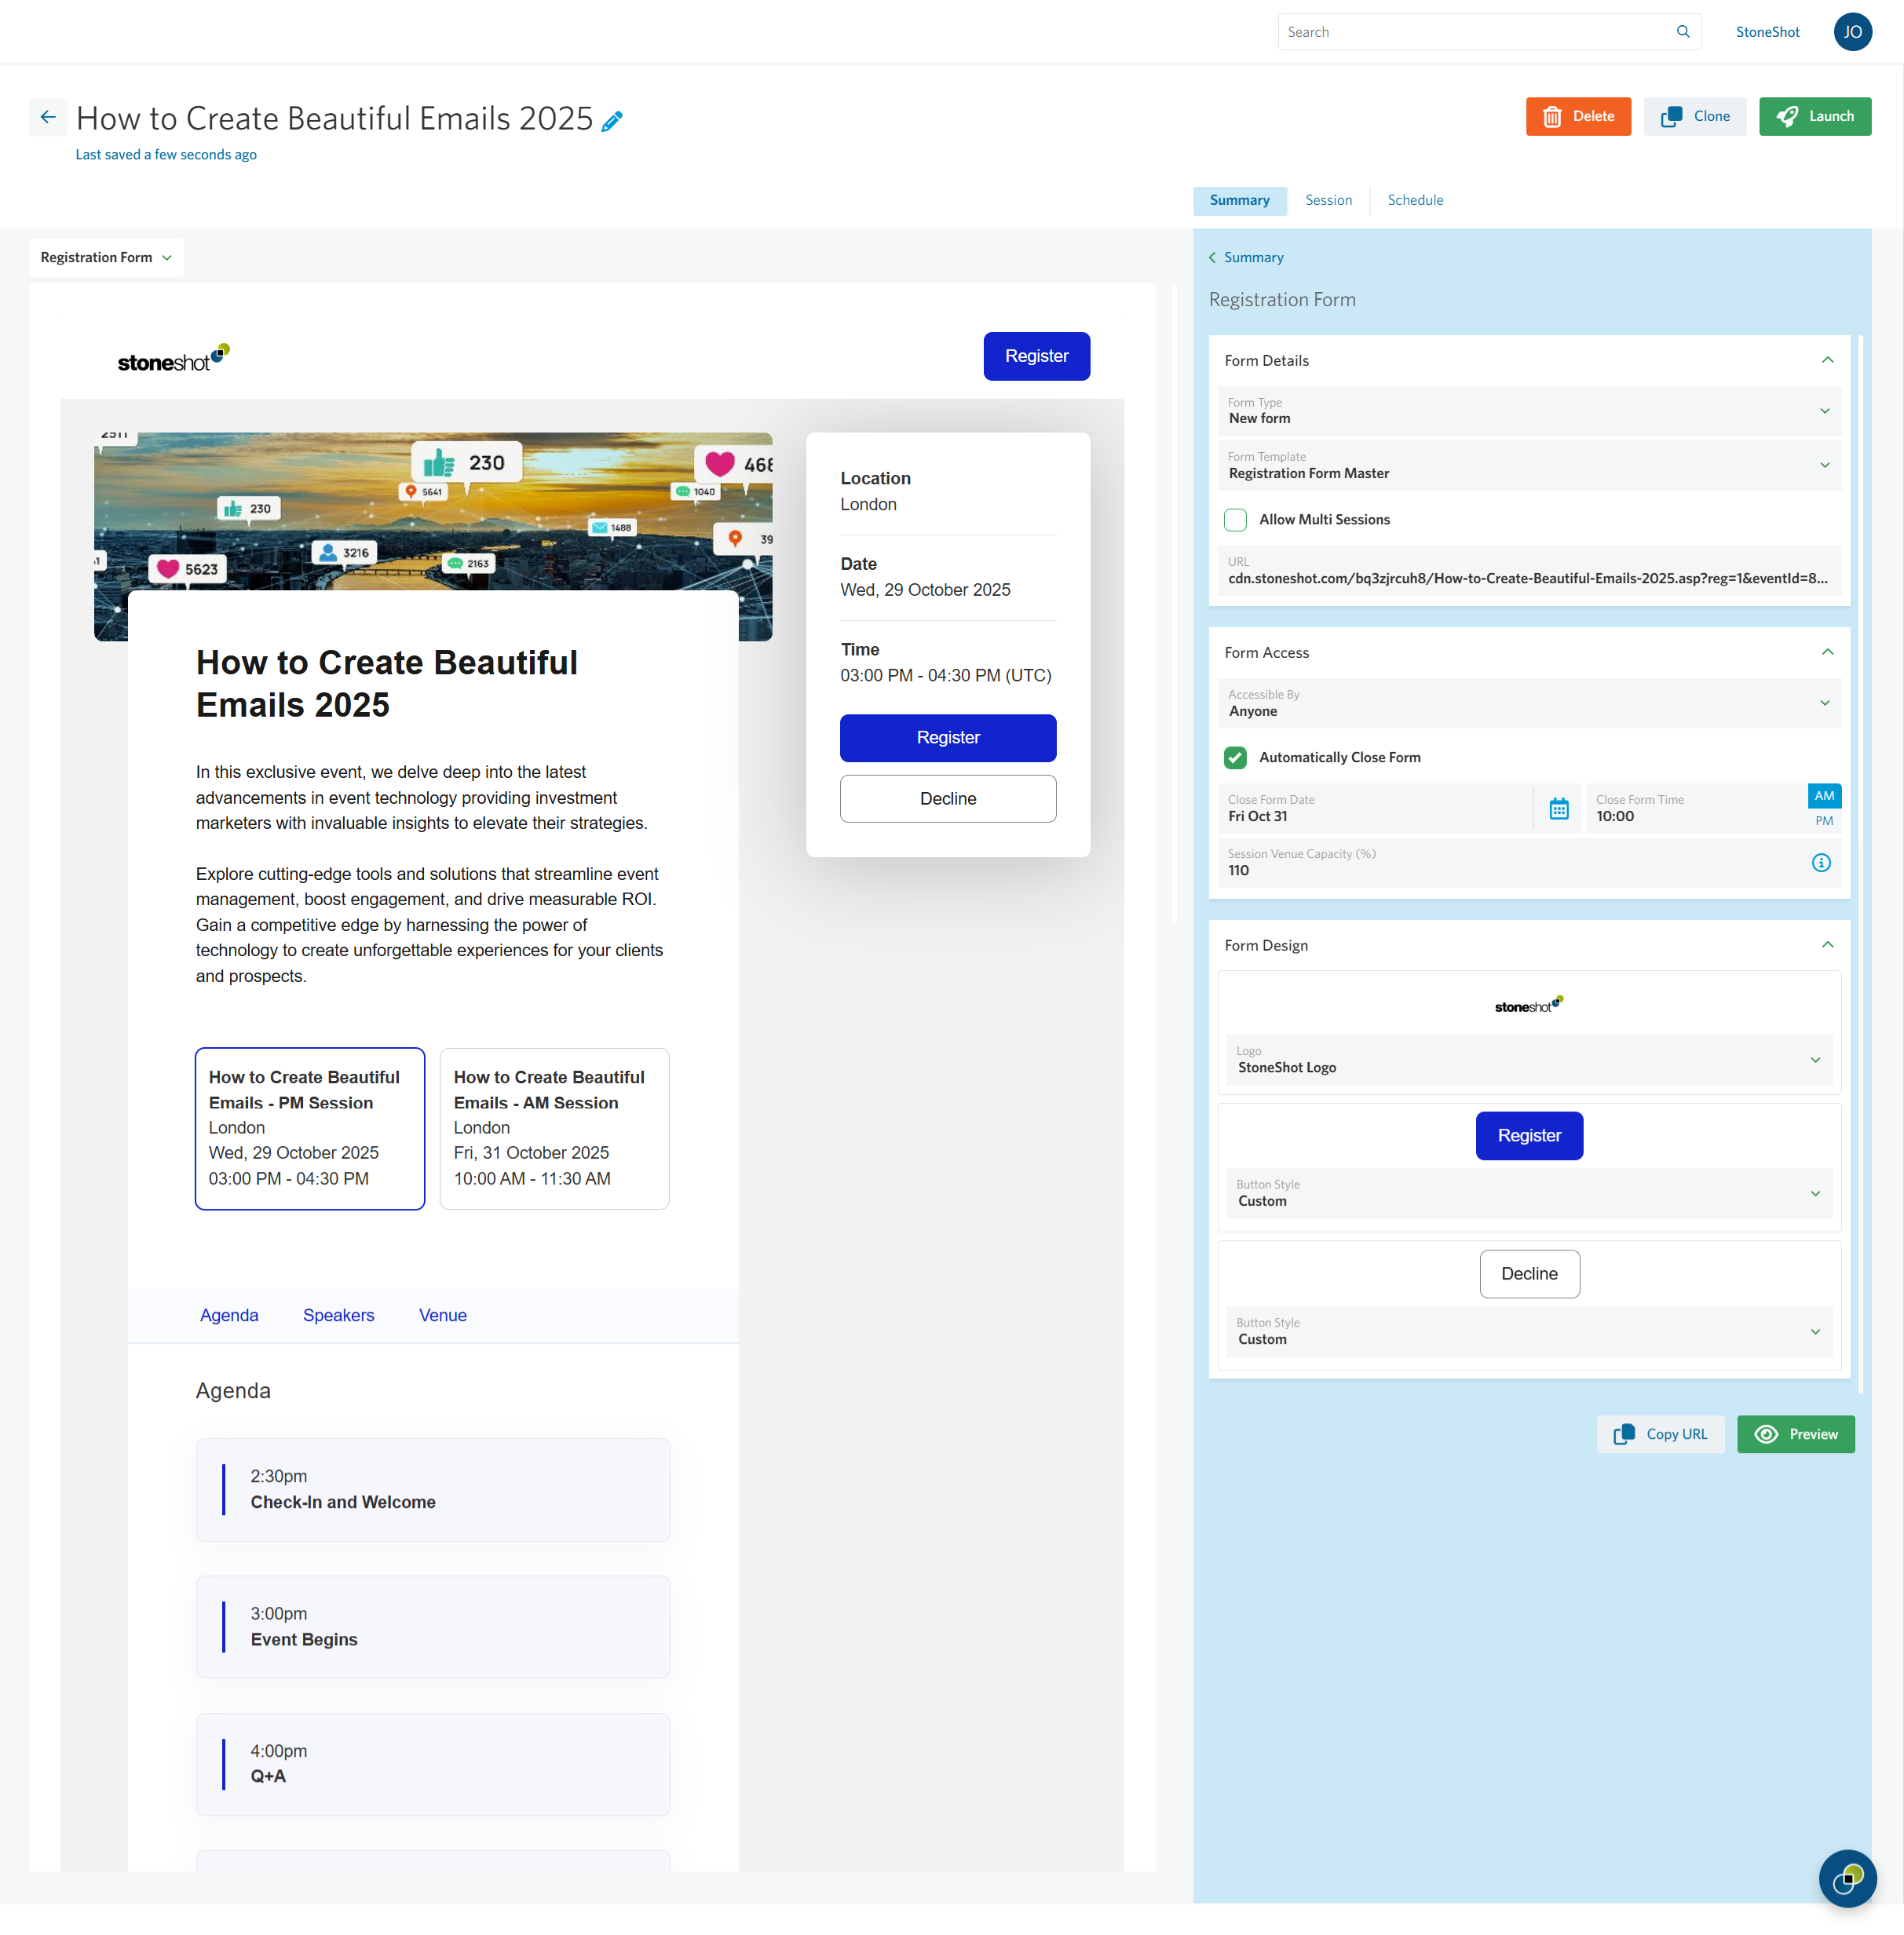
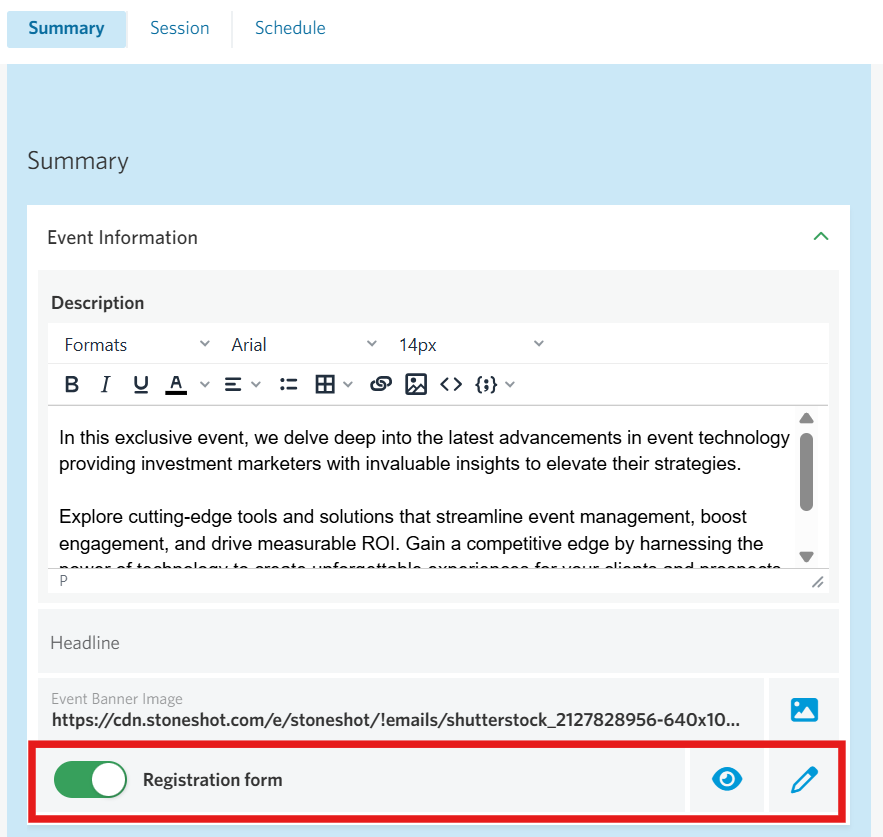
Let’s assume you’re using one from our library. Access the Form Builder via the blue edit pencil in the Registration form field within the Summary tab.
Form Details
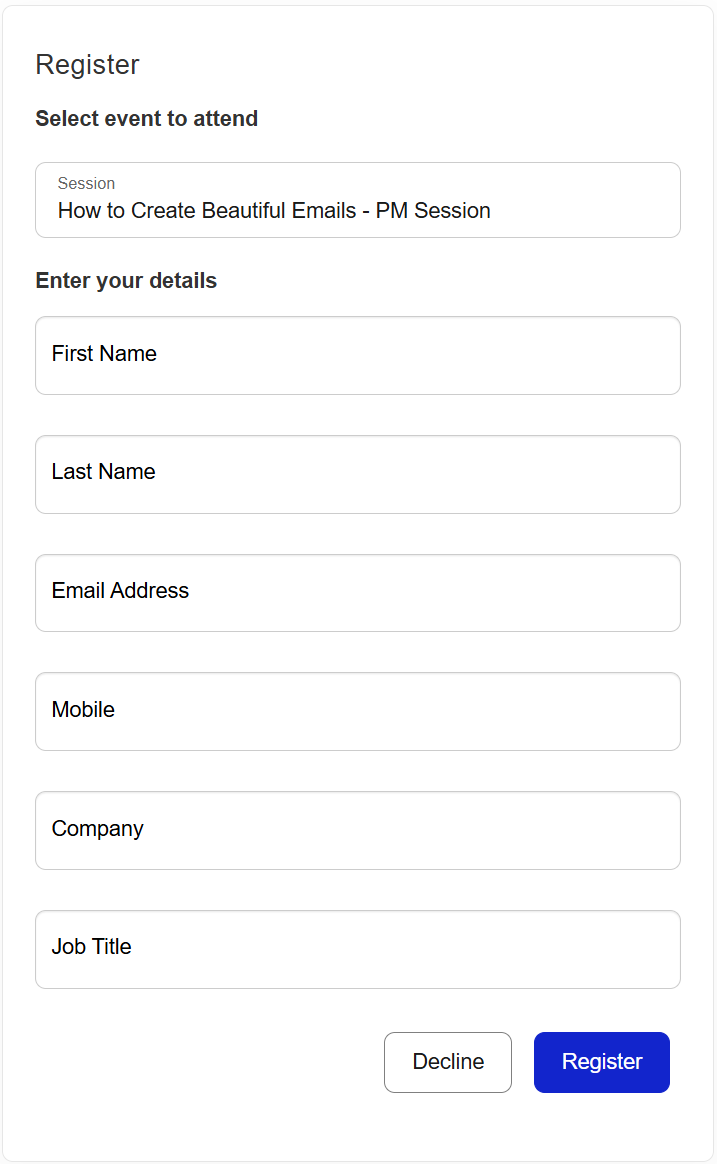
You’ll see our default form which you can change by picking another on the Form Template dropdown. The default form shows all sessions in the event, allowing your client to choose a single session. If they can attend multiple sessions – for example a single-venue event with breakout sessions – check “Allow Multi Sessions” on the right.
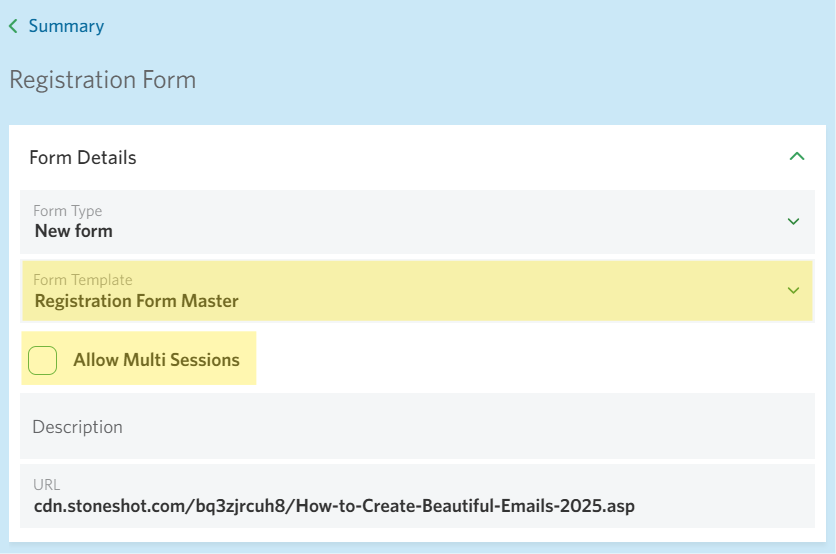
Below this, you can enter a custom description for the form, though we usually use the event description (see Creating an Event). There’s a URL too for the form, though the invitation emails in our library have the form link in them already.
Form Access
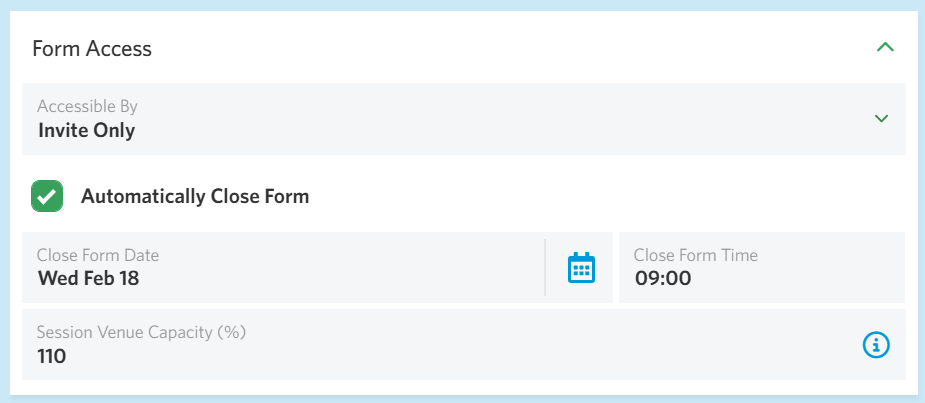
You can also restrict who can access a form. By default it’s open to anyone but you can change this to Invite Only. That means the form can only be submitted by contacts you’ve invited to the event, and it also hides sessions they’ve not been invited to.
You can automatically close the form too on a specific date or venue capacity. By default we close the form on the start time/date of the last session in the event. We also recommend a Session Venue Capacity of 110% to allow a 10% overrun for no-shows.
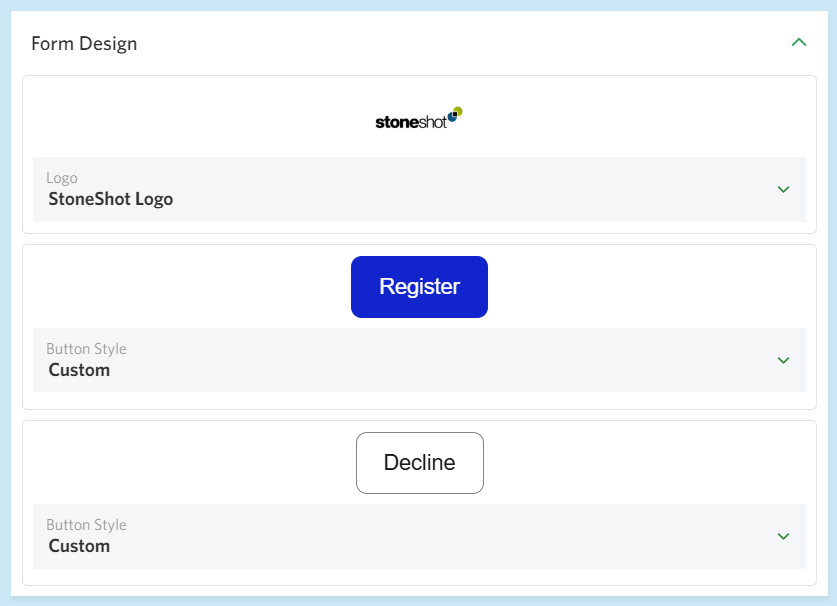
Form Design
The Form Design section lets you customize your form’s visual elements, such as the logo and Register/Decline button styling. It’s fully synced with your Brand Manager, allowing you to choose from the logos and button styles already set up there. Any updates you make will instantly appear in the preview on the left.
Form Elements
Right, so let’s make this form your own! You can choose the standard fields you’d like to show on the form and make custom fields too.
 | 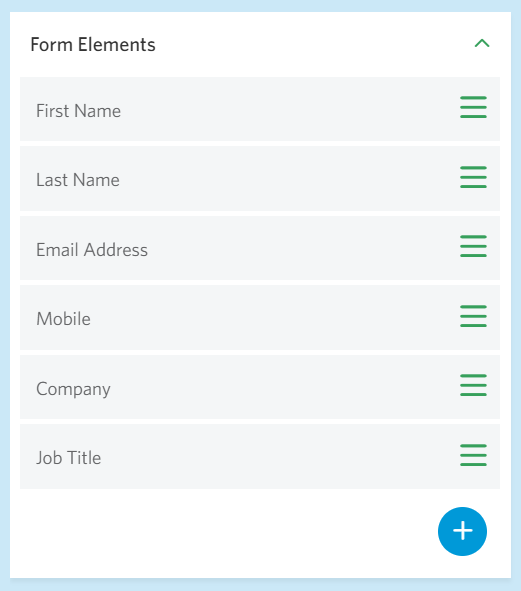 |
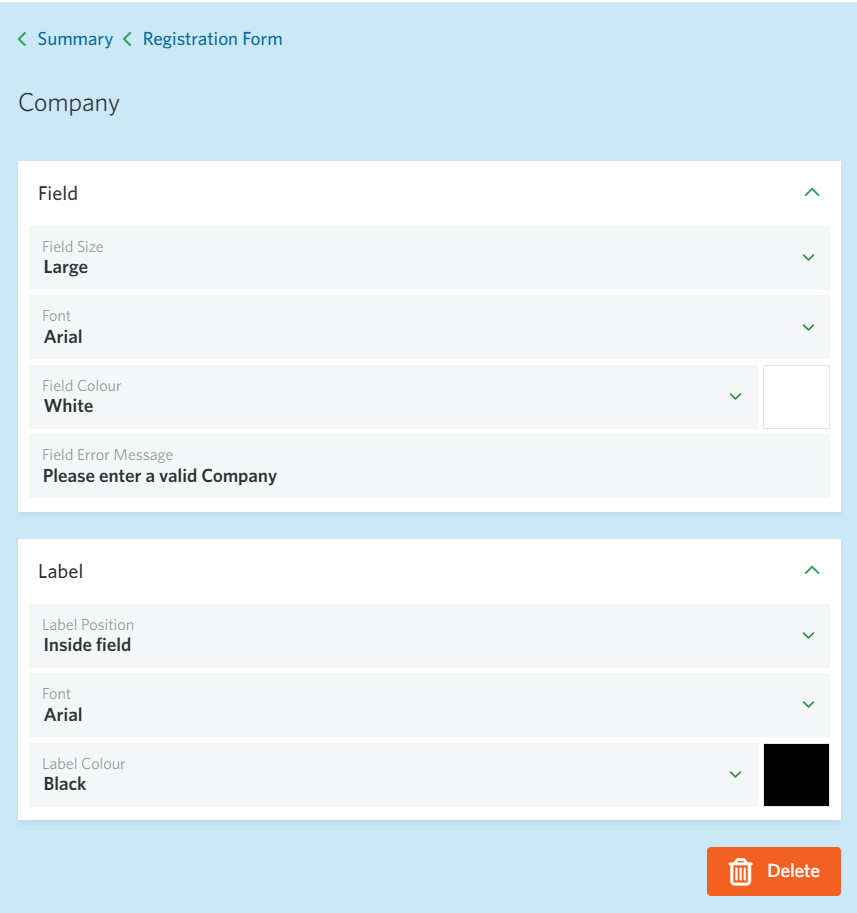
Each field has properties. Just click on the field and you’ll see you can change the field size, font colors, error message and label position. To remove a field, just hit Delete at the bottom (don’t worry, you can add it again later).
You can navigate back to the form by clicking Registration Form at the top of the panel.
Adding Form Fields
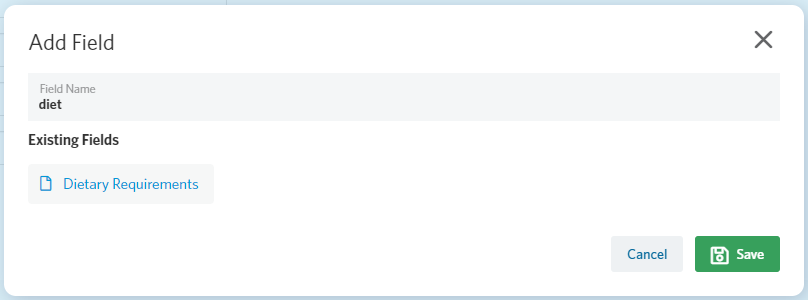
To add a field, hit the plus icon and give the field a name. The Form Builder will look for existing fields and segments first, so if you type “diet” you’ll see Dietary Requirements appear. You can simply click on Dietary Requirements and hit Save to add it to the form. You can add any contact fields and segments in the same way.
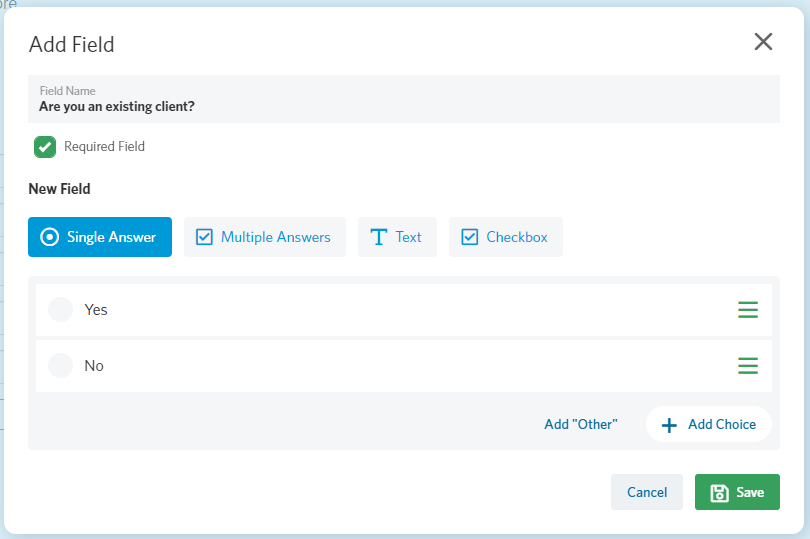
To add a new field, simply type the full field name and pick a field type from the ones listed below.
- Single Answer – two or more options are given, only one can be selected
- Multiple Answers – two or more options are given, many can be selected
- Text – single or multiple line text box
- Checkbox – single check question
Let’s go with Single Answer. You can add more choices of course.
Form Messaging
We’re nearly there! The last touches are the messaging around the When an invitee registers and When the form has expired. Alternatively, you can redirect to other pages by entering a URL.

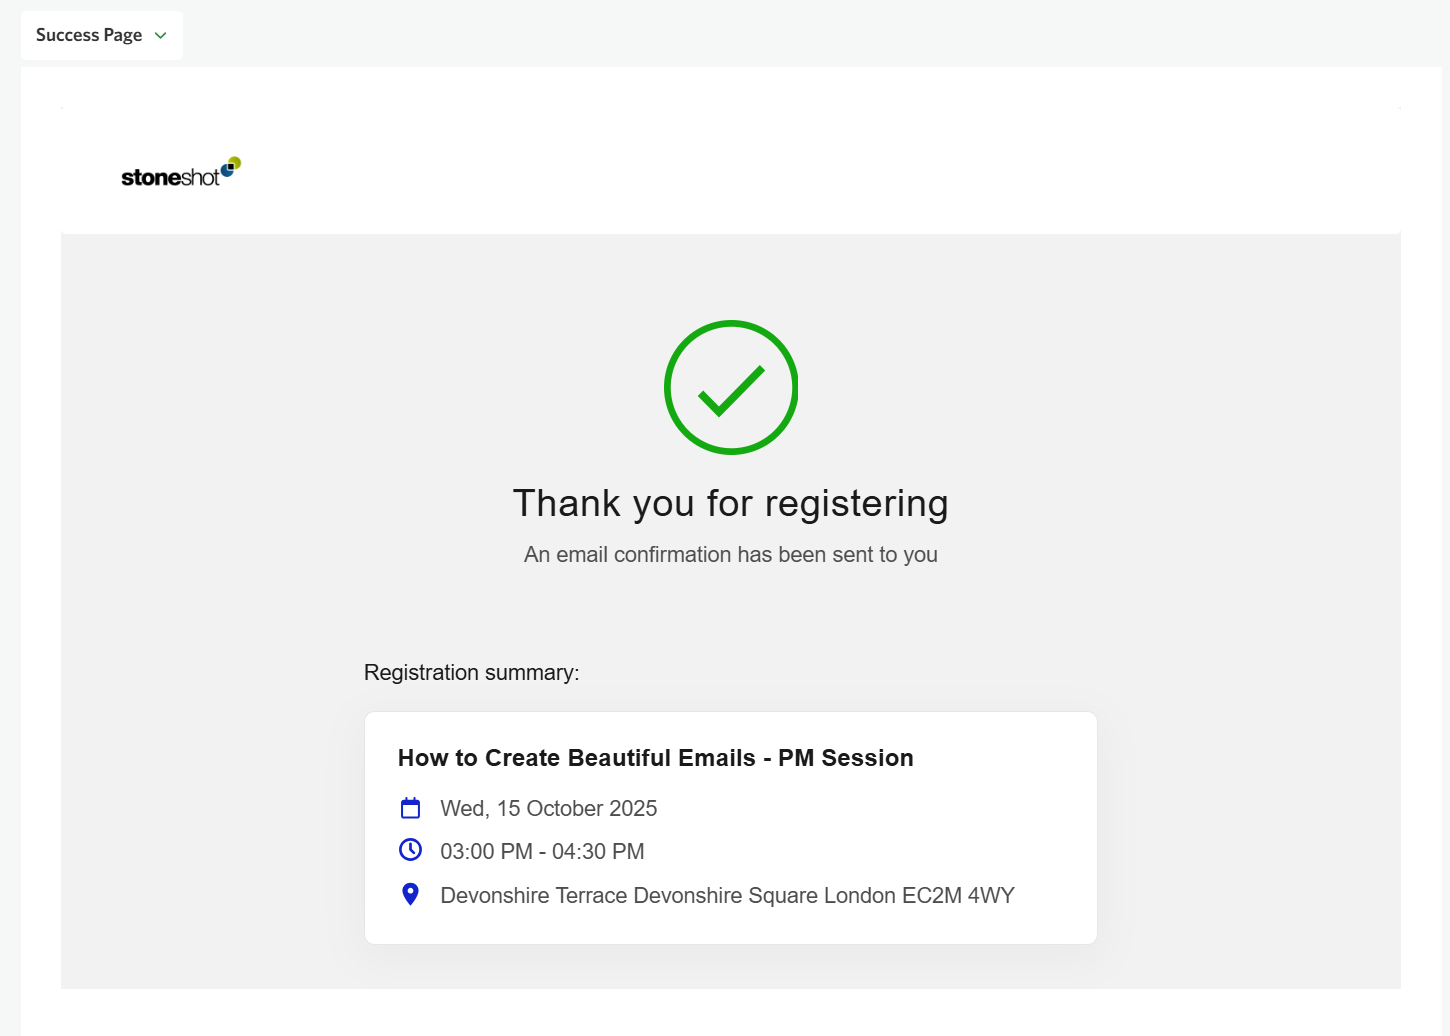
Preview Form
You can preview your form and additional “Success”, “Decline”, “Expiry” and “Not Open” pages via the dropdown on the left.
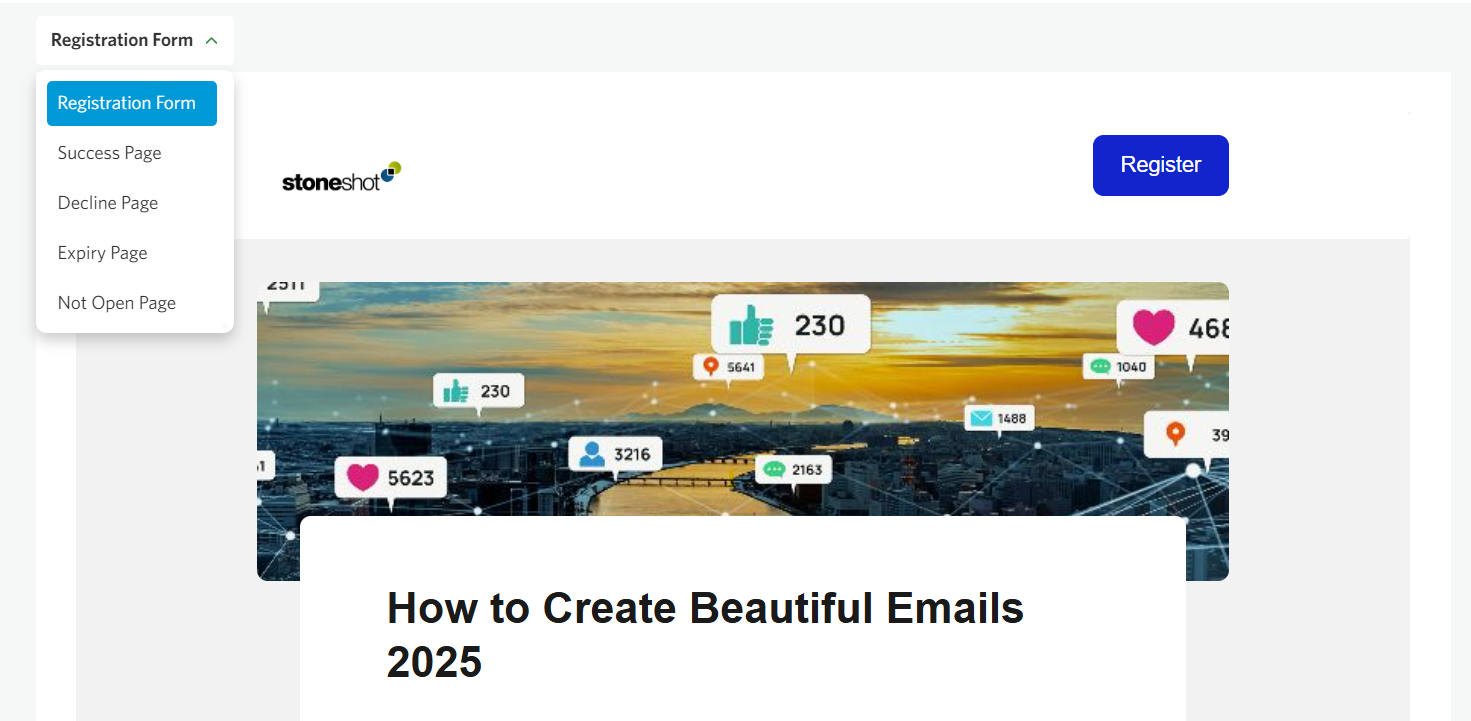
The preview panel will automatically update as you make any edits to the form elements and messaging.
So that’s the form complete. If you’ve not done it already, let’s setup the Sessions or Schedule.
FAQ
Can I embed event forms into my website?
Yes. Go into the event and click Edit Event. Then click the pencil icon to the right of “Registration form”. Copy the URL from the Form Details panel and paste into an iframe on your website. Here’s an example:
<iframe src=”https://cdn.stoneshot.com/cgifupw8b3/my_form_name.asp“></iframe>