


StoneShot Learning > Contacts Lists > Managing Segmentation
Managing Segmentation
What is segmentation? Why is it important?
Managing your contact list with proper segmentation will allow you to target your customers and will give a boost to your marketing strategy. It is very important to know your contacts and to keep a record of their behaviour so that you can create different segments within your account. You do not want all the content you produce to go to all your contacts simultaneously. If your list is properly segmented, you can target specific groups that are relative to the subject.
Segments can be assigned to contacts for several reasons. It can be that a contact was assigned because they signed up for an event or newsletter. A segment could can also be set for clients of one of the sales team.
Together we will see how to create segmentation to group a contacts list with their related Sales managers.
Creating segmentation and its segments
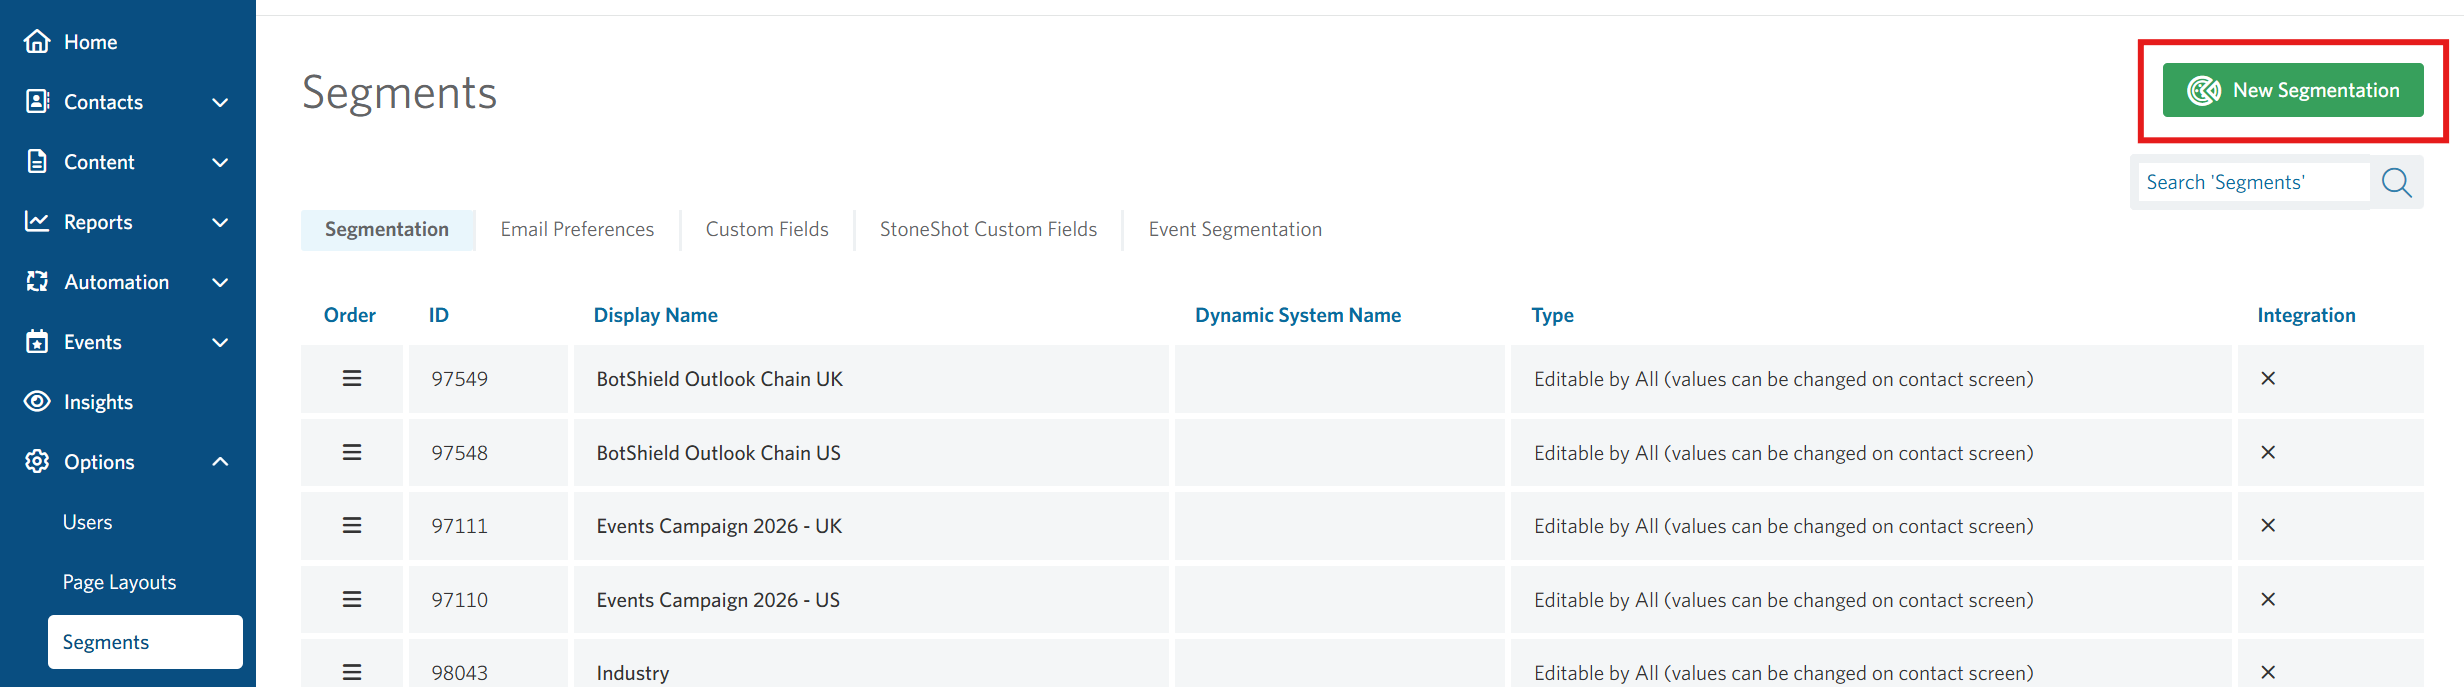
If you go to Options > Segments > Segmentation, you will be able to see the list of various segmentation options you have.
Let us start by clicking on New Segmentation as shown here below.
When creating a new segmentation, fill in the Name. The other fields you can ignore for now.
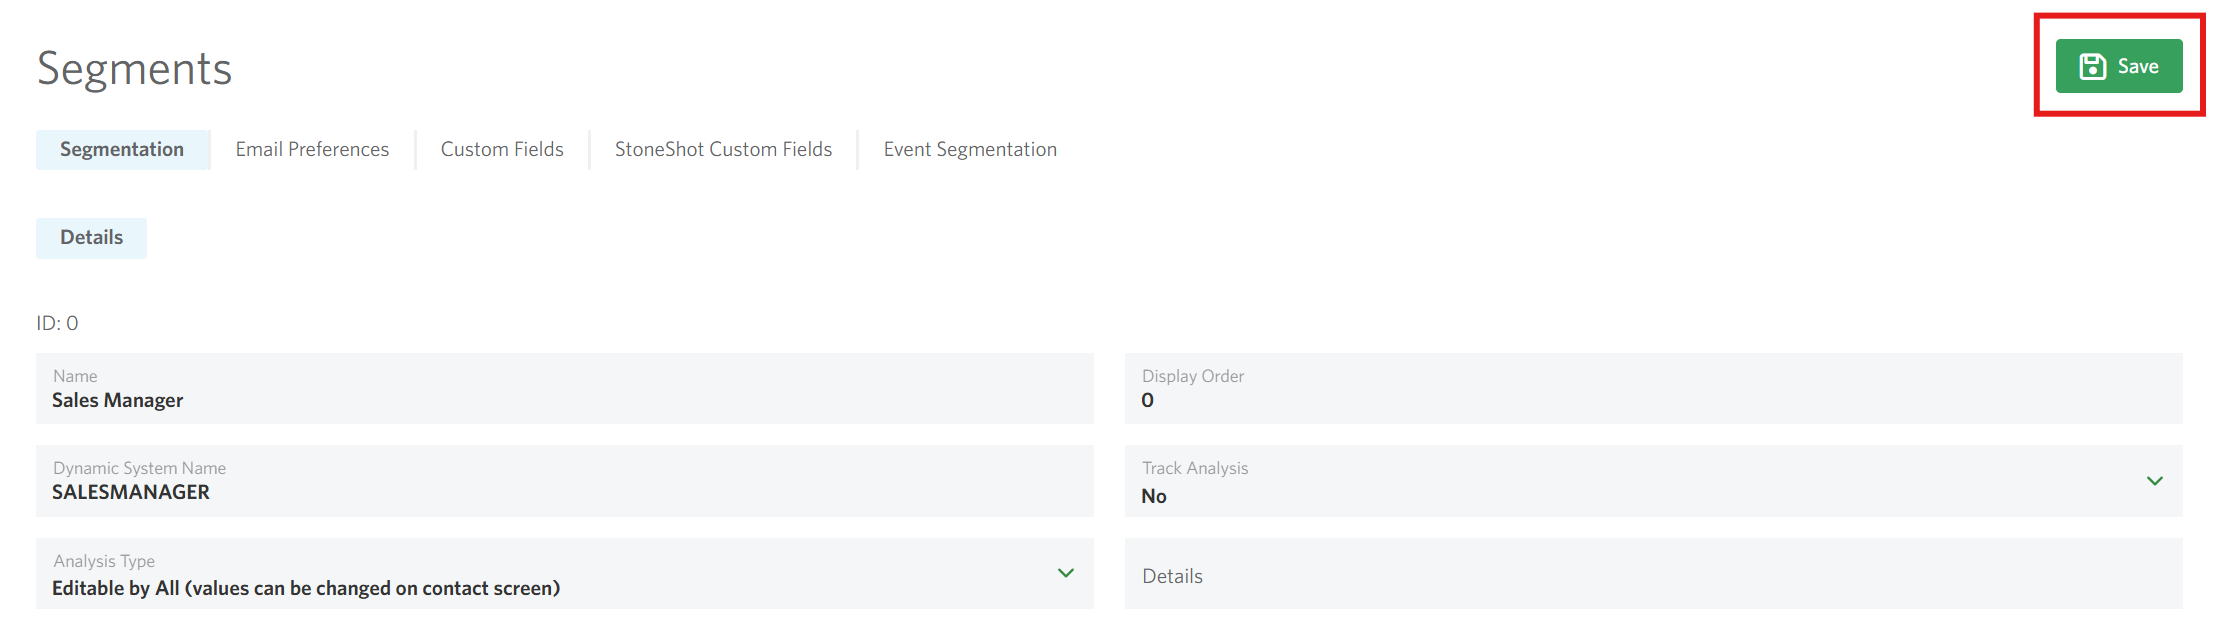
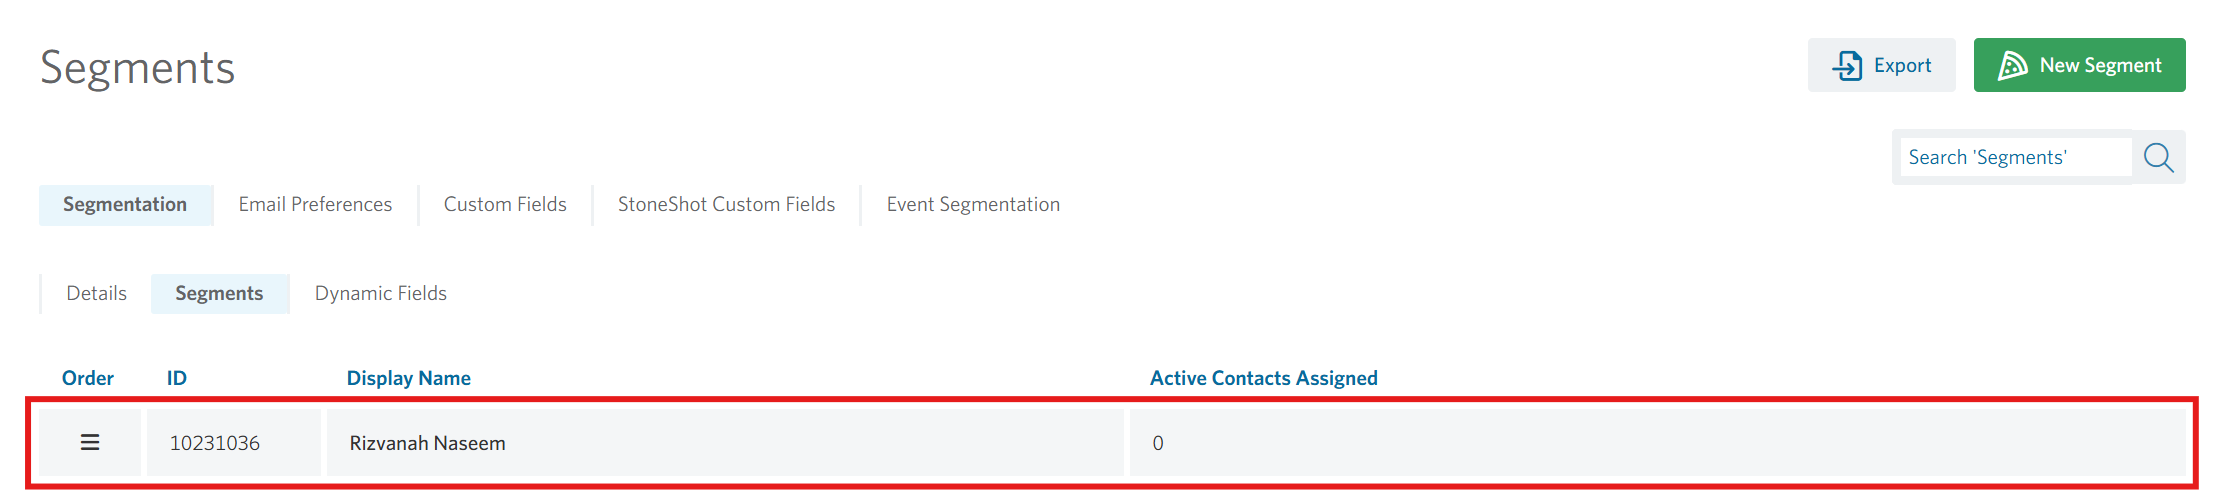
Once you are done click Save and it will be time to move to the Segments section. Here we will have a list of all the different options that will be available in the segmentation. In our case a list of all the Sales Managers.
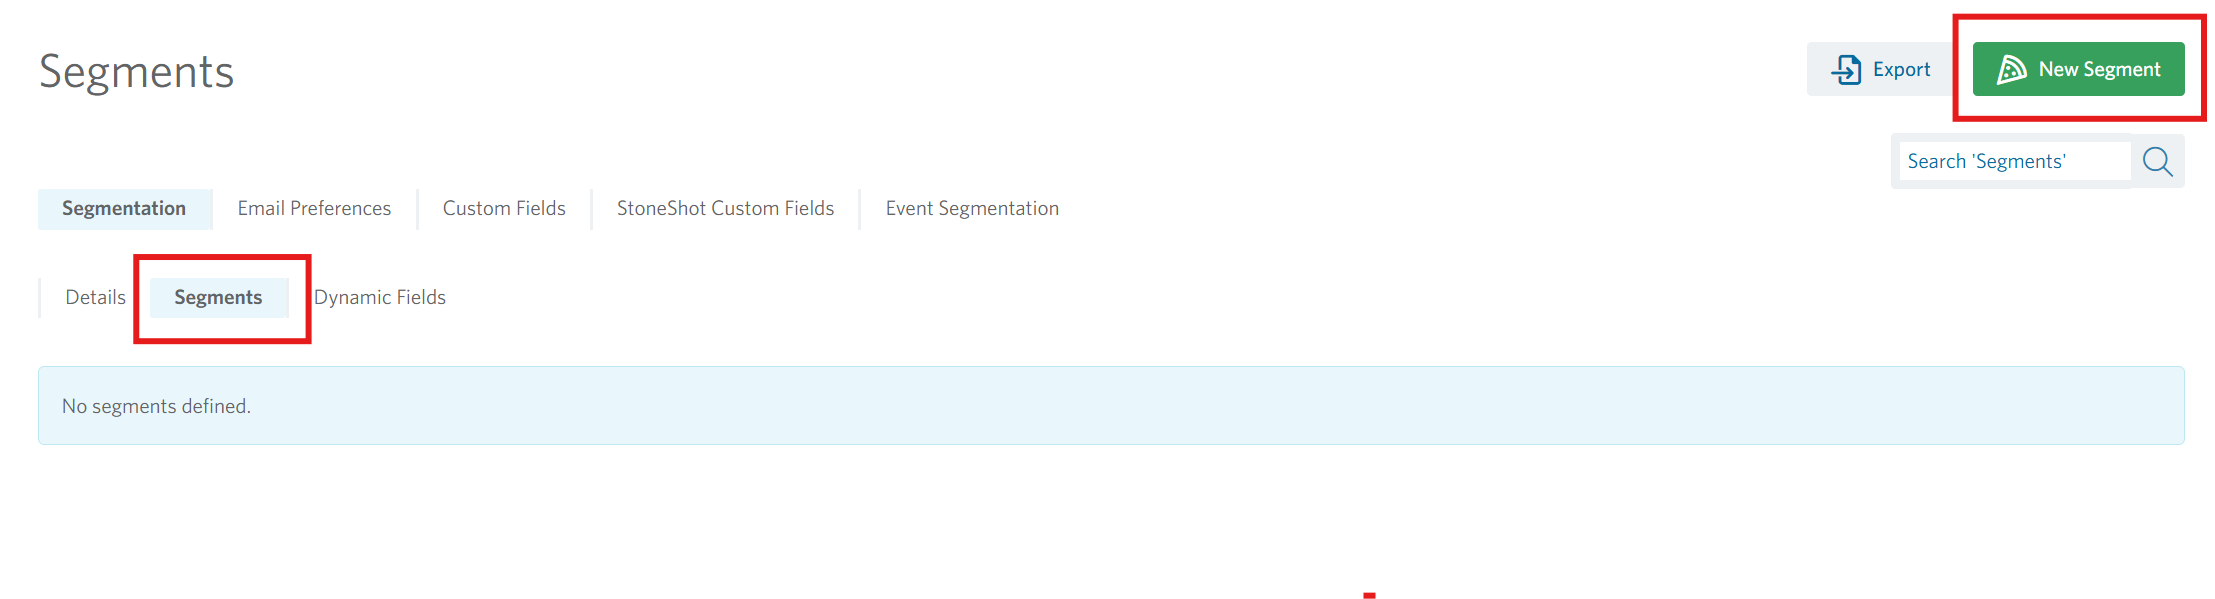
Click on New and let us start by adding a Sales Manager.
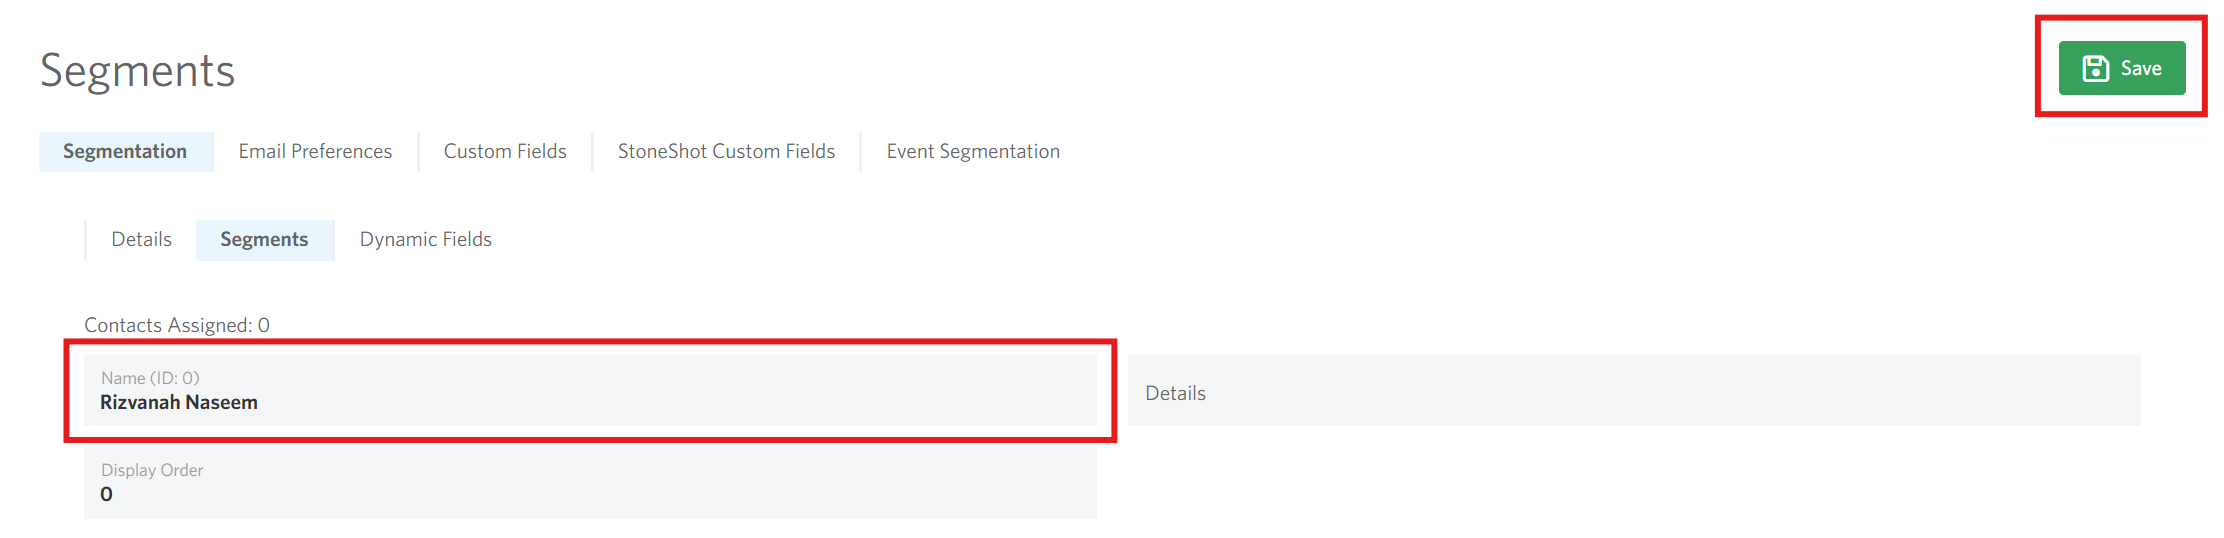
Fill in the Name that will show as a segment. Click Save.
Now we can see our first segment as seen below. Repeat this for all the options you want in your segmentation, in our case this would be all of the sales managers.
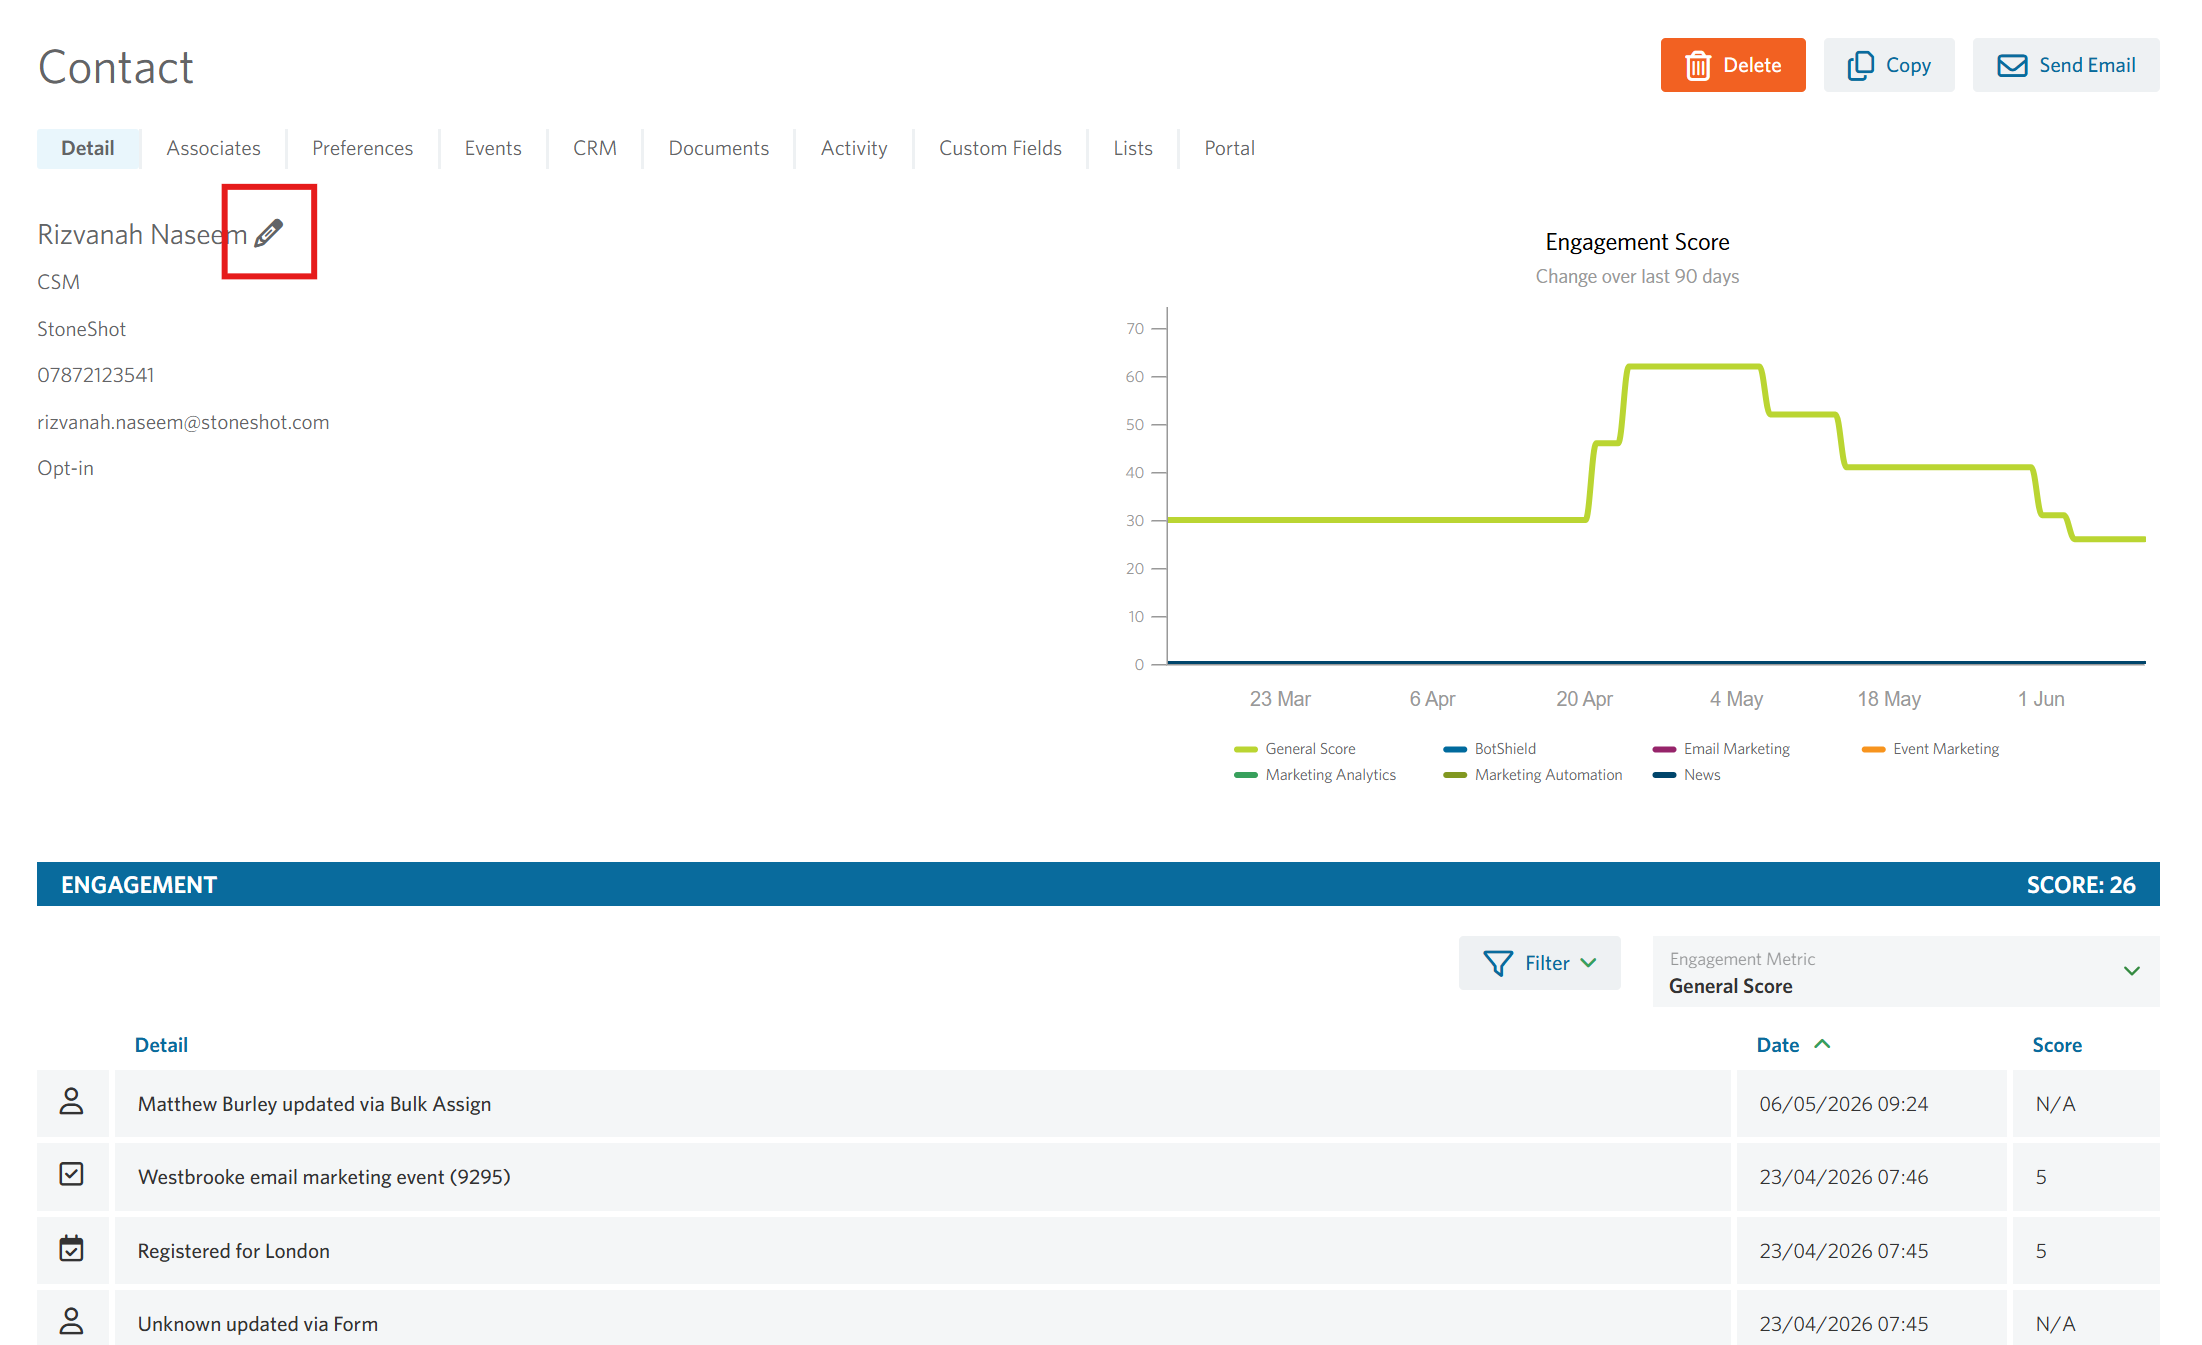
If we now view any contact profile, scroll to the bottom and click on the little pencil icon next to segmentation and you will be able to see our new segmentation. Select the sales manager you would like for this contact and Save.

How to bulk assign a segment to a list of contacts?
Bulk assigning is very simple and straight forward. It is just like preparing a new list for import. The only difference is that there will be a new column in the excel sheet stating the value of the segmentation. In our case, it will be the sales manager linked with the contact.

If you want to just update the Sales Manager fields all you need is a unique identifier (Email / CRM ID) in our case email and the segmentation column which in our case is Sales Manager.

As you may have noticed, you do not need to prepare a list for each sales manager. You can have them all in one list.
If you need to find out more on how to import a list, find out more here.
How do I see a contact’s custom fields?
Custom fields are an excellent way to deliver targeted and personalized messages to your audience. In the StoneShot platform, there are two different types of custom fields: StoneShot Custom Fields and Contact Custom Fields.
StoneShot Custom Fields appear on the main page of the contact screen and are great for storing custom salutation, dietary requirements etc. You can have up to 12 of them and they work well for entries that are less than 70 characters (with spaces) and that you use quite regularly in your communications.
To see this information for a contact, search for the record by either using the search at the top right of the page

or by navigating to Contacts > Contacts and using the Search Contacts function to the right
When you have found the contact, click into the Name

And then the pencil icon shown…
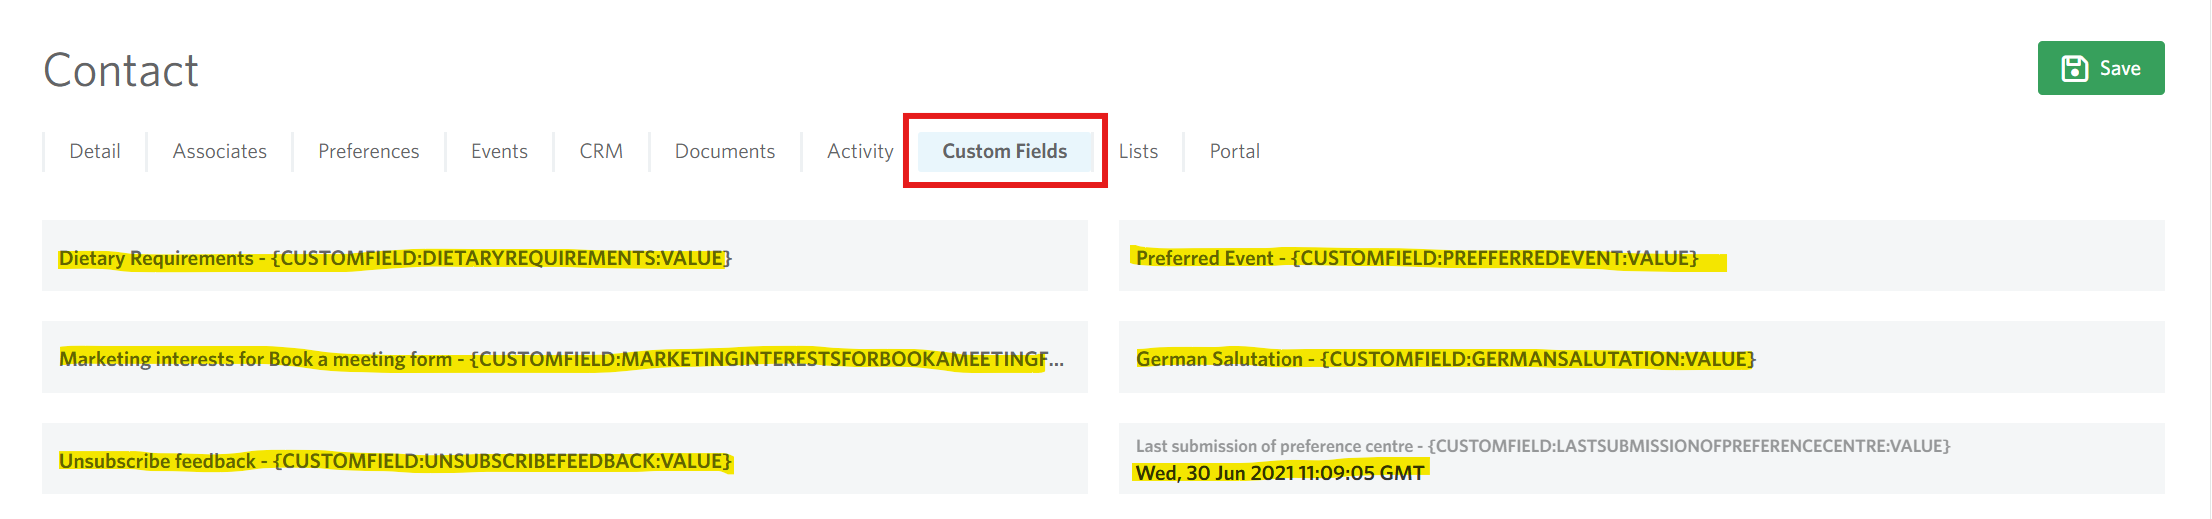
The StoneShot custom fields will show after the standard fields.

This information can be pulled through in your emails dynamically using {Custom1}; {Custom2} etc.
If you need some additional custom fields, don’t worry, we have you covered. You can use the Contact Custom Fields instead. You can have as many as you like and there is no limit on the number of characters you can store either.
These will appear in the Custom Fields section…

You can use the dynamic tags shown on the screen to pull this information into your emails.
FAQ
How can I create custom fields?
You can create custom fields against contacts, events and emails within StoneShot.
- Contact Custom Fields. To create a custom field for a contact, head into Options > Segments and click StoneShot Custom Fields.
- Event Custom Fields. Go into Events > Events, click on an event and hit Edit Event. Click on the Session tab and click on a session. Click More Options and Edit to the right of Custom Fields. When done you can populate the custom field for each session and use the Merge Name within your emails.
- Email Custom Fields. You can bring in contact custom fields, sales manager signoffs, fund documents and a stream from your blog. See Creating an Email and Dynamic Emails for more.
How do I see a contact’s custom fields?
To see a contact’s custom fields, click into their contact record, then click on the pencil icon next to the contact’s name.

Is it possible to create sub-segments?
No, it’s not possible to create a sub-segment. But when sending an email dynamically from a sales manager, you can add custom fields within each sales manager – such as their profile photo or a short sign-off.
Why can't I delete a segment?
Please check to see if the Segment is being used as a Filter for one of your Dynamic Lists. If yes, you would have to remove this criteria from the filter and then you should be able to delete the Segment.
How can I reassign contacts from one Sales Manager to another?
You can use the Bulk assign contacts feature to do this:
- Create a Dynamic List and add the filter Segment > [ Sales Manager Segmentation ] > Equals.
- Select the Sales Manager whose contacts you would like to reassign and click Apply.
- Click Actions > Bulk assign contacts.
- Set Type to Sales Manager.
- Select the name of the new Sales Manager in the Sales Manager field.
- Tick Overwrite existing values?.
- Click Save.
How do I group segmentation?
Go to Options > Segments and click New Segmentation in the top-right corner. To create a heading, set the Analysis Type to Separator/Title. You can then edit the Display Order of each Segment to control how they are grouped and ordered.