

StoneShot Learning > Marketing Automation > Workflows
Workflows
StoneShot automated workflows are powerful tools that can make your life a lot easier, automating actions, reducing the risk of human errors and helping you nurture the relationship with your clients.
Before starting to set up a workflow in StoneShot, take some time to think about your marketing strategies, find what parts can be automated, and plan it properly. Here’s a list of questions that you should answer before jumping on StoneShot workflow tool.
- What can be automated? Think about your marketing strategy and try to find an email or a sequence of emails that can be automated. Our suggestion is to start from something simple, and then move on to something more complex once you have familiarised yourself with our workflows. Do you usually send, for example, a welcome email to new clients? Or do you send follow-up emails with more info when someone shows interest on a specific topic? Those are 2 perfect examples that you could start from.
- What’s your target audience? Once you have decided what process you want to automate, you should be clear on what your specific target will be (i.e. new clients or people interested in a specific topic). Keeping this in mind will be important when you set up the “Entry point” of your workflow.
- What’s your goal? What do you want to achieve with this workflow? Is it just a welcome message to a new user, do you want them to download something, or click on a specific link? We suggest choosing just one “main” goal for each workflow, which would make your call-to-actions more clear and powerful.
- What actions do you want to automate? Here’s where you need the good old pen and paper: think about what actions you need to automate to achieve your goal and try to sketch the whole process out. Actions can be the launch of an email, a segmentation change, or a notification to a specific email address or to a Sales Manager. You can even plan multiple actions based on users’ behaviour. For example: a few users have ignored your first email? Then send them a new one, a week later, maybe with a different subject line. Or some users have clicked on your article? Great! Now send them, a week later, a report on the same topic, and see how engaged they are.
Once you have answered these questions, setting up the workflow will be a lot easier for you.
To learn about how to implement a Marketing Automation strategy, please look at the Marketing Automation Strategy article.
Set up a new workflow
The first step is to create a new workflow and give it a name. Go to Automation > Workflows and hit the green New workflow button at the top of the page. This will bring you straight to your workflow edit page, where you can rename your workflow with a name that makes sense for you. Users won’t be able to see this name and you can rename this at any point.
Entry point
Every time you create a new workflow, the first and last actions will already be set into your workspace. The first action is to determine how your contacts enter this workflow. To set this select the cog icon.
You’ll be shown a window like the one below where you’ll be able to set up your Entry point in a few steps.
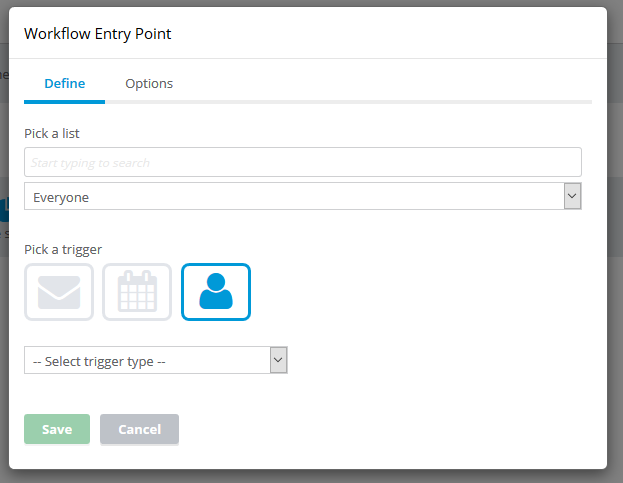
- Pick a list, if you want the Entry point to be based on a specific list, otherwise leave it set to “Everyone”, which should be pre-selected by default.
- Pick a trigger. If you know what your target is then you just need to tell the system how to identify those users. Triggers can be based on Email interactions (i.e.: contacts who have opened a specific email or who have clicked on a specific email link), Event status (i.e.: contacts who have attended a specific event) or a Segmentation change. This third trigger gives you many options: for example, you can select an Email preference change (i.e. users who have just subscribed for a specific communication), a Field change (i.e. contacts whose job title has just been updated), a Segmentation change (i.e. users who’ve just been assigned to a different Sales Manager), and more.
- Add conditions. Once the trigger is defined, you can play with the Options tab of the Entry point window to add conditions to better define your target. For example, you can choose to apply the trigger just to contacts assigned to a specific Sales manager or subscribed to a specific communication.
Exit point
The second action we’ve placed onto your workspace is the exit point for the workflow. Once you have completed your workflow you can connect your final stages to the exit workflow icon.
Add actions
To build your workflow you now have the option of four different activities. To place an activity into a workflow, simply hold and drag it anywhere on your workspace, then select the cog button to edit the settings and configure the activity.
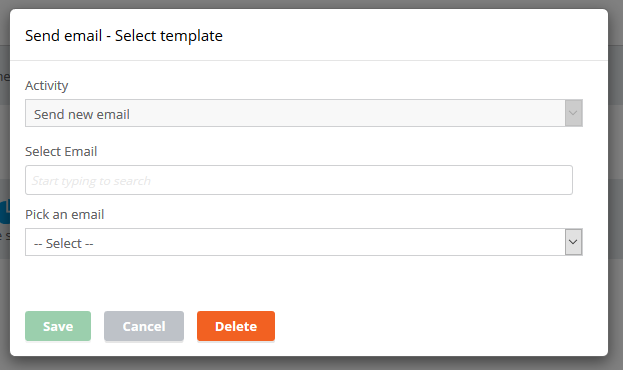
Send email
One of the simplest actions that you can add to your workflow is the launch of an email. When setting up this action in your workflow, from a window like the below one, you’ll be asked to pick up your email from a list. The dropdown will include all the emails saved in your account. This means that, before scheduling the email launch in your workflow, you’d need to build it, test it, and add tracking to it, exactly like any other email launch. Once the email is ready and tested, you can select it from the window below and even edit the sender details before scheduling it into your workflow.
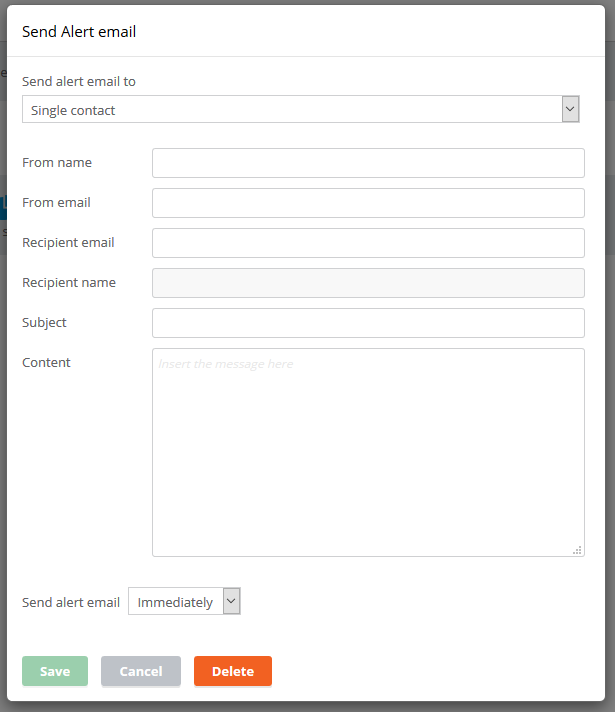
Send alert email
You can also use a workflow to send “internal” alert emails to notify your team or Relationship Managers of a client action or update. When setting up this action, you’ll first be asked to choose who to send the alert to, picking up one option between a specific email or a Relationship Manager (in which case the notification will be sent dynamically to the RM assigned to that user). Once an option is selected, you’ll be asked to set up the alert details filling the fields in as shown below.
Change segment
You can ask the workflow to automatically update the contact segmentation, picking up from any existing segmentation and segment in your account.
Change workflow
If you already have other workflows in place, you can decide to send contacts from one workflow to another. Let’s say, for example, that you have already set up a workflow to nurture contacts on a specific topic, and that you’re now setting up a new workflow to welcome new contacts. The first action in this new workflow could be to send new users a welcome email with an overview on a few topics with one CTA per topic. You could then decide to send users to a dedicated workflow if they show interest by clicking on a specific CTA.
After placing and configuring your activities, the next step is linking each activity with triggers. To do this, hold the grey semi-circle and drag the connector to its destination. The arrow that appears will snap to each activity. Once it is connected, a pop up will appear where you can configure the trigger. When connecting a Send email to another action, or to the Exit point, for example, you could select as a trigger the Open of the email or the Click on a specific link and so on.
Add global rules
In addition to the actions set up, you can also apply Global rules to your workflow. These global rules will bypass the action settings. You could, for example, decide to always make contacts exit the workflow straight away (ignoring any remaining action set up) if they unsubscribe, or if they are assigned to a different Relationship Manager and so on.
Save and push the workflow live
Your work will automatically save as you go along.
When you’re ready you can activate your workflow, by switching Activate workflow, on the top right of your page. You can also do this on the overview screen by selecting the pause / play icon next to any workflow.
Delete or edit your workflow
If you need to delete a workflow or edit the advanced settings locate the cog in the top right corner. Alongside here you can find further help on our workflow builder by selecting the question mark icon.
Workflow reports
Once created, your workflow will appear on the workflows page (Automation > Workflows). On this page you’ll find all your workflows, and you’ll immediately be able to see which ones are live, how many activities they have scheduled and how many contacts are currently active on that specific workflow. If you click on the number in the Active contacts column, you’ll be able to see who they are and even manually remove them from your workflow if you want to.
It’s important to bear in mind that contacts can only enter each workflow once. This means that those contacts who’ve already gone through your workflow won’t be able to re-enter it in future. They will of course be able to enter other workflows.
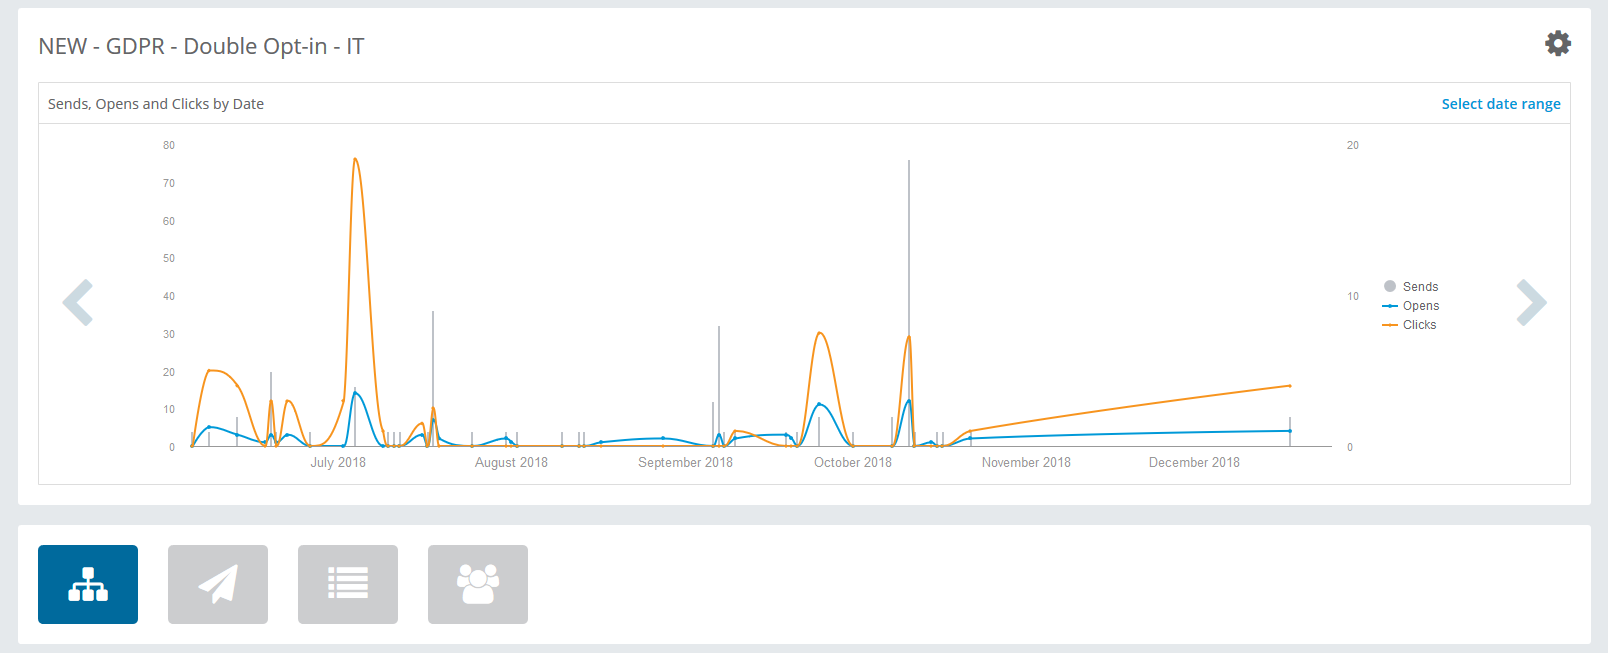
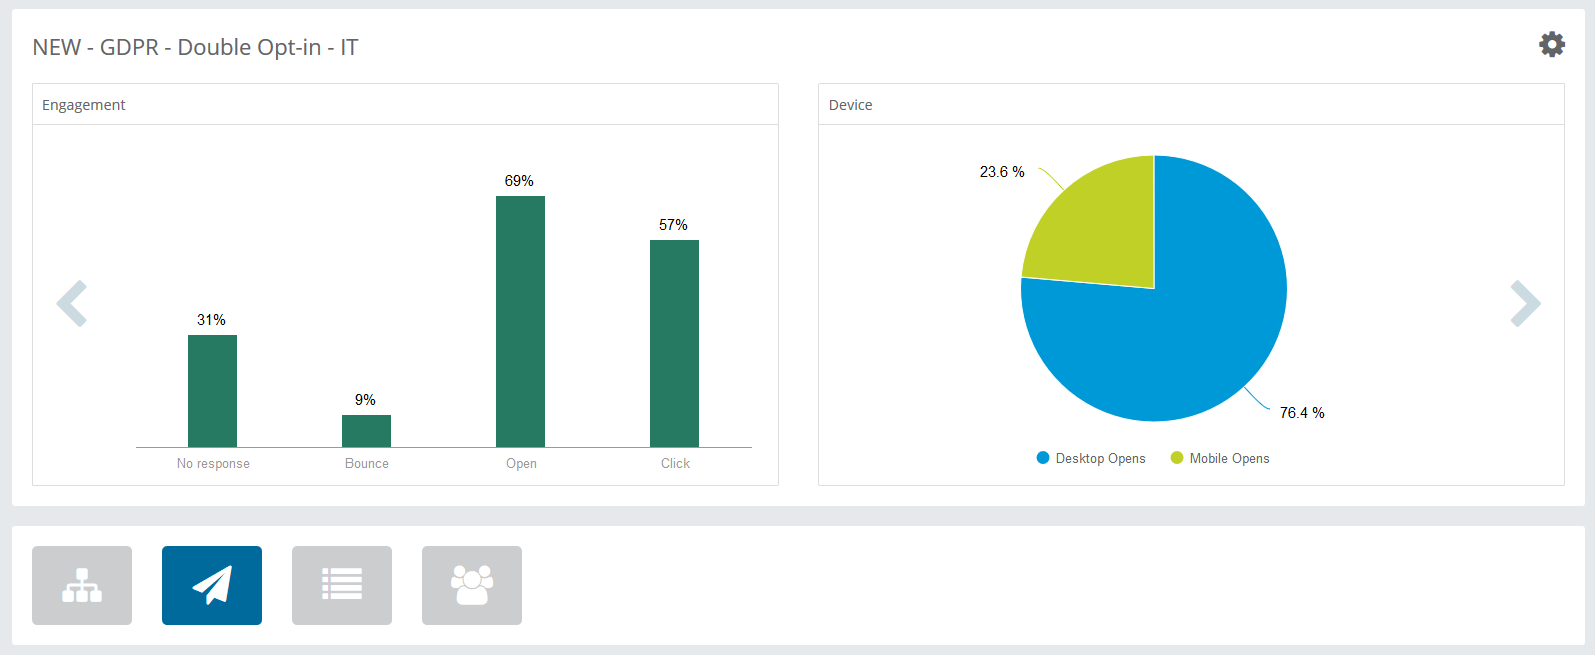
If you click on the Activities number, you’ll then have access to the workflow structure and be able to edit it. By clicking on the workflow name you’ll be able to access the stats and reports related to that specific workflow.

Deleting workflows
StoneShot automated workflows are powerful tools that can help you nurture the relationship with your clients and make your life a lot easier by eliminating time-consuming tasks and reducing the risk of human error.
To access workflows on the StoneShot platform, you will need to be an Admin or Manager user. You can delete workflows via the steps below:
- Navigate to Automation > Workflows

- Click into the workflow you’d like to delete and hit the Edit button in the top right corner of the page.

- Within the workspace, you must first disable the workflow by toggling off the ‘Activate workflow’ switch. Note: You will not be able to delete a workflow that is still active.

- Then, click into the settings via the Settings button.

- Finally, delete the workflow by clicking Delete in the top right corner.


To learn more about Marketing Automation Workflows, take a look at our video below.
