


StoneShot Learning > Event Marketing > Creating Add to Calendar
Creating Add to Calendar
The surest way to get a client to attend an event is to get it in their calendar.
For in-person events, we can add crucial venue info such as the address, directions and parking instructions and for online we can add a link to the online meet.
You can actually add a lot more – the event description, agenda, speakers, arrival time, map links… As you know, we’re big on automation so you can dynamically bring in this info from the event itself. You can also edit the calendar content for each session in the event.
Creating Calendars
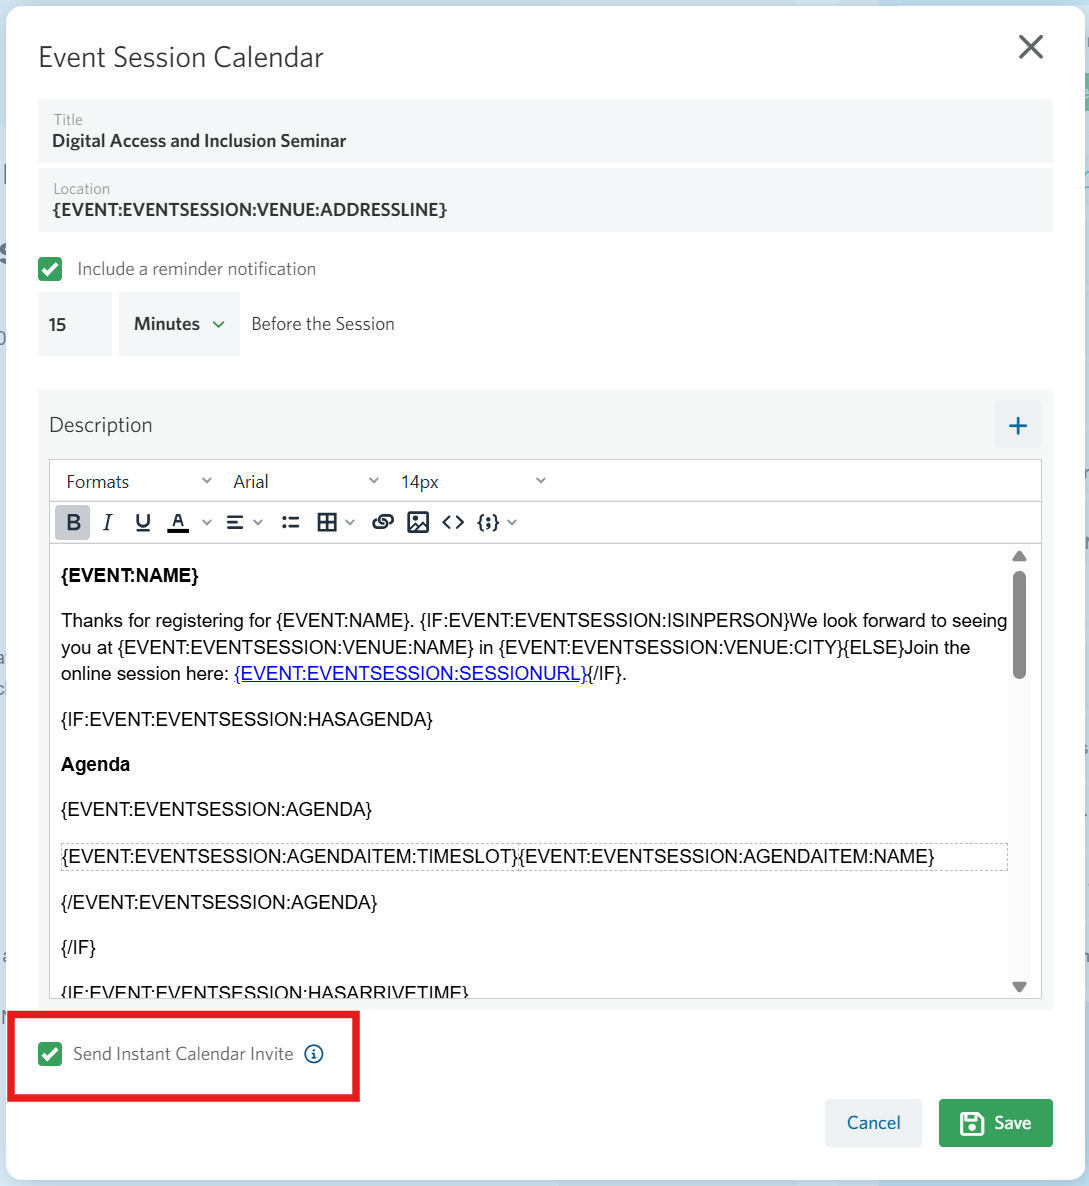
On the Session tab in the Event Builder you’ll see Calendar Invites for each individual session. It’s turned on by default and you can hit the pencil icon to edit.
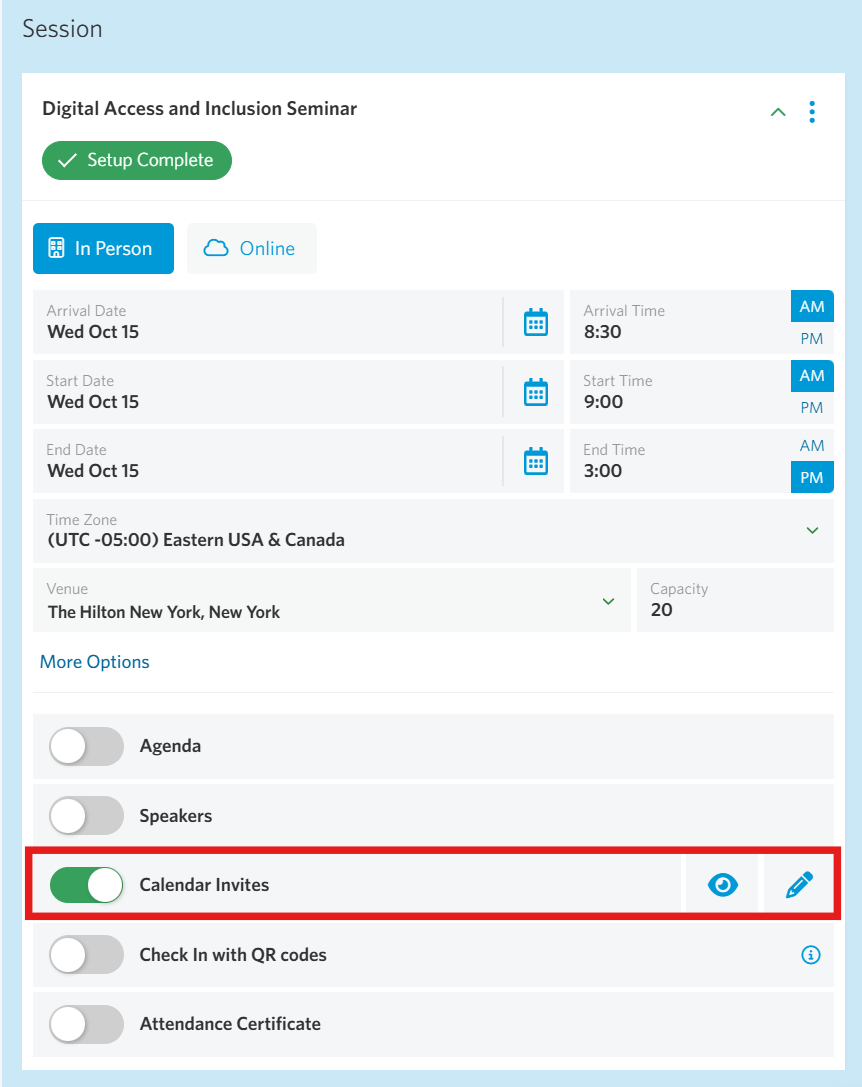
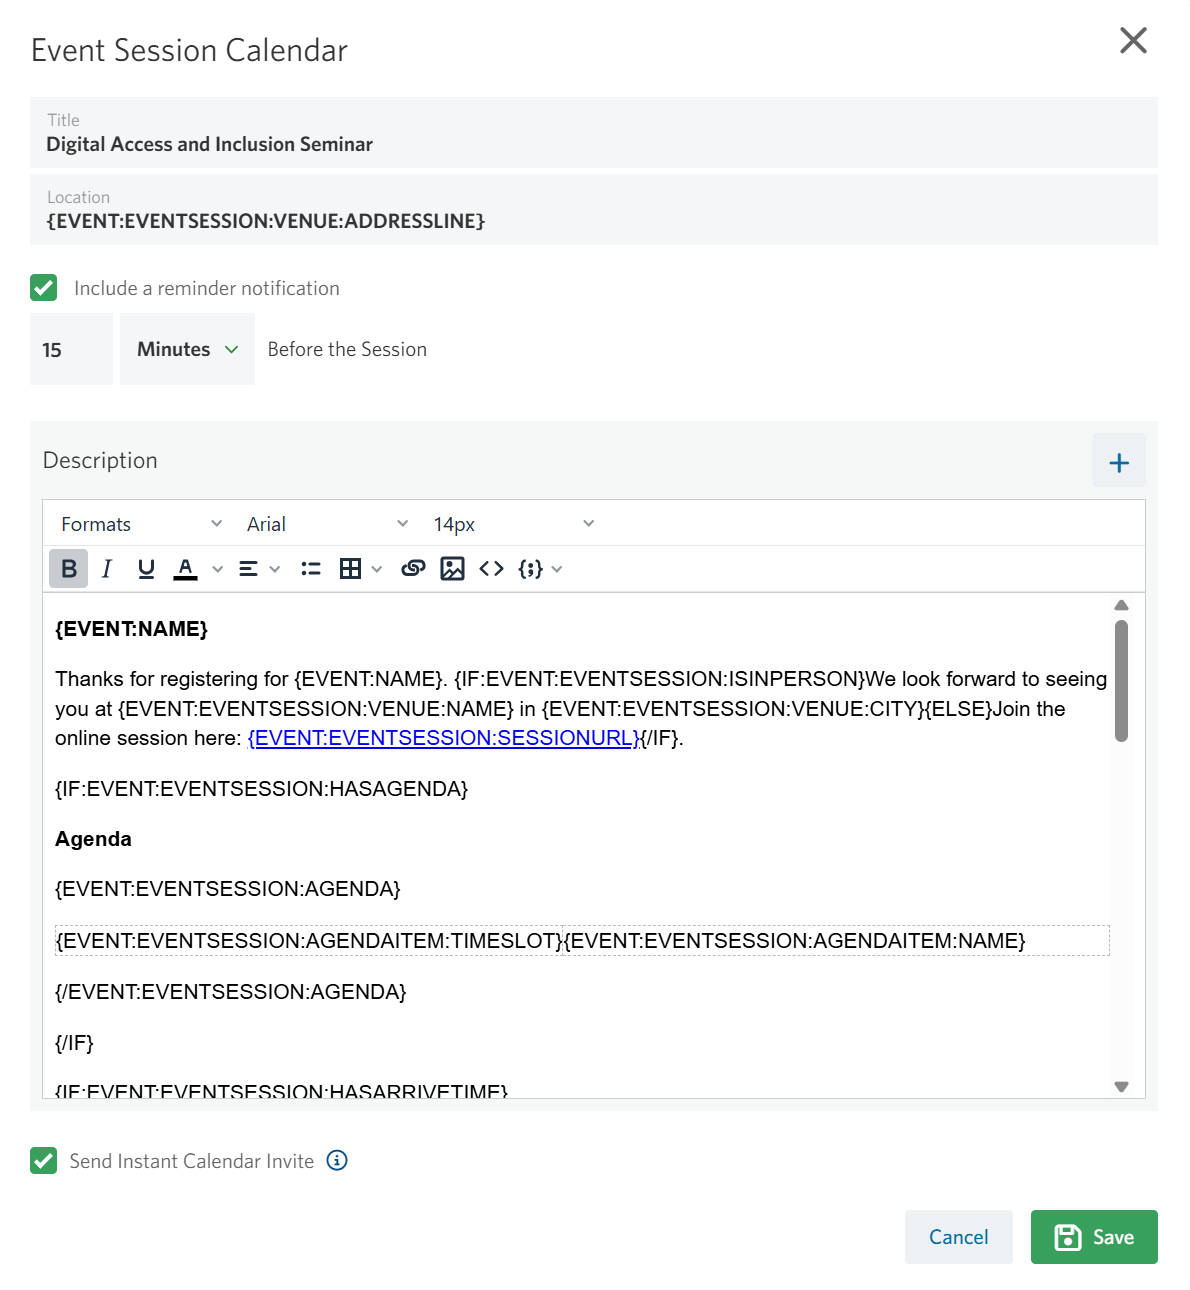
We pick up start and end dates from each session, so you only need to enter the calendar body – and pick the notification reminder too.
Notification Reminders
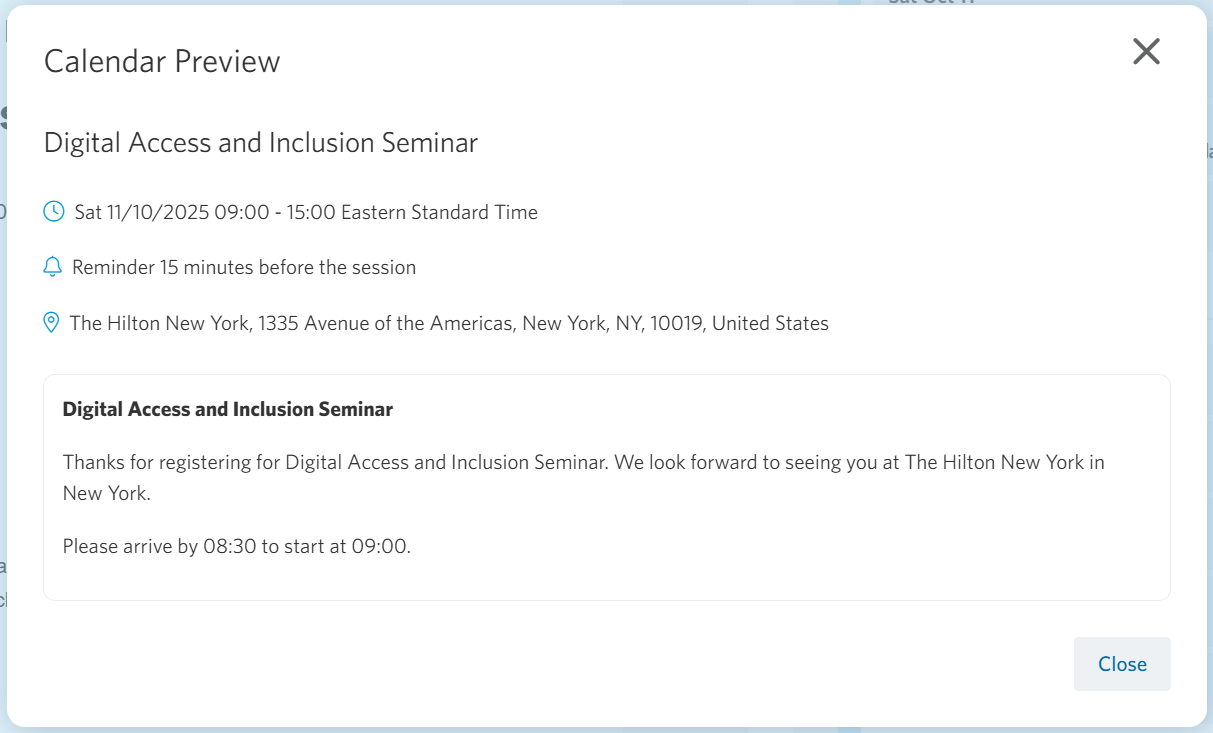
The Notification Reminder is the calendar alert that pops up on your desktop or mobile prior to an event. This is in addition to a reminder email we usually schedule, and those reminders are sent out much earlier.
These notifications are a really gentle reminder that the event is about to start. You can choose to have any number of Minutes/Hours/Days/Weeks before the session – we use 15 minutes as the default.
Calendar Description
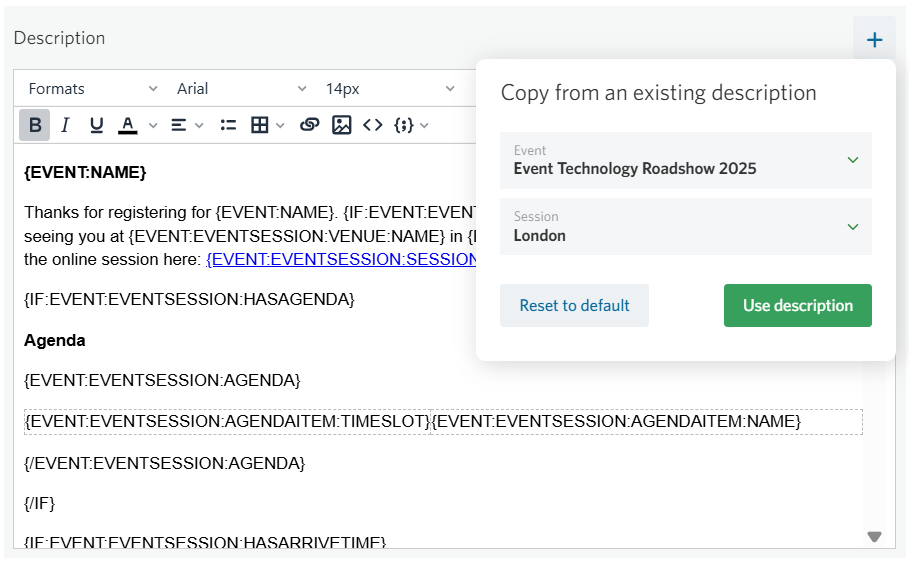
You can create a new calendar description from scratch, set one up with automation, or copy an existing description from a previous event or session.
To copy an existing description:
- Click the plus icon in the calendar description area.
- Select the event and session you’d like to copy from.
- Click the green “Use description” button. The calendar body will automatically update with the selected description.
If you want to return to the default text, simply click the gray “Restore to default” button.
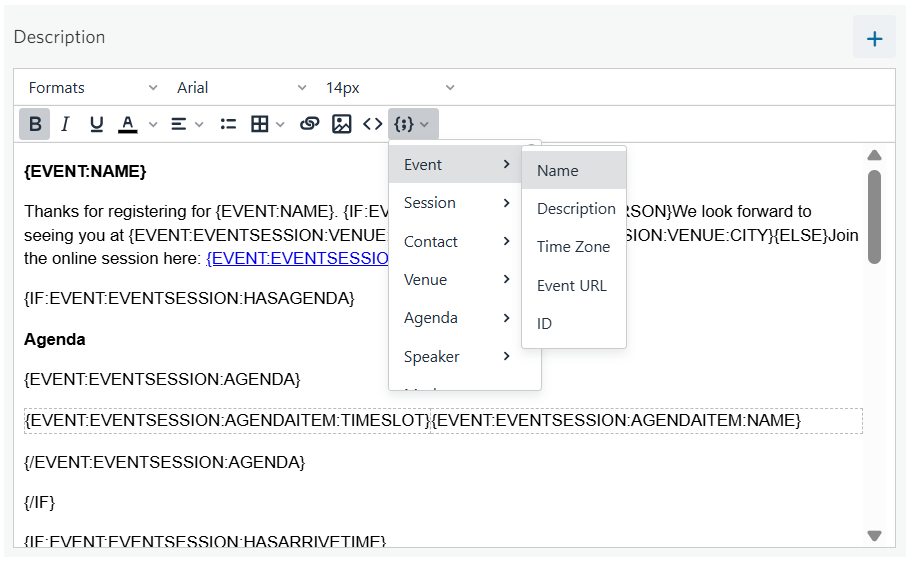
For even faster setup, you can automate your calendar descriptions. By default, we include a description template with merge fields that automatically pull in details like:
- Event name
- Agenda and speakers
- Venue information for in-person events
- Event URL for online events
The merge-field picker lets you preview and select exactly which fields to include.
You can of course enter your own descriptions along with links, images and more.
While you edit, click Preview in the session panel to see exactly how the invite will appear to registrants.
 |
Enabling Instant Calendar Invites
With Instant Calendar Invites enabled, registrants are sent a native calendar invite automatically with the confirmation email—eliminating the need to include download links in your emails.
Check the box next to “Send Instant Calendar Invite” below the calendar description and save your changes.
Click here to learn more about Instant Calendar Invites.
Adding the Calendar Invite to Your Email
If you prefer to offer a manual option, you can insert a link to your calendar invite using the merge tag:
{EVENT:EVENTSESSION:CALENDAR}
When registrants click this link, they’ll be prompted to download an .ics file, which they can then open and add to their personal calendar.