


StoneShot Learning > Event Marketing > Creating Events
Creating Events
Hover over the event icon and pick Events. If you’ve created events before, you’ll see them here, with upcoming events at the top and past events below. If this is your first time, it’s best to set up your Venues and Speakers first, as we’ll be selecting them while setting up the event.
Ok, with that done, hit New Event and you’ll go through three steps starting with the Event Title and Sessions. We use the Event Title as a headline within our invitation, confirmation, reminder, and post-event emails as well as the registration form, calendar invite, and more. It’s the name you’d give your event to an external audience such as:
- ESG Roundtable March 2024
- Investment Roundtable 2024
- Global Equity Roadshow 2024
Don’t worry about adding the exact date and time in the title as this goes in separately.
Right, now Sessions. An event can have one or many sessions… a session could relate to another venue or perhaps the online element of a hybrid event. In this example we’re making a roadshow event with two in-person sessions and one online.
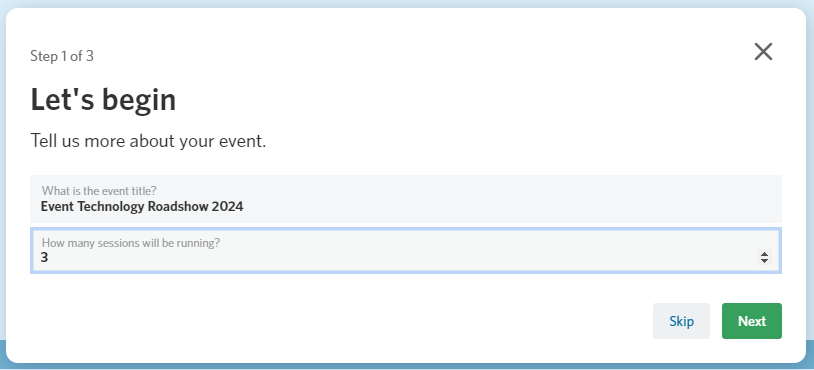
Hit Next and you’ll be prompted to enter session names and dates, and whether the event is in-person or online. We usually don’t use the session name in our emails but you can. The default start time is 9AM as that’s the most popular time across all our clients.

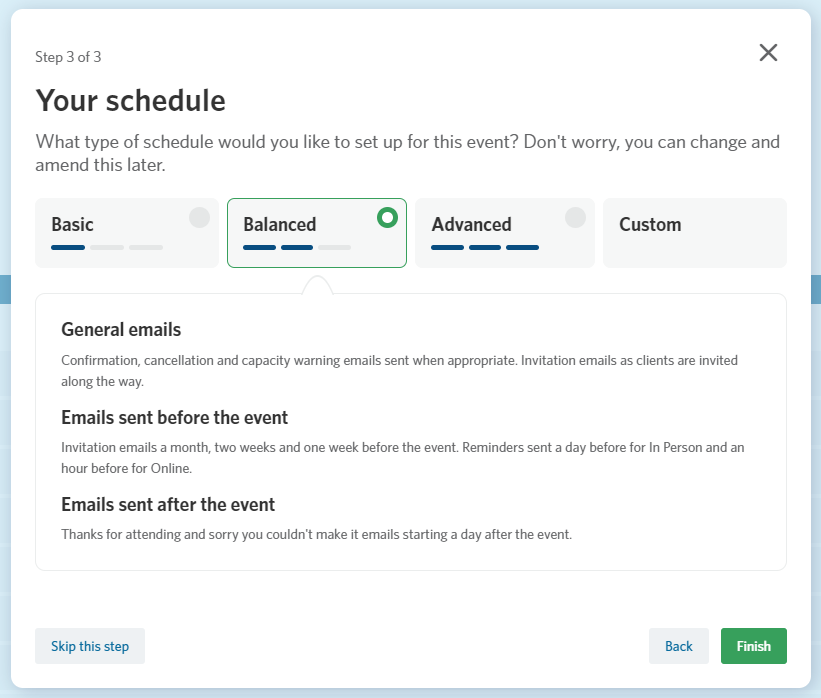
Now you can see three template schedules. A schedule defines when your invitation, confirmation, reminder, and post-event emails get sent. You can click on each to get a summary. We recommend selecting Balanced unless you’re running accredited events (Advanced is best there).
These schedules pull in emails from our Email Library. As those emails are connected to the Brand Manager, they’ll be on-brand right out of the gate. You can edit the emails after you’ve hit Finish right up to the point of launching the event.
Want to make your own schedule? No problem. Pick a template first then edit away until you’re happy. The Event Builder will allow you to make a custom schedule, and you can save it to use in future events. They’ll appear under the Custom tab.
Hit Finish and you’re done.
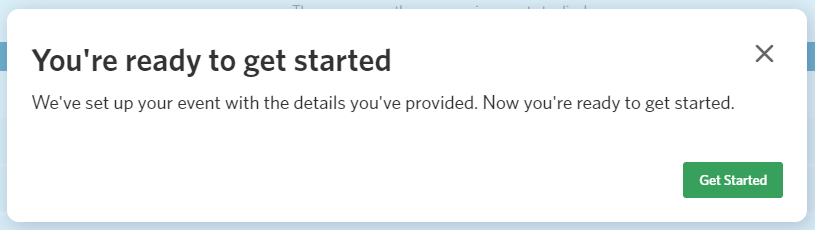
The Event Builder has setup the schedule, created invitation, confirmation, reminder, and post-event emails based on the schedule, made a form and calendar invite, and a whole host more. You can see each email on the dropdown and you edit them too.
The emails might look a little raw to start and you’ll see code like {EVENT:EVENTDESCRIPTION}. We call these merge fields and they dynamically merge in the content in your emails, forms, calendar invites and more. They’ll be replaced with content as you configure your event.
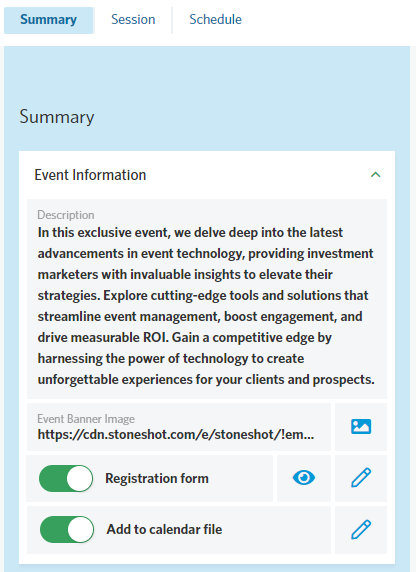
On the right-hand side of the page you’ll see a panel that’s styled like our Email Builder, with Summary, Session, and Schedule up top. Staying on Summary, let’s get an event description and pick a banner.
We use the event Description in our emails to explain the benefits of attending. We usually separate out “Please join us…” so the description works for invitation, confirmation, and reminder emails. Sticking with the theme of a roadshow on event marketing technology, we’ll use this description:
In this exclusive event, we delve deep into the latest advancements in event technology, providing investment marketers with invaluable insights to elevate their strategies. Explore cutting-edge tools and solutions that streamline event management, boost engagement, and drive measurable ROI. Gain a competitive edge by harnessing the power of technology to create unforgettable experiences for your clients and prospects.
Next, let’s pick an Event Banner. We recommend using a single image that provides a consistent theme across all emails for this event. Click the image icon to the right of Event Banner Image and an image picker will pop up. You can either upload an image here or pick one you’ve previously uploaded.
You’ll see the email preview updating as you go and it should start looking pretty complete now. Here’s how it looks in this example.
You can now either create the registration form, set up each session or review and edit the event schedule.