

StoneShot Learning > Email Marketing > Creating an Email
Creating an Email
There are three ways to create an email:
- Use the Email Builder
- Drop in your own code
- Have us do everything for you
Let’s start with the last one. If you have the content but no time to create and send, you can hand it all over to us. You can either login to StoneShot and fire up a chat (it goes straight to your dedicated team) or email over your request. Check out the briefing process and put up your feet.
Still here? Ok, great, let’s go through making an email.
Using the Email Builder
We’ve put in a ton of work to optimize the the email production process. In fact, we’re slowing you down by even writing this so let’s get to it!
Pick Content and then Emails from the navigation and click New Email (top right). At this point you can either pick a template from our library (Email Library tab) or use one of your own custom templates (My Templates). The library has 10+ rock-solid templates covering the kind of emails investment marketers most often use. The process to create an email is the same so we’ll use “Event invitation – in person” from the library.
Hover over the template and pick Build and you’ll go into the Email Builder.
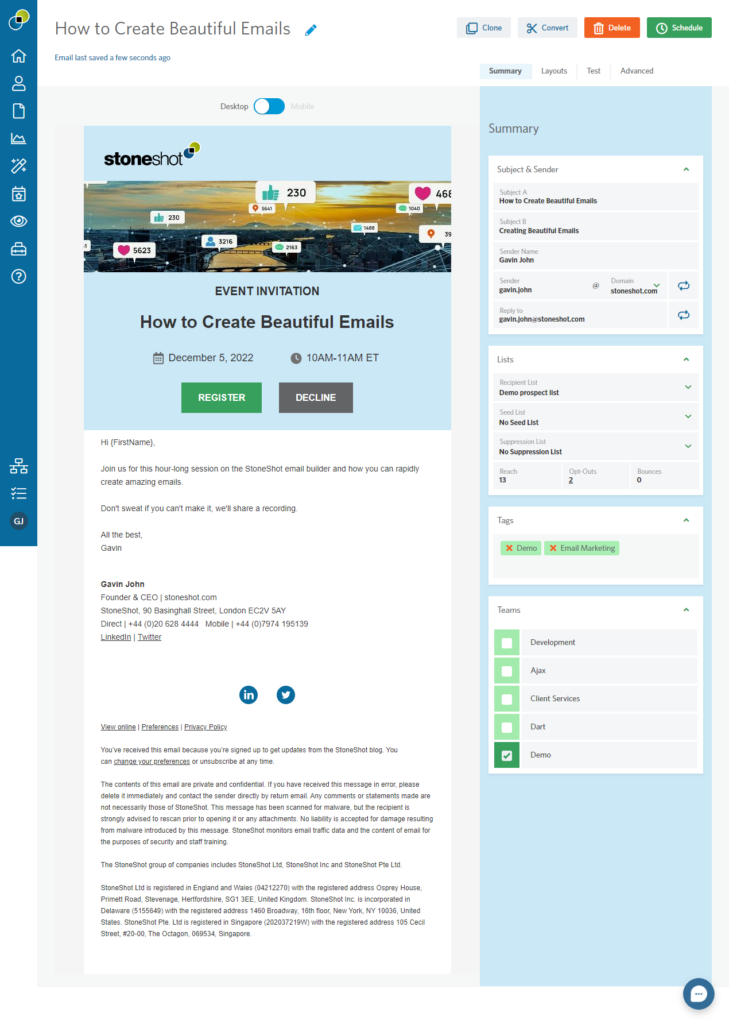
First look
Your email will always be visible so you can see progression as you add layouts and your content. The Desktop/Mobile toggle above allows you to see how your email will look on – you guessed it – desktop and mobile devices. Hit that now and you’ll see how the Register and Decline buttons stack on mobile. We’ve built these responsive features into all layouts in the library.
The panel on the right allows you specify the basics (subject lines, senders, lists, etc). There are additional options under Advanced – more on that later.
The Email Builder will auto-save in most cases so you don’t need to worry about losing your work. You only need to save when you enter a block of content – more on that later.
Subject lines and the email sender
You’ll see there are two subject lines, allowing for simple A/B testing. All you need do is enter the second subject and the StoneShot platform will use the winning subject line after testing both. We recommend always using A/B Testing – check out A/B Testing for more info.
Next is the email sender. In our own StoneShot account we’ve setup restricted sender so we can only send from a @stoneshot.com mailbox. You should see your own corporate domain instead.
The icon to the right of that allows you to use a dynamic sender. This is usually the contact owner within your CRM… so you can send to a single list and the StoneShot platform will dynamically send from each recipient’s relationship manager. Please see Dynamic Emails for more info.
Finally, Reply To allows you to control where replies will go. Again, this could be a static email address or a dynamic one.
Lists
You can see there are three selectable lists. The first is simply your recipient lists… the contacts that will get your email when you launch. Seed List allows you to include your own team at launch. It’s a good way to give your colleagues some visibility without them adding to your open and click metrics. Suppression list allows you to manage an exclusion list. It simply removes any matching contacts in your Recipient List.
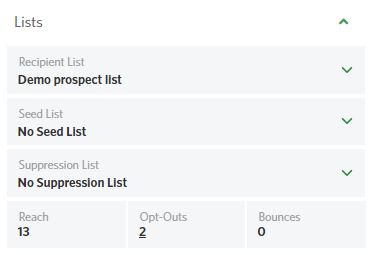
Below the lists, you can see Reach, Opt-outs and Bounces. Reach gives a count on the number of contacts in the Recipient List that will receive an email. That’s the Recipient List minus the Suppression List if you’ve picked one minus any opt-outs.
Opt-outs shows a count on those people that previously unsubscribed. You don’t have to worry about this one, our platform will never email these folks. Finally, Bounces shows the contacts we expect to bounce.
How do we know an email address will bounce before you’ve even sent the email? We specialize in working with financial services firms and keep track of broken email addresses. It means we can warn you ahead of sending so you can clean your lists and retain a squeaky-clean sender reputation. We don’t exclude these emails from your send, but you can export them by clicking the link on Bounces.
Tags and Teams
Tags allow you to flag content either for reporting or engagement scoring. Teams allow you to segregate content by team within the StoneShot Platform.
Layouts
Right, let’s head into the Layouts tab (above panel on right) and explore how we can add content to the email.
Within our email library, we’ve broken out layouts into Banners (the top bit), Main-content (middle bit) and Footer (bottom bit). If you’re using a custom template, you can make any sections you wish but we tend to follow this approach for all master templates we make.
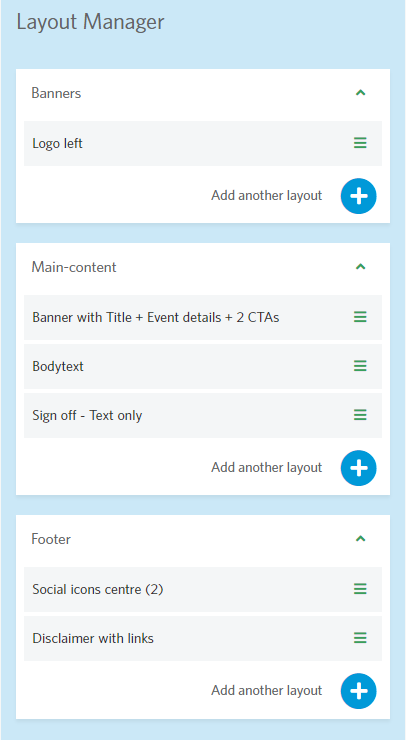
Within each section you can see layouts. If you’ve made a new email, you’ll see the default layouts for the master template you’ve used. You can click on a layout to get to the components within it. We’ve detailed each component within the email library.
We give layouts a descriptive name based on their components. If you hit Add another layout you’ll see a thumbnail representing each layout. Added layouts go to the bottom of the list – you drag and reorder them to determine their position in the email, and the email preview with refresh as you make changes. To delete a layout, just click into it and pick Delete Layout.
Let’s go into the “Banner with Title + Event details + 2 CTAs” layout and look at the components.
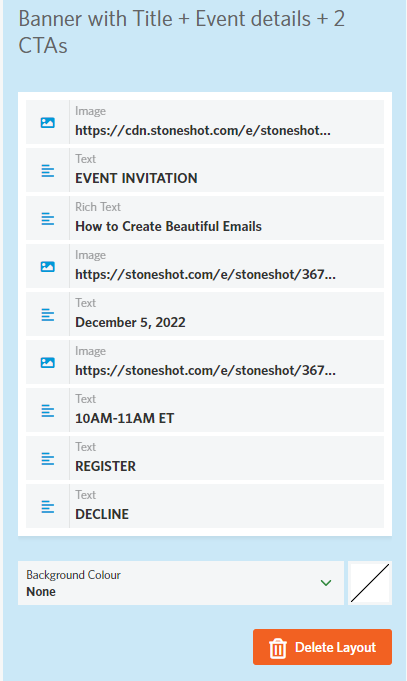
As you can see, there’s an image up top followed by a plain text header. The event title is rich text and there are editable images for the calendar and clock, and text fields for the date, time and buttons. Let’s hop into the header image.
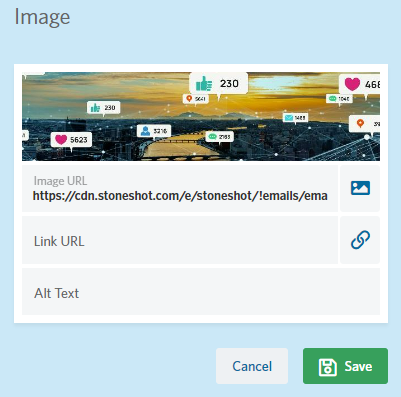
You can see a preview of the image, edit the image source, add a link and add alt text. Clicking on the image icon will take you into the image browser. This lets you upload images or manipulate images you’ve already uploaded. Right-click on an image and pick Edit. This will allow you to resize, crop, flip/rotate and apply filters to the image.
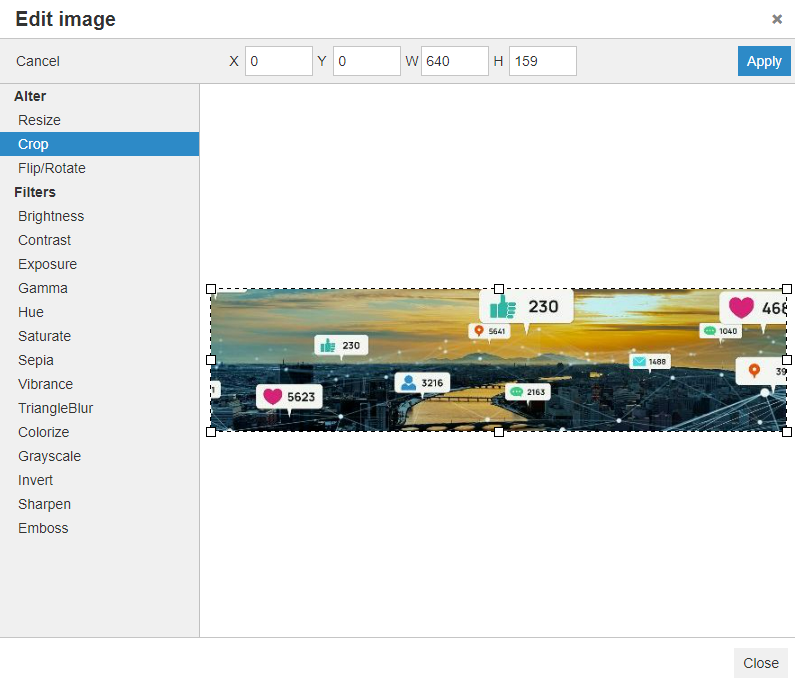
When you’re done altering and filtering, hit Apply and then click Save. This will allow you to either overwrite the image you selected or to save a copy. Click Save and you’re done.
Email testing
Do we need to say how important it is to test your email before launch? Nope, thought not.
Head into the Test tab above the right hand panel. The Email Builder will tell you if there are any obvious issues, we always, always, always send a test. All you need do here is pick your email address and click Send Test. You’ll get a test email shortly after. You can also use the Share button to give to a colleague or compliance for approval.
Advanced
When we created the Email Builder we did a ton of user analysis and popped the lightly used features under Advanced. Hmm, it’s not really advanced at all… we could have called it “Stuff you don’t use much” but the tab would have been too big.
Anyhow, you can change the options here for A/B Testing, turn off email tracking and more. You’re probably looking at it all now going “hmm, aha..” and will never go there again.
Launch and scheduling
So that’s it. You’ve created an email, tested it out and it looks fantastic. Your clients are going to love it. So let’s get it out there!
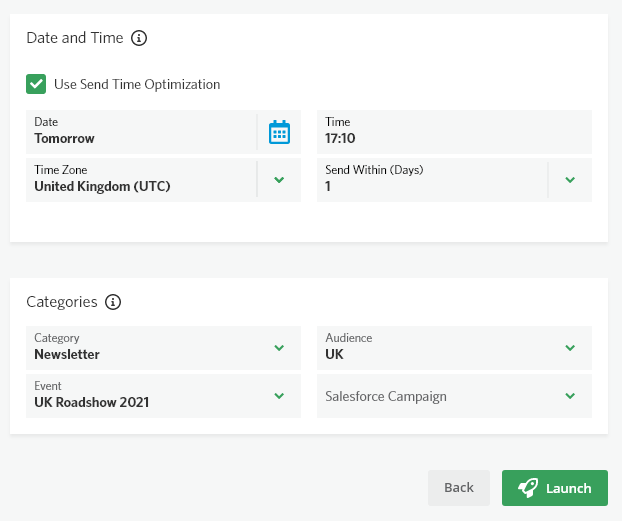
Hit the Schedule button and you can pick the launch date and time as well as having a final skim over all options. Send Time Optimization is checked by default. This works out the optimal time to send an email to each recipient on the list. We’ve written a full page on it – you’ll love it.
Cloning
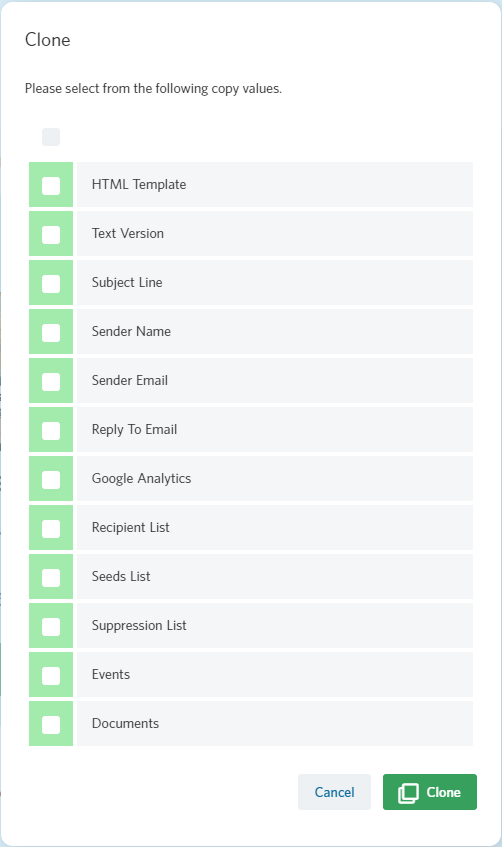
You’ve made the perfect email and you want to clone it, tweak the content and send again? That’s what the Clone button is for! Clone lets you choose what you want to clone and will make a new email with today’s date.
Dropping in your own code
If you’re an email pro and have coded your own email, all you need to do is this:
- Pick Content and then Emails from the navigation.
- Click New Email and pick Paste in your own code.
- Hit Next on blank master template.
- Complete the necessary fields on Summary, click HTML, paste in your code and hit Save.
- Click Text to make a text version.
- Click Lists and pick your distribution list.
- Test and add tracking on the Test page.
- Finally you can send under Launch.
FAQ
Why has my campaign not sent yet?
When you launch a campaign it goes into a queue. It could be that your colleagues have scheduled their campaigns to be sent out at the same time too so the system is working on those.
Unfortunately, this means that yours may have to wait a little while and how long the wait is depends on the size of the audience they’re sending to. In most cases, there shouldn’t be more than a 15-minutes delay but if you find this not to be the case please contact support@stoneshot.com.
Can I recall an email that’s been sent?
Unfortunately not, once an email has been sent out it cannot be edited or recalled.